
This is ONE OF THOSE PROJECTS that looks absolutely stunning on a table but works up faster than you’d ever expect! I’m talking about a gorgeous layered placemat with a sweet bee applique, beautiful scalloped edges, and the kind of texture that makes people ask, "Wait, you MADE that?" The best part? You’ll be using basic stitches you probably already know. This is the kind of project that impresses everyone at brunch while secretly being totally manageable for intermediate crocheters.
Get the Ad-Free PDF Pattern
You can find the free pattern below, or you can purchase the ad-free printable PDF from my shop.
Get the Printable PDF →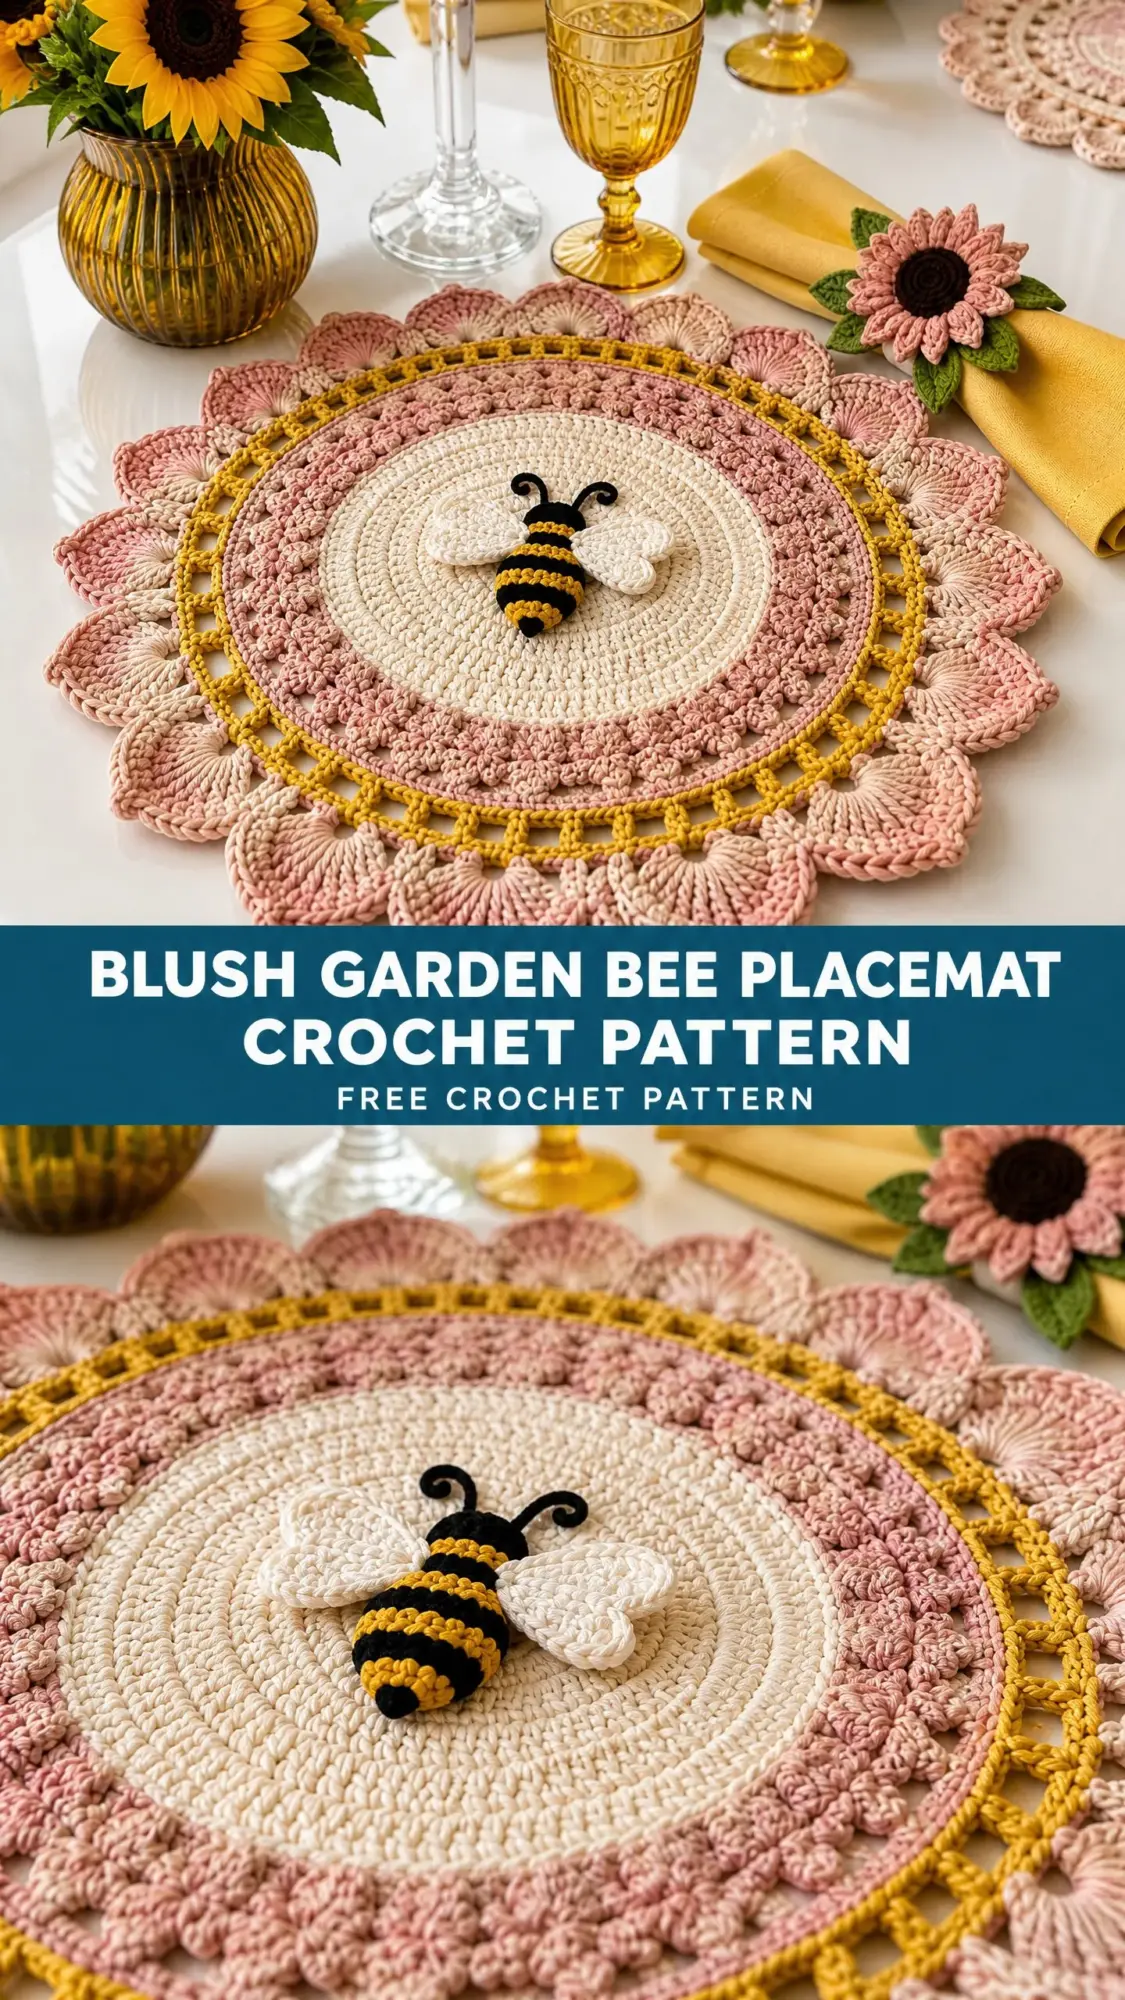
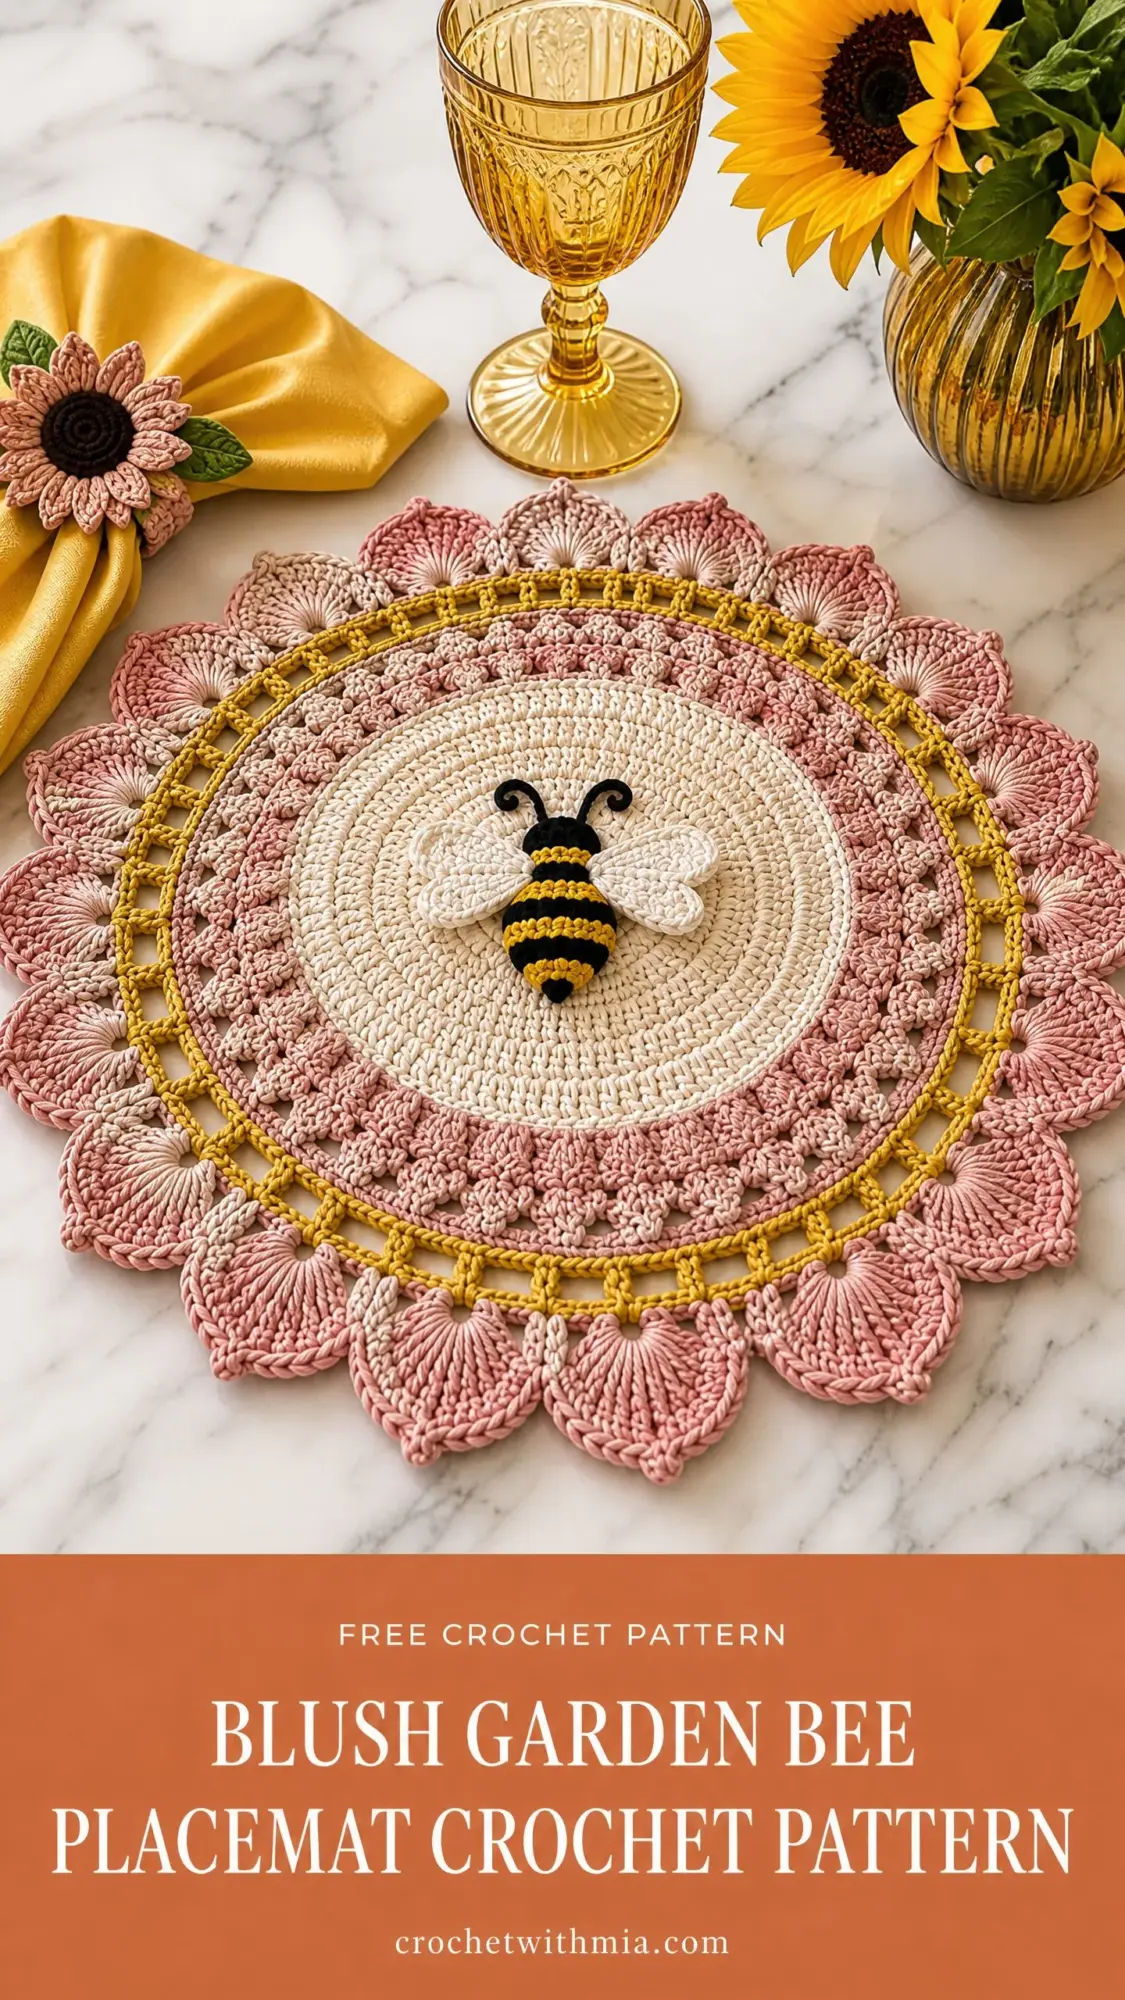
If you’ve been wanting to upgrade your dining table with handmade pieces, this is your sign. The Blush Garden Bee Placemat combines a dense cream center, shell stitch bands, an eyelet ring, and the prettiest petal border you’ve ever seen. Plus, there’s a matching sunflower napkin ring to complete the look.
Whether you’re making these for yourself or as gifts for someone who loves garden themes, you’re going to have so much fun watching this project come together round by round. Let’s dive in!
About This Crochet Placemat Pattern
This round crochet dining placemat features multiple design elements that create stunning visual interest. The finished piece measures approximately 15 to 16 inches (38 to 41 cm) in diameter, making it the perfect size for a standard dinner plate with a beautiful decorative border peeking out around the edges.
The design is worked in circular rounds from the center outward, which means no seaming and a satisfying progression as you watch your placemat grow. You’ll start with a dense cream spiral-style center, then add a raised crochet bee motif, followed by a blush shell stitch decorative band, an ochre eyelet ring, and finally those gorgeous large blush petal scallops around the edge.
Skill level: Intermediate. If you’re comfortable working in the round and can handle basic stitch increases, you’ve got this. The applique work requires some sewing skills, but nothing complicated.
Materials You’ll Need
Before you start, gather all your supplies. Having everything ready makes the crocheting process so much smoother.
Yarn:
Tools:
Why cotton yarn? Cotton is ideal for placemats because it’s durable, washable, and lies flat on the table. It also gives you beautiful stitch definition so all those shell stitches and petals really pop.
Stitch Abbreviations
Let me walk you through every abbreviation used in this pattern. Even if you know these already, a quick refresher never hurts!
MR = Magic ring. This is a technique for starting work in the round that creates a tight, closed center with no hole. You wrap yarn around your fingers, pull up a loop, then work your stitches into that ring before pulling it tight.
ch = Chain. The most basic crochet stitch. Yarn over, pull through the loop on your hook. That’s one chain.
sl st = Slip stitch. Insert hook into stitch, yarn over, pull through both the stitch and the loop on your hook in one motion. Used for joining rounds.
sc = Single crochet. Insert hook into stitch, yarn over and pull up a loop (2 loops on hook), yarn over and pull through both loops.
hdc = Half double crochet. Yarn over, insert hook into stitch, yarn over and pull up a loop (3 loops on hook), yarn over and pull through all 3 loops.
dc = Double crochet. Yarn over, insert hook into stitch, yarn over and pull up a loop (3 loops on hook), yarn over and pull through 2 loops (2 loops remain), yarn over and pull through remaining 2 loops.
tr = Treble crochet. Yarn over twice, insert hook into stitch, yarn over and pull up a loop, then yarn over and pull through 2 loops three times.
sk = Skip. Simply skip over that stitch without working into it.
sp = Space. Refers to the gap created by chain stitches in previous rows.
inc = Increase. Work 2 stitches into 1 stitch to add stitches and make your circle grow.
Placemat Pattern Instructions
Now for the fun part! Follow these steps carefully, and you’ll have a beautiful placemat in no time.
Center Circle (Cream Yarn)
This is the foundation of your placemat. Take your time here to ensure your circle lies flat.
Round 1:
Make a magic ring. Crochet 12 dc (double crochet) into the ring. Join with a sl st (slip stitch).
Round 2:
Ch 2 (chain 2). Work 2 dc in each stitch around. Join. (24 dc)
Round 3:
Ch 2. Alternate 1 dc, 2 dc in next stitch around. Join.
Round 4:
Ch 2. Work 1 dc in each stitch around.
Round 5:
Ch 2. Increase evenly around to create a flat circle.
Continue increasing in this manner until the center measures approximately 8 inches (20 cm).
A quick tip: If your circle starts to ruffle or cup, you’re adding too many or too few increases. A flat circle needs the right balance. Generally, for double crochet, you’ll increase by about 12 stitches per round. Place your work flat on a table periodically to check that it’s lying nice and flat.
Blush Shell Band
This is where the texture really starts to shine! The shell stitch creates those beautiful scalloped waves.
Attach blush yarn to any stitch on your center circle.
Round 1:
Sc (single crochet) around the edge.
Round 2 (Shell Round):
Skip 2 stitches, work 5 dc into next stitch, skip 2 stitches, sc into next stitch. Repeat around to create the textured shell band.
The shell stitch is essentially a fan of stitches all worked into the same spot. When you put 5 dc into one stitch, they spread out and create that lovely shell shape. The skipped stitches on either side give the shells room to bloom.
Ochre Eyelet Ring
This golden ring adds a pop of color and creates beautiful open spaces.
Attach ochre yarn.
Round 1:
Sc around.
Round 2 (Eyelet Round):
Dc, ch 1, skip 1 stitch repeat around.
Round 3:
Sc into each stitch and chain space.
The eyelet pattern creates small holes in your work, which adds visual interest and lets the layers beneath peek through slightly. It’s a simple technique that makes a big impact.
Blush Petal Border
This is the showstopper! Those big beautiful petals make this placemat look like a flower.
Attach blush yarn.
Petal Round:
Sc into next stitch, skip 2 stitches, 7 dc into next stitch, skip 2 stitches repeat around.
Final Round:
Add a decorative slip stitch edge around each petal for a clean finish.
Working 7 dc into a single stitch creates those large, dramatic petals. The slip stitch edging at the end gives each petal a polished, defined look.
Bee Applique Instructions
The bee is the heart of this design! It’s worked separately and then sewn onto your finished placemat center.
Body
With black yarn, create a small oval using sc stitches. Add yellow rounds between black sections to create the classic bee stripe pattern.
Here’s how to think about it: You’re essentially making a tiny striped tube. Start with black, work a few rounds, switch to yellow for a stripe, then back to black, and so on. The oval shape comes from increasing at the beginning and decreasing at the end.
Wings
With cream yarn, make two small oval shapes using dc and hdc stitches. These should be slightly rounded and about the same length as the bee body.
Sew symmetrically above the bee body, angling them slightly outward like a real bee’s wings.
Antennae
Use black yarn to make two short chains. Attach securely to the top of the bee’s head. You can curl the ends slightly by adding a slip stitch or just leave them as simple chains.
Sew the completed bee firmly onto the center of the placemat. Use your tapestry needle and matching yarn to secure it in several places so it won’t shift with washing.
Sunflower Napkin Ring Pattern
This adorable accessory completes your table setting!
Flower Center
With brown yarn, make a small circle of sc stitches using the magic ring method. This should be about 1 inch in diameter.
Petals
Using blush yarn, create 10 to 12 elongated petals using dc clusters around the center. Work these directly into the edge of your brown center, spacing them evenly.
Leaves
With sage yarn, crochet small leaf shapes. A simple leaf is just a chain with sc, hdc, dc, hdc, sc worked down one side and back up the other. Sew behind the petals.
Band
Crochet a simple yellow or blush chain band sized to fit a folded napkin. You’ll need to measure around your rolled napkin to get the right length. Join into a ring and attach your sunflower.
Assembly and Finishing
You’re almost done! These final steps make all the difference.
1. Weave in all loose ends. Use your tapestry needle to weave each tail through several stitches on the back of your work. This keeps everything secure and neat.
2. Lightly steam block the placemat into a perfect circle. Lay it flat on your blocking mat, pin the edges into a round shape, and hover your steam iron over it without touching. The steam relaxes the fibers and helps everything settle into place.
3. Shape each scalloped petal evenly. While blocking, make sure each petal fans out to the same size. Pin them if needed.
4. Attach the bee securely. Give it a gentle tug after sewing to make sure it’s really anchored.
5. Pair with the sunflower napkin ring for a complete table setting!
Care Instructions
Your beautiful handmade placemat deserves gentle care.
Hand wash gently in cool water with a mild detergent. Avoid wringing or twisting.
Lay flat to dry on a clean towel, reshaping if needed.
Avoid high heat to preserve the cotton texture. No tumble drying or ironing directly on the surface.
Pattern Notes and Tips
For a larger placemat: Continue increasing additional rounds on the cream center before adding the decorative borders. Every 2 to 3 additional rounds will add roughly an inch to your diameter.
For a firmer dining placemat: Use cotton yarn and a slightly smaller hook than recommended. This creates a tighter fabric that’s more durable and lies flatter on the table.
Having trouble with the shell band? Make sure your stitch count on the center circle is divisible by 6 before starting. This ensures your shells will work out evenly around the circle.
Don’t stress about perfection. Handmade items have character! Small variations in your stitches won’t be noticeable once the placemat is on the table with a plate on top.
Final Thoughts on the Blush Garden Bee Placemat Crochet Pattern
I hope you love making this Blush Garden Bee Placemat as much as I enjoyed putting this pattern together. The combination of textures, the sweet bee detail, and those stunning petal edges create something truly special for your table. It’s the kind of project that feels impressive but is totally achievable for anyone comfortable with basic crochet stitches.
This makes a wonderful gift for housewarmings, bridal showers, or anyone who appreciates handmade home decor. Make a full set of four or six for a coordinated tablescape that will have everyone asking where you bought them!
Thank you so much for choosing this pattern. Happy crocheting, and I can’t wait to see what you create!
If you enjoyed this crochet tutorial, I’d love for you to save it to your Pinterest boards so you can find it whenever you’re ready to start. And please drop a comment below if you make one of these beauties. Seeing your finished projects absolutely makes my day!
Want a Quick & Easy Printable Version?
Get a clean, beautifully formatted PDF of this pattern — easy to follow step by step, ready to print or save on any device. No scrolling, no distractions, just the pattern.
Get the Printable PDF →