
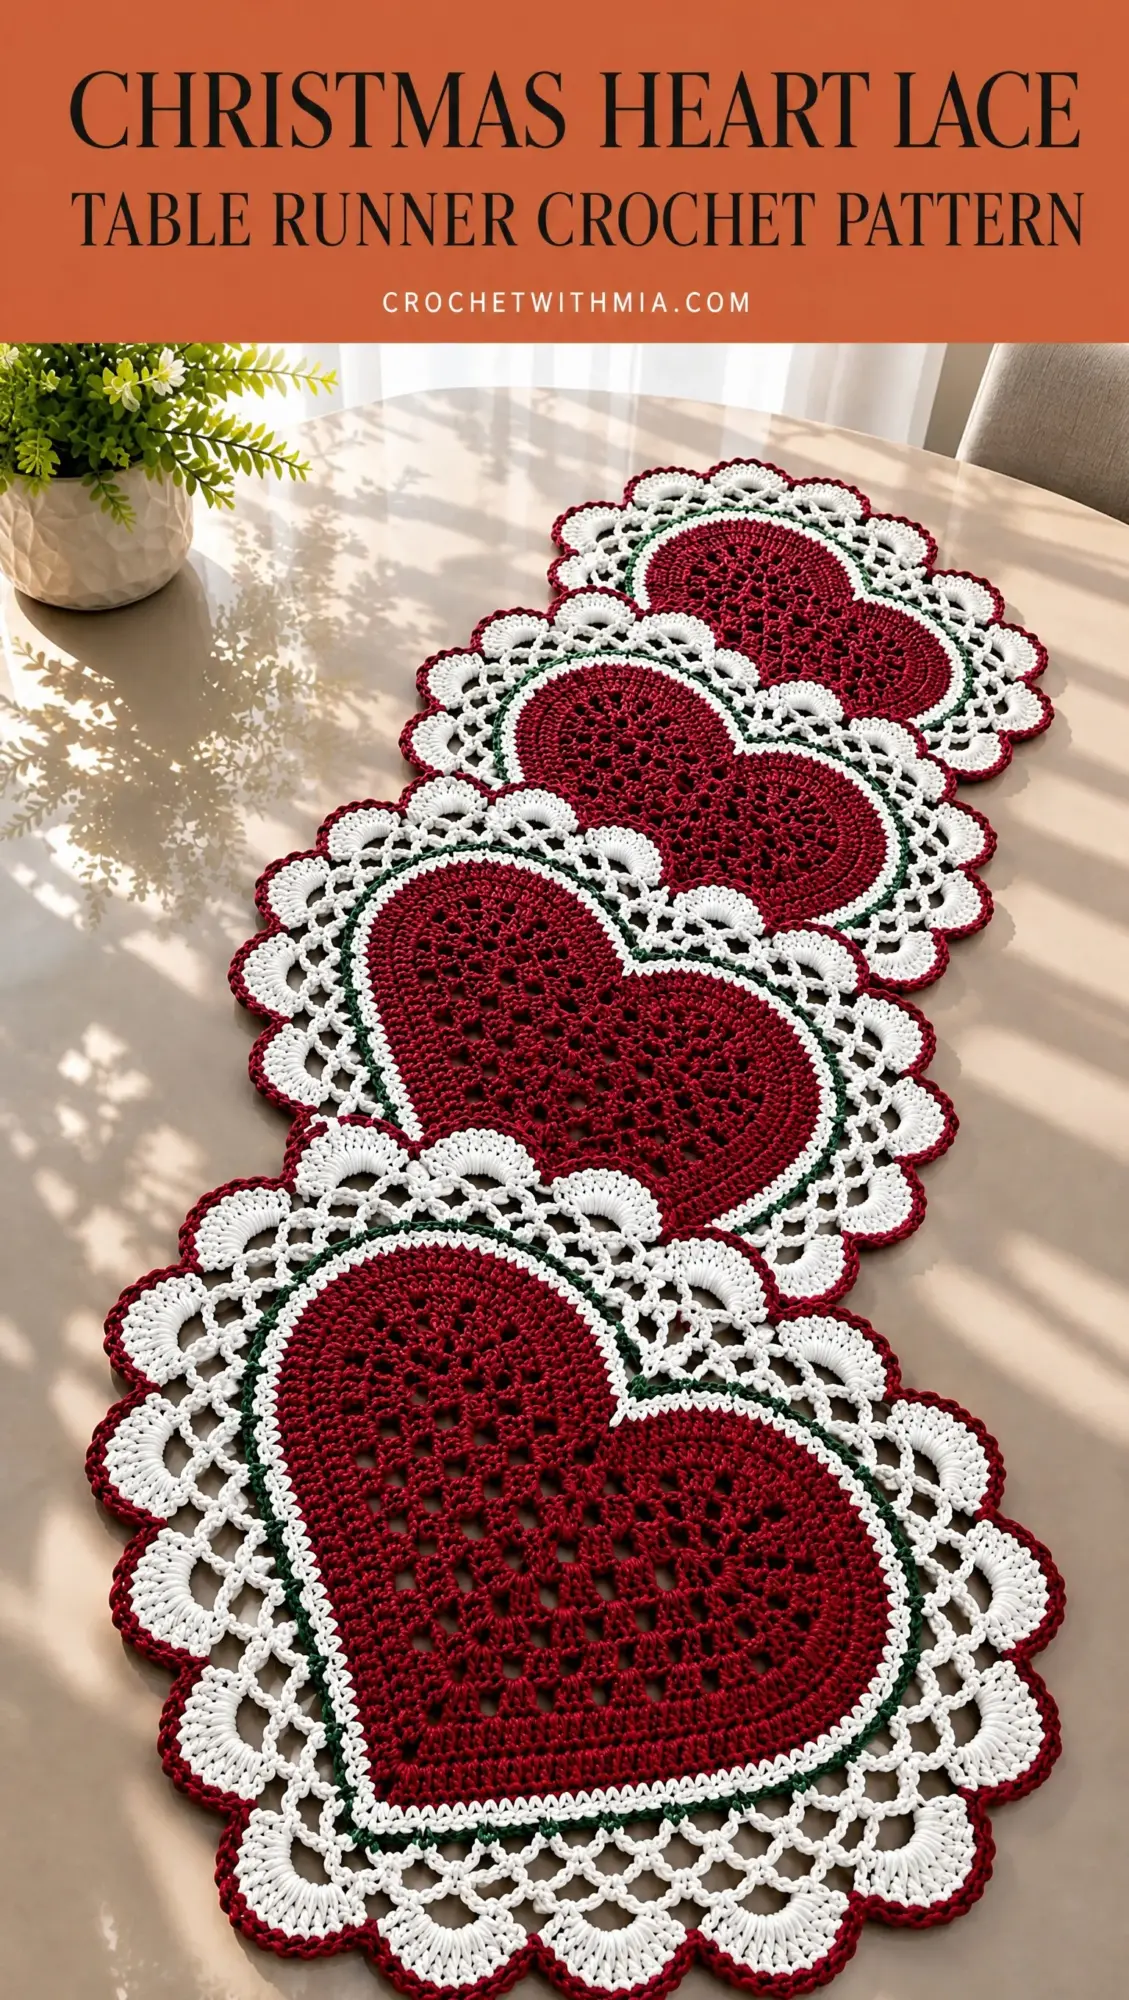
This table runner is a SHOWSTOPPER, and I’m thrilled to share it with you! Four gorgeous filet hearts with delicate lace borders and scalloped edges come together to create something truly impressive. The best part? It looks incredibly intricate, but if you can work double crochet and follow a simple pattern repeat, you’ve got this. This runner makes an absolutely stunning holiday gift or centerpiece for your own table.
Get the Ad-Free PDF Pattern
You can find the free pattern below, or you can purchase the ad-free printable PDF from my shop.
Get the Printable PDF →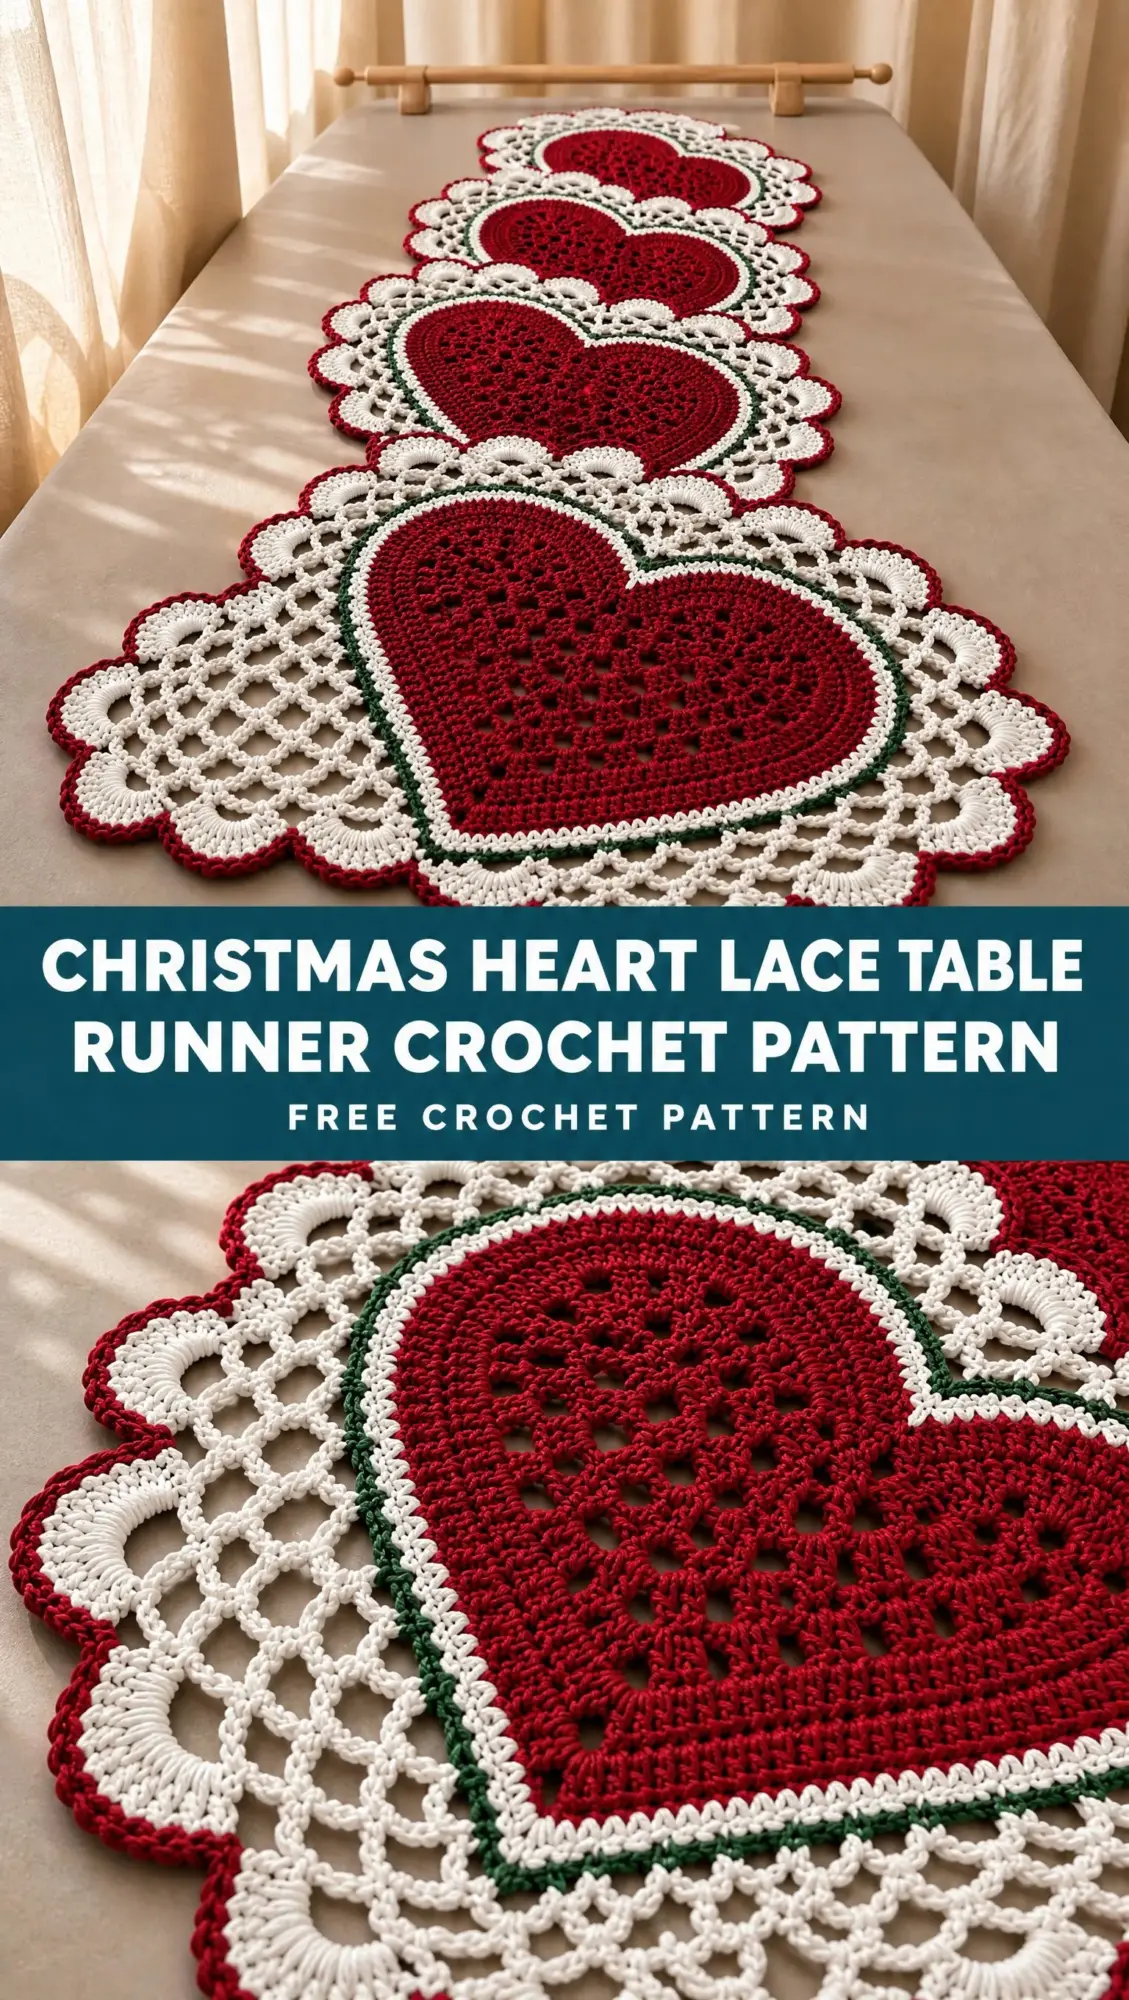
I designed this project with intermediate crocheters in mind, though confident beginners who take their time will do beautifully. The construction is straightforward. You’ll make four individual hearts, add the lace edging, then join them with a small overlap. No complicated joining as you go, no confusing charts to follow.
Whether you’re decorating for Christmas or Valentine’s Day, this cranberry red and snow white combination is festive and elegant. Let’s dive in and make something beautiful together!
What Makes This Heart Table Runner Special
This Christmas Heart Lace Table Runner uses a filet crochet technique for the heart bodies. Filet crochet creates a mesh-like fabric with open and filled spaces, giving each heart that lovely lacy texture you see in the photos. The hearts are worked from the bottom point upward toward the cleft, which makes shaping intuitive and easy to follow.
Each completed heart measures approximately 30 to 35 cm wide and 31 to 34 cm tall after blocking. When you join all four hearts with a 3 to 5 cm overlap, your finished runner will be approximately 110 to 120 cm long. That’s a generous size perfect for a dining table, sideboard, or mantel.
The white scalloped border adds romance and softness, while the forest green surface slip stitch creates that beautiful color separation you see between the red heart and white lace. It’s a small detail that makes a big visual impact.
Materials You’ll Need
Before you begin, gather these supplies. Having everything ready makes the process so much smoother.
Yarn:
Tools:
Gauge: 20 double crochet stitches and 11 rows equals 10 cm square, measured before adding the edging. Please make a gauge swatch! The heart body reaches a maximum width of 49 double crochet positions, which should measure about 24.5 cm. If your gauge doesn’t match, adjust your hook size accordingly.
Abbreviations and Stitch Definitions
Let me walk you through every stitch abbreviation used in this pattern. Even if you’re familiar with these terms, a quick review never hurts.
ch = chain: Wrap yarn over hook, pull through loop on hook. This creates the foundation for most crochet work.
sl st = slip stitch: Insert hook into stitch, yarn over, pull through both the stitch and the loop on your hook in one motion. Used for joining and moving across stitches without adding height.
sc = single crochet: Insert hook into stitch, yarn over and pull up a loop (2 loops on hook), yarn over and pull through both loops. A short, tight stitch.
hdc = half double crochet: Yarn over, insert hook into stitch, yarn over and pull up a loop (3 loops on hook), yarn over and pull through all 3 loops. Slightly taller than single crochet.
dc = double crochet: Yarn over, insert hook into stitch, yarn over and pull up a loop (3 loops on hook), yarn over and pull through 2 loops (2 loops remain), yarn over and pull through remaining 2 loops. The main stitch used in this pattern.
st/sts = stitch/stitches
sp = space: The gap created by chain stitches in previous rows.
RS/WS = right side/wrong side
rep = repeat
Increase: Work 2 stitches into one stitch.
sc2tog or dc2tog: A decrease that joins 2 stitches into 1. For dc2tog, work a double crochet until 2 loops remain on hook, then work another double crochet in the next stitch until 3 loops remain, yarn over and pull through all 3 loops.
Important: Turning chains do NOT count as a stitch unless a step explicitly says otherwise.
Heart Body Instructions (Make Four)
You’ll create four identical heart bodies in Color A (cranberry red). Work from the lower point upward toward the cleft.
Starting the Heart
Row 1: Chain 4. Work 3 dc in the fourth chain from the hook. The unused chains are foundation only, not a fourth stitch. You should count 3 dc. Turn.
Row 2: Chain 2, work 2 dc in the first stitch, dc in the middle stitch, 2 dc in the last stitch. You now have 5 stitches. Turn.
Shaping Rows 3 Through 24
Each row increases by 2 stitches total. You’ll work 2 dc in the first stitch, continue across the middle following the lace rule below, then 2 dc in the last stitch. Row n will have 2n+1 positions.
Check your stitch counts at these key rows:
The Lace Rule
This creates the beautiful open mesh texture in your hearts.
On rows divisible by 3 (that’s rows 3, 6, 9, 12, 15, 18, 21, and 24), after working the first increase, work the pattern (ch 1, skip next position, dc in next position) as many times as possible before the last 2 old positions. Then ch 1, skip the penultimate position, and work 2 dc in the last position.
All other rows are solid double crochet with no chain spaces.
Example for Row 3: 2 dc (increase), ch 1/skip, dc, ch 1/skip, 2 dc (increase) = 7 positions total.
Rows 25 Through 28
Work even over 49 positions with no increases.
Rows 25, 26, and 28: Double crochet in every position. You should have 49 stitches.
Row 27: Dc in the first stitch, then work (ch 1, skip 1, dc in next) 24 times. This creates 25 dc plus 24 chain 1 spaces.
After completing Row 28, fasten off.
Shaping the Two Lobes
This section creates the curved top of the heart. Don’t let it intimidate you. It’s just decreasing symmetrically on both sides!
Mark the Split
With the right side facing you, count across Row 28. Mark position 25 for the central cleft and leave it unworked. The left lobe uses positions 1 through 24. The right lobe uses positions 26 through 49. You’ll work each lobe separately.
Working the Lobes
Lobe Row 1: Join Color A at the outside edge for the first lobe and work dc in 24 positions. For the second lobe, join at the cleft side and work 24 positions. This way, both lobes mirror each other naturally. Turn. (24 stitches)
Lobe Row 2: Ch 2, dc2tog, dc in the next 20 stitches, dc2tog. Turn. (22 stitches)
Lobe Row 3: Ch 2, dc2tog, dc in the next 18 stitches, dc2tog. Turn. (20 stitches)
Lobe Row 4: Ch 2, dc2tog, dc in the next 16 stitches, dc2tog. Turn. (18 stitches)
Lobe Row 5: Ch 2, dc2tog, dc in the next 14 stitches, dc2tog. Turn. (16 stitches)
Lobe Row 6: Ch 2, dc2tog, dc in the next 12 stitches, dc2tog. Turn. (14 stitches)
Lobe Row 7: Ch 2, dc2tog, dc in the next 10 stitches, dc2tog. Fasten off. (12 stitches)
Work the second lobe exactly the same way. You should now have a symmetric heart with a 7 row cleft and two softly sloping tops.
Smooth the Body Edge
Join Color A at the lower point. Single crochet evenly around the entire heart body. Use approximately 2 sc per double crochet row end, 1 sc per top stitch, and 3 sc at the bottom point. At the deepest part of the cleft, work sc2tog to prevent a gap from forming.
If your edging starts to ruffle, reduce to 1 sc in selected row ends. Mark the point and cleft with stitch markers. Join with a slip stitch and fasten off.
This is an eased edging, not a fixed count round. The goal is a flat, smooth edge.
Open Lace and Scallop Border
Now for the beautiful white border! Switch to Color B (snow white).
Round 1: Outline
Join Color B at the bottom point. Single crochet in each edging stitch around the heart. At the middle point stitch, work (sc, ch 2, sc). At the cleft, work sc2tog over the 2 central stitches to keep things snug. Join with a slip stitch.
Lay the heart flat. Record your edging stitch count for the remaining hearts. A flat heart matters more than forcing a specific perimeter count.
Round 2: Mesh
Slip stitch into the point space. Chain 1, then work (sc, ch 5, sc) in the point. Continue around the heart working ch 5, skip 2 stitches, sc in the next stitch.
At the cleft, use ch 3 instead of ch 5 to draw it inward. Adjust the final skip to 1 or 3 stitches if needed to make the round work out evenly. Join to the first sc. Mark the point loop with a stitch marker.
Round 3: Mesh
Slip stitch into the first ch 5 loop. Chain 1, sc into the loop. Work ch 5, sc in the next loop around the heart.
At the point, work (sc, ch 5, sc) in the marked point loop to add one extra loop. At the cleft, use ch 3 again. Chain 5 and join to the first sc. Lay flat and check your work before continuing.
Round 4: Fans
Slip stitch into the first loop. In each regular loop, work (sc, hdc, 5 dc, hdc, sc). That’s 9 stitches per fan.
In the cleft loop only, work (sc, hdc, dc, hdc, sc) instead. This smaller 5 stitch fan prevents crowding. Join and fasten off.
Round 5: Fine Edge
Switch back to Color A. Join anywhere along the border. Slip stitch loosely in each fan stitch, working ch 1 between neighboring fans. Join invisibly, fasten off, and weave in your ends.
If the outer edge contracts or pulls in, try using a larger hook for this round.
Adding the Green Color Detail
With your forest green cotton, work a surface slip stitch around the boundary between the red heart (Color A) and the white edging (Color B).
Work into every second Color B stitch and chain 1 between insertions. Keep each loop loose and relaxed. Make sure the green line stays on the heart side of the lace, not out on the white border.
Blocking and Joining Your Hearts
Block Each Heart Individually
Soak your hearts briefly following your yarn label’s instructions. Press gently between towels to remove excess water. Pin each piece to identical dimensions on your blocking mat.
Shape the two lobes evenly and gently open each lace loop. Do not stretch one heart to compensate for a different gauge. Let them dry completely before joining.
Arrange Four Hearts
Lay all four hearts facing the same direction in a line. Place the point of heart 2 over the cleft of heart 1, overlapping approximately 3 to 5 cm. Repeat this arrangement for hearts 3 and 4.
Choose an overlap amount that hides the join while keeping both lobes visible on each heart. Your total runner length equals 4 times the heart height minus 3 times your overlap.
Sew the Joins
Using matching thread or split cotton yarn, make small whipstitches only where the two lace borders touch. Secure an area approximately 6 to 8 cm wide at each overlap.
Do not sew a hard straight seam through the centers. Keep your joins flat with no dangling loops underneath. Gently lift the runner to confirm all sections remain securely connected.
Care Instructions
Hand wash your runner in cool water following your yarn label’s recommendations. Avoid wringing or twisting. Lay flat to dry and reshape all scallops while damp.
Use colorfast yarn to prevent the darker red center from bleeding into the pale white border. When displaying, place a protective layer beneath hot serving dishes to protect your beautiful work.
Final Sample Review
Before considering this pattern complete, confirm these details:
If your runner curls at the edges, the border needs more ease. If it waves or ripples, you have too many edge stitches. Record your finished dimensions and actual yarn consumption from your sample.
You Did It!
Thank you so much for making this Christmas Heart Lace Table Runner with me! I hope you love how yours turned out. This pattern creates something truly special, the kind of heirloom piece that gets pulled out year after year and always draws compliments.
If you make this runner, I would absolutely love to see it! Share your photos on Instagram or in our Facebook group. Seeing your creations brings me so much joy.
Don’t forget to save this pattern to your Pinterest boards so you can find it easily when you’re ready to start. And please drop a comment below if you make this runner or have any questions along the way. I’m always here to help, and I love hearing from you!
Want a Quick & Easy Printable Version?
Get a clean, beautifully formatted PDF of this pattern — easy to follow step by step, ready to print or save on any device. No scrolling, no distractions, just the pattern.
Get the Printable PDF →