
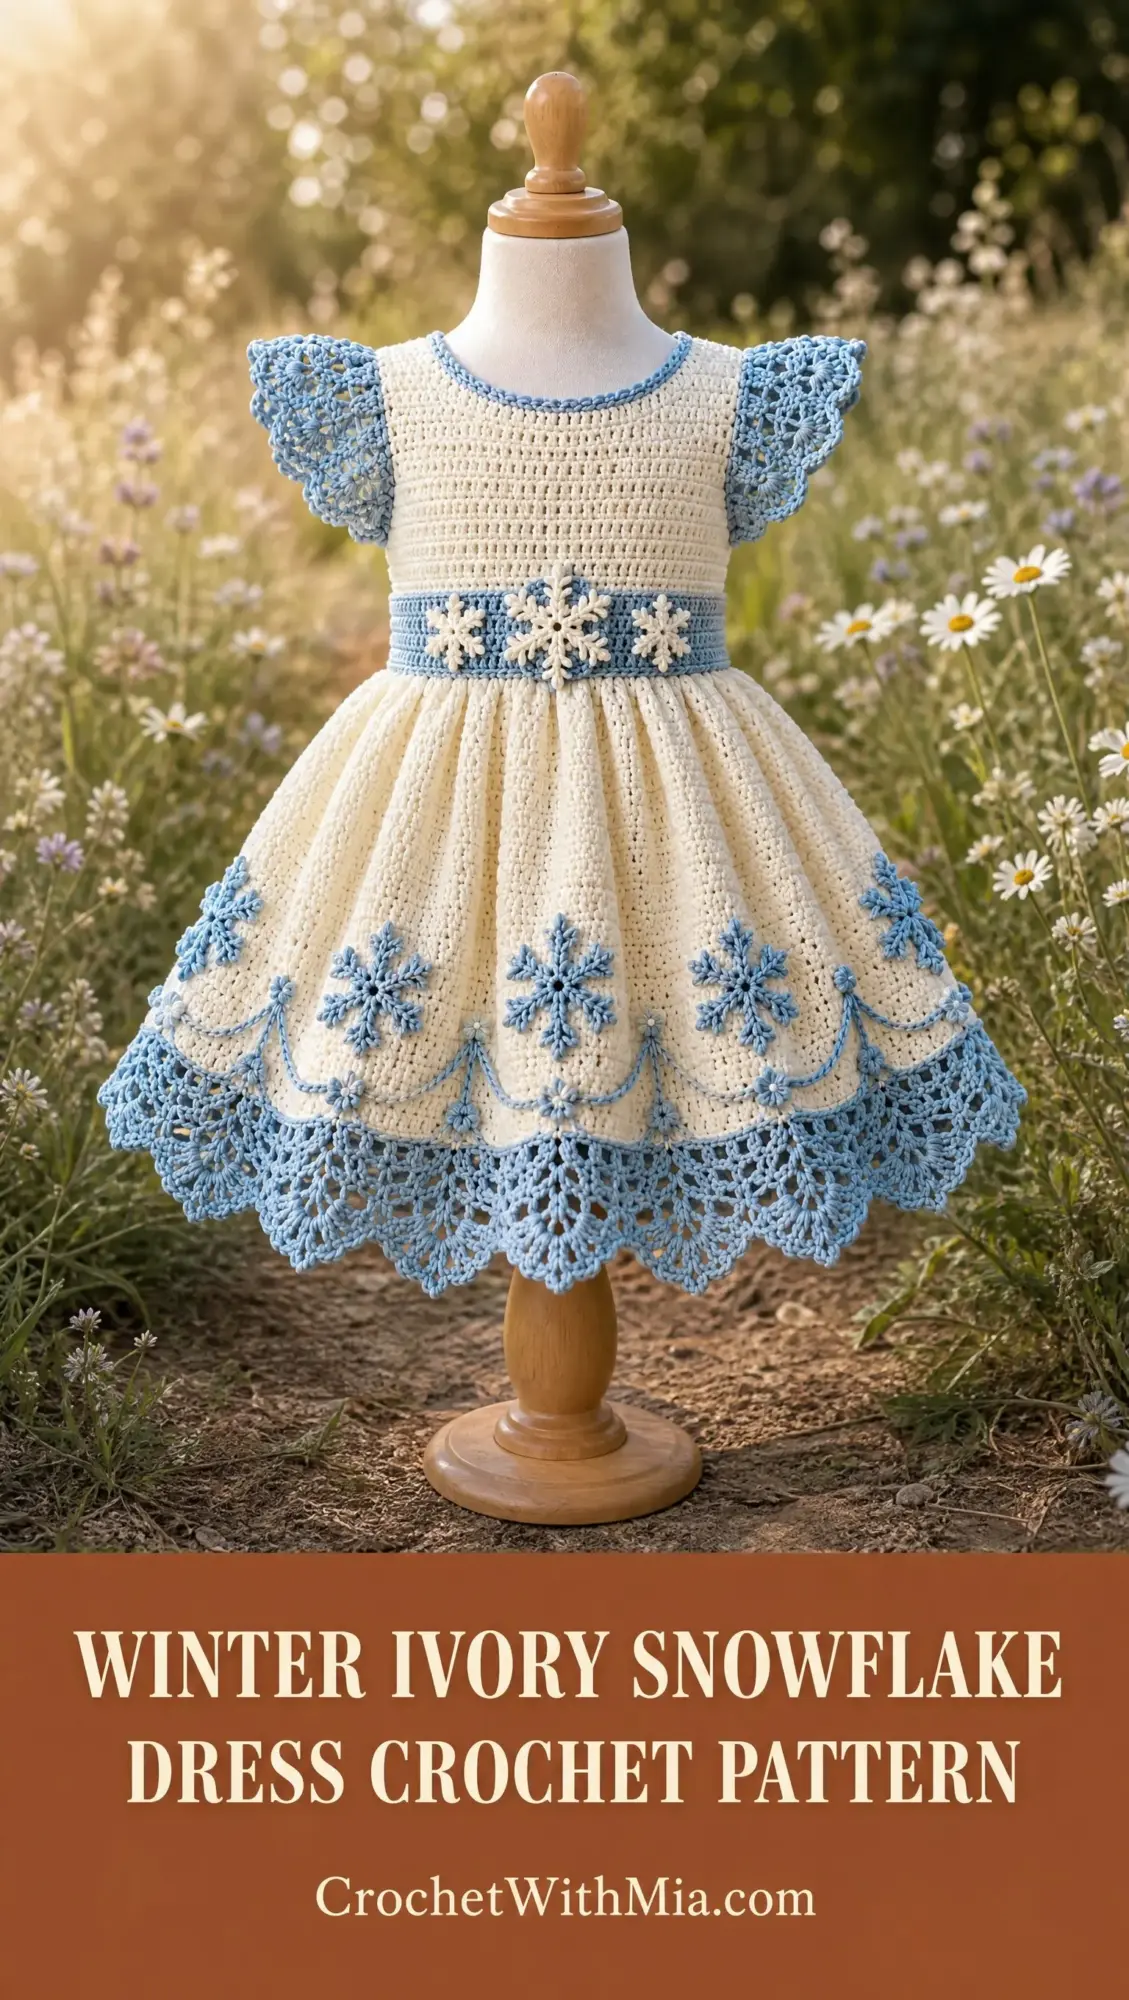
Alright, yarn lovers. This is your sign to dig into that stash and pull out those beautiful skeins you’ve been saving for "something special." The Winter Ivory Snowflake Dress is that something special. With its delicate lace hem, flutter sleeves, and charming snowflake appliqués, this toddler dress combines classic elegance with whimsical winter details.
Get the Ad-Free PDF Pattern
You can find the free pattern below, or you can purchase the ad-free printable PDF from my shop.
Get the Printable PDF →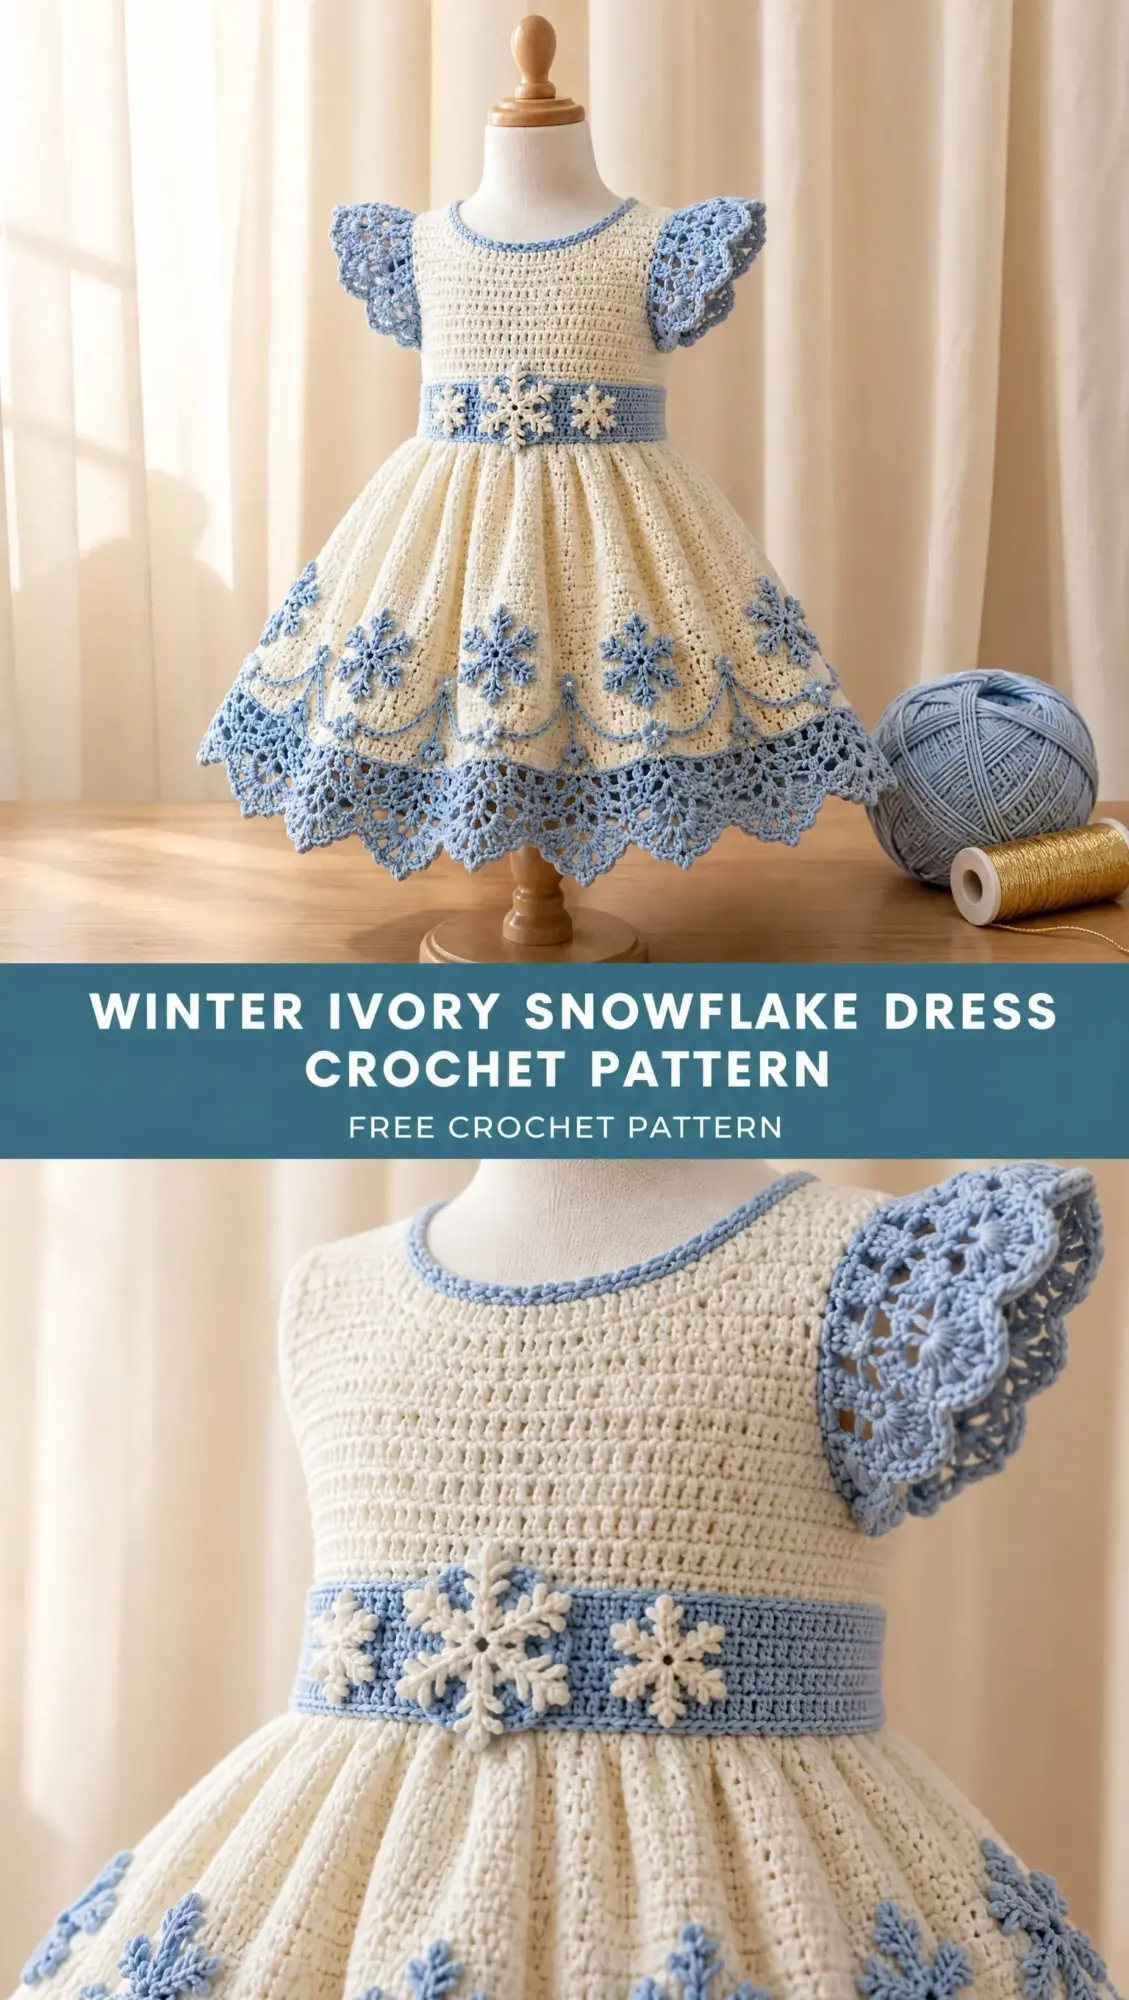
Fair warning: this is an intermediate to advanced project. You’ll be working garment construction, lace edging, and detailed appliqué work. But don’t let that scare you off. The construction is logical once you understand the flow, and the results are absolutely stunning.
If you’ve been wanting to level up your crochet skills while creating something truly heirloom-worthy, this dress pattern delivers. Let me walk you through everything you need to know.
About This Dress Pattern
This crochet dress pattern creates a gorgeous occasion dress sized for toddlers approximately 2 to 3 years old. The finished chest measurement is 56 cm (22 inches), designed to fit a body chest of 50 to 52 cm with 4 to 6 cm of ease for comfortable movement. The total shoulder-to-hem length runs about 46 to 49 cm, with a bodice depth of approximately 22 cm.
The dress features a two-panel bodice construction with a center back opening secured by snaps. The skirt is worked downward from the bodice foundation, creating that beautiful gathered fullness you see in the photos. Flutter sleeves add a feminine touch, and the lace fan border at the hem brings serious wow factor.
Important note: This pattern uses US crochet terminology throughout. The design includes decorative snowflake motifs at the waist and scattered across the lower skirt, connected by slip-stitched cord details.
Materials You’ll Need
Yarn
You’ll need sport weight or fine-weight cotton yarn with approximately 125 meters per 50 grams. Here’s the breakdown by color:
Soft Ivory:
Icy Pale Blue:
The total comes to approximately 1,050 meters before small contrast colors. I always recommend buying a bit extra, especially for garment projects. Your actual usage should be measured on your sample.
Tools
Gauge
Blocked gauge: 20 double crochet (dc) and 12 rows = 10 x 10 cm
To check your gauge, chain 32. Work a dc in the 3rd chain from hook and in each remaining chain (30 dc). Work 18 rows total. Wash and dry your swatch exactly as you plan to care for the finished garment, then measure the central 20 dc and 12 rows.
If your measurements don’t match, adjust your hook size and swatch again. Gauge matters enormously for garments. Don’t skip this step.
Abbreviations and Stitch Definitions
Before we dive into construction, let’s cover the stitches you’ll use:
Counting rule: The turning ch 1 or ch 2 does NOT count as a stitch anywhere in this pattern. When joining rounds, join to the first actual stitch. Mark that stitch and count every shaping row carefully.
Front Bodice Instructions
Rows 1 through 14
With soft ivory yarn and your 3.5 mm hook, chain 58.
Row 1: Dc in 3rd ch from hook and in each remaining ch. Turn. (56 dc)
Rows 2 through 14: Ch 2, dc in every st. Turn after each row. Do not work a stitch into the turning chain. (56 dc each row)
Armhole Shaping: Row 15
Sl st in the first 4 stitches. Ch 2, dc in each of the next 48 stitches. Leave the final 4 stitches unworked. Turn. (48 dc)
Those 4 unworked stitches on each side create a 2 cm underarm ledge.
Rows 16 through 20
Ch 2, dc in all 48 stitches. Turn. (48 dc each row)
At gauge, your full panel should now measure about 16.7 cm tall. Place removable markers around the outermost 10 stitches at each edge. The central 28 stitches will form your neckline opening.
First Shoulder: Rows 21 through 26
Ch 2, dc in the first 10 stitches only. Leave the remaining 38 stitches unworked. Turn. (10 dc)
Work 5 more rows of 10 dc, turning each row. Fasten off with a long sewing tail.
Second Shoulder: Rows 21 through 26
With the same face of the panel toward you, attach yarn at the opposite outer edge of Row 20. Work toward the center: ch 2 and dc across only the outermost 10 stitches. Turn.
Work 5 more rows of 10 dc. Fasten off.
Both shoulder straps should have 6 rows above Row 20.
Front Bodice Checkpoint
Back Bodice Instructions
Rows 1 through 14
Using soft ivory, make a second panel exactly as Front Rows 1 through 14: 56 dc each row. Mark the center between stitches 28 and 29.
Left Half: Rows 15 through 23
Row 15: Sl st in first 4 sts. Ch 2, dc in next 24 sts, stopping at the center marker. Leave the other half unworked. Turn. (24 dc)
Rows 16 through 23: Ch 2, dc in each st. Turn. (24 dc each row)
Fasten off.
Right Half: Rows 15 through 23
Return to the unworked half of Row 14. Attach at the center marker and work toward the outer edge: ch 2, dc in the next 24 sts, leaving the final 4 sts unworked. Turn. (24 dc)
Work Rows 16 through 23 as for the left half. Fasten off.
The center edges remain separate to create your back opening.
Back Shoulders: Rows 24 through 26
On each half, attach yarn at the outer armhole edge of Row 23 and dc across the outermost 10 sts. Leave the inner 14 sts unworked. Turn.
Work 2 more rows of 10 dc. Fasten off.
The two 14-st inner gaps create a 28-st back neckline.
Joining the Bodice
Block both panels to your target measurements. With right sides together, join each pair of 10-st shoulder tops using mattress stitch. To work mattress stitch, align matching edges and pick up one small strand from each edge alternately with a tapestry needle. Tighten gradually so the join lies flat. Never pull the seam shorter than the fabric.
Join side edges from the foundation edge through Row 14 only, matching rows carefully. Keep all upper edges open for armholes. Turn right side out.
Check before adding the skirt: The lower edge has 56 foundation stitches on each panel, 112 total. The back slit begins above Row 14. Try the bodice on a correctly sized dress form to check chest ease and head access before adding the weight of the skirt.
Skirt Construction
Round 1
With soft ivory, join at one side seam of the bodice foundation. Ch 2, work 2 dc into the underside of each of the 112 foundation stitches. Join. (224 dc)
This intentional doubling creates the full gathered skirt.
Rounds 2 through 23
Ch 2, dc in each st around. Join. (224 dc each round)
Turn after every round to reduce bias and keep the join less visible.
Round 24
Ch 2, repeat [dc in next 13 sts, 2 dc in next st] 16 times. Join. (240 dc)
Each repeat uses 14 old stitches and creates 15 new stitches.
Hem Foundation
Ch 1, sc in each dc. Join. (240 sc)
Change to icy pale blue for the fan border. Before adding the border, your skirt should measure approximately 20 cm below the waist. Check the length on your sample.
Flutter Sleeves
Sleeve Foundation
Use icy pale blue and your 3.5 mm hook. On one armhole, identify the shoulder seam. Measure 6 cm down the front edge and 6 cm down the back edge. Mark both points.
Join at the front marker, work 30 sc evenly across the 12 cm upper arc to the back marker, crossing over the shoulder seam. Do not work around the lower underarm.
Flutter Rows
Turn.
Row 2: Ch 2, 2 dc in each sc. Turn. (60 dc)
Row 3: Ch 2, repeat [dc in next st, 2 dc in next st] 30 times. Turn. (90 dc)
Row 4: Ch 1, sc in every st. Fasten off. (90 sc)
Repeat on the other armhole, matching the marked arc and stitch counts. This creates one softly ruffled cap sleeve on each side.
Lace Hem Border
Hem Round 1
With icy pale blue, join in any of the 240 hem foundation sc. Ch 1 and sc in that same stitch.
Repeat 24 times: skip next 4 foundation sts, 11 tr in next st, skip next 4 foundation sts, sc in next st.
The last sc location is your starting sc. Instead of making a second sc there, join to the first sc.
Result: 24 fans of 11 tr and 24 sc anchors.
Hem Round 2
Ch 1, sc in same anchor. For each fan: ch 1, work dc in each of its 11 tr with ch 1 between adjacent dc, ch 1, sc in the next anchor.
On the last fan, join to the first sc instead of making a duplicate anchor. Each fan now has 11 dc and 12 ch-1 spaces.
Hem Round 3
Ch 1, sc in each sc anchor, each dc, and each ch-1 space around. Join and fasten off. (576 sc)
Keep your tension relaxed. When blocking, shape individual fans into smooth rounded scallops without pulling the skirt waist wider.
Six-Arm Snowflake Motifs
Center
With icy pale blue and your 3 mm hook, make a magic ring. Ch 1 and work 6 sc into the ring. Pull the tail to tighten. Join.
Six Arms
Repeat in each of the 6 center stitches: sl st in the st, ch 7, sl st in 2nd ch from hook and next ch, ch 3, sl st in 2nd and 3rd ch from hook, sl st in each of the 4 remaining chains of the original ch-7 arm.
This creates a forked arm. Join to first sl st and fasten off.
Finishing the Snowflakes
Make 8 border motifs and 3 waist motifs (11 total). Pin the arms at equal angles while damp, then let dry completely. Sew each arm down separately. Do not stiffen the garment with glue or starch.
Leaves and Small Flowers
Pointed Leaf
With icy pale blue and 3 mm hook, ch 9.
Working along one side: sl st in 2nd ch from hook, sc in next, hdc in next, dc in next 3, hdc in next, (sc, ch 2, sc) in the last ch.
Continue along the opposite side of the same chain: hdc in next, dc in next 3, hdc in next, sc in next, sl st in last.
Fasten off with a sewing tail. Embroider a straight vein down the middle if desired.
Tiny Filler Flower
With a contrast color and 3 mm hook, make a magic ring.
Repeat 5 times into the ring: ch 2, 2 dc, ch 2, sl st.
Tighten, fasten off, and sew the center securely. Embroider a contrasting center using three short straight stitches.
Quantities
Appliqué Placement
Lay the blocked dress flat. Mark the front center and both side seams. Arrange motifs 3 to 5 cm above the start of the lace hem, distributing them evenly between the side seams.
Overlap only the leaf bases, not their tips. Baste first, then sew around all edges and through every layered center with small matching stitches.
Decorative Cords and Waist Details
Making the Cords
With icy pale blue and 3 mm hook, chain to the needed measured length, then sl st back along the chain.
Make two neckline cords about 30 cm each and two V-panel cords about 18 cm each. Measure against your blocked bodice before cutting. Sew all cords flat to the fabric. These are ornaments, not functional lacing.
Front Arrangement
Use the design illustration as a placement guide. Form a curved or sweetheart outline just below the real neckline. Place the paired V cords from the upper chest toward the central waist motif.
Where crossed lacing appears, embroider 4 to 5 shallow crosses directly on the fabric between them. Do not leave long loose cord spans.
Lower Scrolls
Make additional slip-stitched chains to bridge the spaces between lower motifs in shallow S-curves. Baste first and secure every 1 cm. Keep chains away from the loose outer hem fans.
Neckline Edge and Back Closure
Neckline Edge
Using soft ivory or icy pale blue, join at the back neck. Work 1 sc per horizontal stitch and approximately 2 sc per dc row-end around the neck, excluding the vertical center-back slit.
At inner corners, work sc2tog across the corner if needed to lie flat. Join. Work one more round of sc. Join and fasten off.
Keep both sides symmetrical.
Back Bands
Along each vertical back-slit edge, work 2 sc into each dc row-end for Rows 15 through 23. (18 sc)
Turn and work 2 more rows of 18 sc. Fasten off.
Lightly block the two bands so they overlap by about 1 cm without pulling the back panel.
Closures
Sew three snaps through small soft backing patches at approximately 1 cm below the top of the slit, at its midpoint, and 1 cm above its bottom. Align paired halves before stitching. Cover exposed backing edges with soft fabric.
Blocking and Finishing
Weave all ends through several stitches, reverse direction, and secure. Wash according to your yarn label. Gently press out water in a towel. Do not wring.
Pin the bodice to 56 cm chest circumference. Ease the skirt outward without stretching the waist. Shape the lace scallops, sleeve ruffles, and appliqués. Dry completely on a flat surface.
Care Instructions
Hand-wash cool if compatible with all materials. Support the wet garment and dry flat. Do not hang while wet. Check snaps, seams, and appliqué attachments before each wear. Repair any loose parts before use.
Safety Notes for Children’s Wear
The pattern notes mention that the illustration may show decorative beads or ribbon. For a child-worn garment, substitute embroidered centers instead of beads, stitch sash and bow tails flat, and secure every appliqué edge thoroughly.
Use this dress with a sewn cotton slip or suitable underdress where the lace fabric is open. This design is occasion clothing, not sleepwear.
Final Thoughts
This Winter Ivory Snowflake Dress is truly a labor of love. The combination of solid bodice construction, gathered skirt, delicate flutter sleeves, and that stunning lace hem creates something your little one can wear for holidays, portraits, or any special occasion worth remembering.
Take your time with the appliqué placement. That’s where this dress really comes to life. And definitely block everything carefully. The lace fans especially need that final shaping to look their best.
I hope you love making this dress as much as I loved designing it. If you create one, I’d absolutely love to see it! Save this pattern to your Pinterest boards so you can find it when you’re ready to start, and please drop a comment below if you make one. Seeing your finished projects is honestly the best part of sharing patterns.
Want a Quick & Easy Printable Version?
Get a clean, beautifully formatted PDF of this pattern — easy to follow step by step, ready to print or save on any device. No scrolling, no distractions, just the pattern.
Get the Printable PDF →