
I call this one the Cloud Nine Hoodie, and it has been living in my head for almost three years now. The original sketch came from a coffee-stained notebook I keep beside my bed for those 2 a.m. moments when an idea just will not let me sleep. I wanted to make something that felt like a hoodie but looked absolutely nothing like the heavy fleece versions we all grew up wearing.
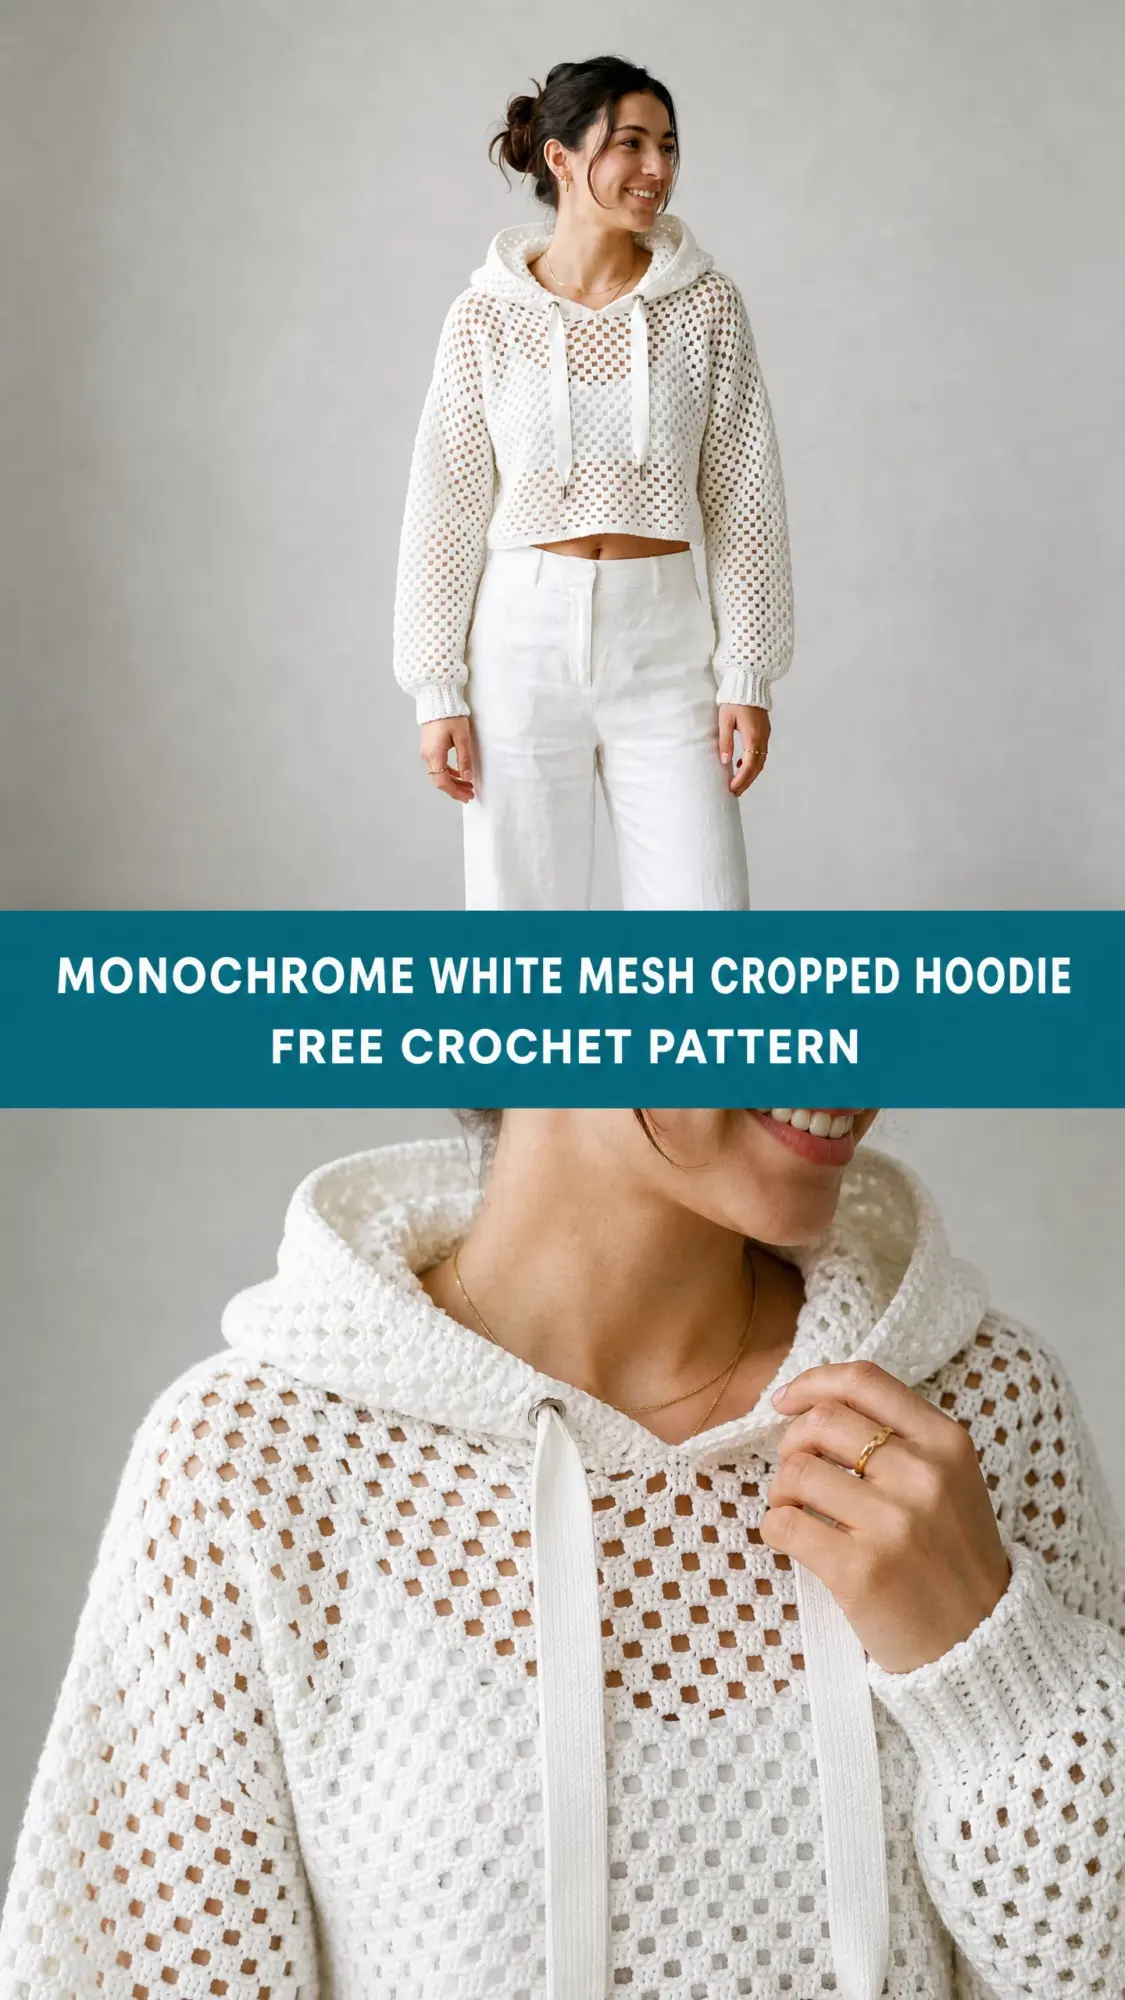
When I finally sat down to bring this design to life, I knew exactly what I was after. Light, airy, a little bit crop, and that satisfying open mesh texture that makes you look like you spent way more time than you actually did. The white-on-white styling gives it this fresh, modern edge that works just as well over a swimsuit at the beach as it does with high-waisted jeans for brunch.
This cropped hoodie pattern became one of those projects I kept picking up and putting down because I wanted every detail to be right. The proportions. The hood depth. The way the drawstring sits. Now that it is finally done and tested, I am genuinely thrilled to share it with you.
Why You Will Love This Mesh Cropped Hoodie Crochet Pattern
This is not your average beginner rectangle project, but it is absolutely achievable if you have made at least one seamed garment before. The mesh stitch itself is incredibly simple and repetitive. Once you get into the rhythm, you will fly through rows while binge-watching your favorite show.
The construction might sound intimidating at first glance. You are working flat panels, seaming shoulders and sides, setting in sleeves, and picking up stitches for a hood. But here is the thing: each individual step is straightforward. It is just that there are several steps. Take them one at a time and you will have a stunning finished garment.
What makes this pattern special:
Skill Level
Intermediate. The mesh stitch repeat is simple and highly repetitive, but the pattern requires comfort with flat panel construction, seaming garment pieces, picking up stitches around a neckline, and working a basic set-in sleeve. If you have completed at least one seamed sweater or top, you will find this project straightforward.
Time Estimate
Approximately 20 to 30 hours for an average intermediate crocheter working in the listed yarn weight. The repetitive mesh stitch works up quickly once the repeat is established.
Finished Measurements for This Crochet Hoodie Pattern
This pattern is written for a finished bust of 38 inches (96.5 cm) with instructions for sizes S, M, L, and XL following in parentheses throughout. Where a single number appears, it applies to all sizes.
Size S: finished bust 34 in / 86.5 cm, body length from hem to underarm 11 in / 28 cm, total length from hem to shoulder 17 in / 43 cm, sleeve length 18 in / 45.5 cm
Size M: finished bust 38 in / 96.5 cm, body length from hem to underarm 11.5 in / 29 cm, total length 17.5 in / 44.5 cm, sleeve length 18.5 in / 47 cm
Size L: finished bust 42 in / 106.5 cm, body length from hem to underarm 12 in / 30.5 cm, total length 18 in / 45.5 cm, sleeve length 19 in / 48.5 cm
Size XL: finished bust 46 in / 117 cm, body length from hem to underarm 12.5 in / 31.5 cm, total length 18.5 in / 47 cm, sleeve length 19.5 in / 49.5 cm
Hood depth (front opening to back seam): 11 in / 28 cm all sizes
Hood height (neckline to top seam): 12 in / 30.5 cm all sizes
Materials Needed
Yarn: approximately 900 (1000, 1100, 1250) yards / 820 (915, 1005, 1145) meters of DK weight (CYCA 3) yarn in white or off-white. A smooth, tightly plied cotton or cotton-blend yarn is strongly recommended to showcase the mesh structure and achieve the crisp, opaque appearance of the garment. Avoid loosely spun or highly textured yarns that would obscure the open mesh.
Hook: US size H-8 / 5.0 mm for main fabric. US size G-6 / 4.0 mm for ribbing sections (hem band, cuffs).
Notions:
Yarn Suggestions
Option 1: Paintbox Yarns Cotton DK. 100% cotton, 273 yards / 250 meters per 100 g skein. Crisp stitch definition, excellent wash performance, affordable, widely available. Purchase 4 (4, 5, 5) skeins in Pure White or Paper White.
Option 2: Lion Brand 24/7 Cotton DK. 100% mercerized cotton, 268 yards / 245 meters per 100 g skein. Mercerization adds a subtle sheen that elevates the look of the mesh. Available at most major craft retailers. Purchase 4 (4, 5, 5) skeins in White.
Option 3: Drops Safran. 100% Egyptian cotton, 175 yards / 160 meters per 50 g skein. Finer hand with a slightly softer feel while maintaining excellent stitch definition. Purchase 6 (6, 7, 8) skeins in Off White.
Substitution note: Any DK weight smooth cotton or cotton-blend that achieves the stated gauge is suitable. Avoid yarns with significant stretch (rayon blends can bias the mesh) and avoid wool unless you are comfortable with the resulting drape difference. Always work a gauge swatch before beginning.
Gauge
With H-8 / 5.0 mm hook in Square Mesh Stitch:
4 mesh squares = 4 in / 10 cm
5 rows of mesh = 4 in / 10 cm
Gauge is critical for a fitted garment. Swatch at least 6 inches wide, block the swatch as you intend to block the finished garment, then measure the center 4 inches. Adjust hook size up or down one size if needed to achieve gauge.
For the ribbing sections with G-6 / 4.0 mm hook:
10 sc = 2 in / 5 cm
10 rows of sc ribbing = 2 in / 5 cm
Do not skip the gauge swatch. I know it feels like wasted time, but with a garment like this, being even half a stitch off per inch can mean the difference between a perfect fit and a disappointing result.
Abbreviations (US Terms)
Special Stitches
Square Mesh Stitch
The mesh is formed by a combination of double crochet posts and chain-2 spaces arranged so that each mesh unit looks like an open square when laid flat. The repeat is a multiple of 3 stitches plus 1, worked on a foundation of dc and ch-2 spaces.
Foundation chain: Chain a multiple of 3 plus 4. The extra 4 accounts for the turning chain that acts as the first dc of the first row.
Row 1 (RS): Dc in 7th ch from hook (counts as dc, ch-2 sp, dc), (ch 2, sk 2 ch, dc in next ch) across. Turn.
Row 2: Ch 5 (counts as dc plus ch-2 sp), sk first ch-2 sp, dc in next dc, (ch 2, dc in next dc) across, working last dc into 3rd ch of t-ch. Turn.
Row 2 is the pattern row and is repeated throughout all flat sections. Each mesh square consists of 1 dc post, 1 ch-2 sp. Every dc sits directly above the dc of the previous row, and every ch-2 sp sits above the ch-2 sp of the previous row.
Stitch count note: When counting squares in mesh fabric, count the number of ch-2 spaces across one row, not the individual chains or dc posts. This number equals the mesh square count per row.
Surface Slip Stitch Seam
Hold two panels with right sides facing. Insert hook through both layers in the corner stitch, draw up a loop, chain 1, then slip stitch evenly through both layers across the seam. This creates a flat, low-profile seam visible on the wrong side.
Ribbing (worked flat, turned rows)
Row 1: Sc in 2nd ch from hook and in each ch across. Turn.
Row 2: Ch 1, sc in back loop only (BLO) of each sc across. Turn.
Rep Row 2 for ribbing pattern. Working in back loops only creates the vertical ridged texture that mimics knit ribbing.
Pattern Notes Before You Begin
1. The back panel and front panel are worked identically from hem to underarm, then diverge at the neckline shaping.
2. The hem ribbing is worked by picking up stitches along the foundation chain edge after the panels are complete.
3. Cuffs are worked separately as a short ribbing tube and seamed, then attached to the sleeve lower edge.
4. Turning chains: The ch-5 turning chain at the start of every mesh row counts as 1 dc plus 1 ch-2 sp. At the end of each row, the last dc is worked into the 3rd chain of the previous row’s ch-5 t-ch. Do not skip this stitch or your edges will shrink.
5. Seaming is done with the same yarn using a yarn needle and a whipstitch or the surface slip stitch seam method. The mesh is open, so seams should be worked through the dc posts and along the edges of the ch-2 spaces rather than trying to find a clear center stitch.
6. All stitch counts given in parentheses at the end of each row refer to the number of mesh squares in that row (the number of ch-2 spaces), not the total chain or dc count.
7. Size order throughout: S (M, L, XL).
8. When the pattern says to "work even," continue working Row 2 of the Square Mesh Stitch without any increases or decreases.
Step by Step Instructions for the Mesh Cropped Hoodie
Back Panel
With H-8 / 5.0 mm hook, chain 58 (64, 70, 76).
Foundation Row (RS): Dc in 7th ch from hook, (ch 2, sk 2 ch, dc in next ch) across. Turn.
After Foundation Row: 18 (20, 22, 24) mesh squares.
Rows 1 through 13 (14, 15, 16): Work even in Square Mesh Stitch (rep Row 2).
After Row 13 (14, 15, 16): 18 (20, 22, 24) mesh squares. Piece measures approximately 11 (11.5, 12, 12.5) in / 28 (29, 30.5, 31.5) cm from foundation.
CHECKPOINT: After completing the body rows, the back panel should measure 11 (11.5, 12, 12.5) in / 28 (29, 30.5, 31.5) cm from the lower foundation chain to the top of the last row. Width should be 17 (19, 21, 23) in / 43 (48.5, 53.5, 58.5) cm.
Armhole Shaping
Row 14 (15, 16, 17): Sl st across first 3 (3, 3, 3) mesh squares (sl st into the dc post, into the ch-2 sp, into the next dc post, into the ch-2 sp, into the next dc post), ch 5, work in mesh pattern across until 3 (3, 3, 3) mesh squares remain, turn leaving remaining squares unworked.
After armhole setup row: 12 (14, 16, 18) mesh squares.
Rows 15 through 22 (16 through 24, 17 through 26, 18 through 28): Work even in mesh stitch.
After last armhole row: 12 (14, 16, 18) mesh squares. Armhole depth measures approximately 6 (6, 6, 6) in / 15 (15, 15, 15) cm.
CHECKPOINT: Back panel armhole section should be 6 in / 15 cm tall. Total panel height from foundation to shoulder edge should be 17 (17.5, 18, 18.5) in / 43 (44.5, 45.5, 47) cm.
Fasten off. Weave in ends. Set aside.
Front Panel
Work exactly as Back Panel through the end of armhole shaping rows, ending after completing the same number of armhole rows. Do not fasten off.
Front Neckline Shaping
The front neckline creates a shallow V opening just wide enough for the hood to attach cleanly. The opening is 4 (4, 4, 4) mesh squares wide at the top.
Left Shoulder (when garment is worn):
Row 1 of neckline: Ch 5, work in mesh pattern across first 4 (5, 6, 7) mesh squares only. Turn.
After Row 1 of neckline: 4 (5, 6, 7) mesh squares.
Row 2 of neckline: Work even across. Turn. 4 (5, 6, 7) mesh squares.
Fasten off.
Right Shoulder (when garment is worn):
Rejoin yarn at the 5th (6th, 7th, 8th) mesh square from the right edge of the front panel.
Row 1 of neckline: Ch 5, work in mesh pattern to end. Turn.
After Row 1 of neckline: 4 (5, 6, 7) mesh squares.
Row 2 of neckline: Work even across. Turn. 4 (5, 6, 7) mesh squares.
Fasten off.
Center neck opening is 4 (4, 4, 4) mesh squares wide for all sizes.
Assembly: Shoulder and Side Seams
Block both panels before seaming (see Finishing section below).
Align the back and front panels with right sides together. Seam the shoulder sections together on each side using a surface slip stitch seam or whipstitch through the dc posts and ch-2 sp edges. Each shoulder seam spans 4 (5, 6, 7) mesh squares.
After shoulder seams, fold the joined panels so that side edges align. Seam the side edges from the lower edge up to the armhole opening. Leave the armhole unsewn. The side seam spans the full body height of 11 (11.5, 12, 12.5) in / 28 (29, 30.5, 31.5) cm below the armhole.
Turn right side out.
Sleeves (make 2)
With H-8 / 5.0 mm hook, chain 34 (34, 37, 40).
Foundation Row (RS): Dc in 7th ch from hook, (ch 2, sk 2 ch, dc in next ch) across. Turn.
After Foundation Row: 10 (10, 11, 12) mesh squares.
The sleeve is worked from the cuff edge upward to the sleeve cap. Increases are added on each side every 4th row to shape the sleeve taper.
Row 1: Work even. 10 (10, 11, 12) mesh squares.
Row 2: Work even. 10 (10, 11, 12) mesh squares.
Row 3: Work even. 10 (10, 11, 12) mesh squares.
Row 4 (increase row): Ch 5, dc in first ch-2 sp (increase made at beginning of row), work in mesh across to last dc, (ch 2, dc in top of last dc, ch 2, dc in 3rd ch of t-ch) (increase made at end of row). Turn.
After Row 4: 12 (12, 13, 14) mesh squares.
Note on sleeve increases: To increase at the beginning of a mesh row, after the t-ch, place an additional dc into the first ch-2 sp, creating a new mesh square at the edge. To increase at the end of a mesh row, after working the final dc into the 3rd ch of the t-ch from the previous row, add ch 2 and dc into the top of that same t-ch stitch, creating a new mesh square at that edge. Each increase row adds 2 mesh squares total (1 per side).
Continue working 3 rows even followed by 1 increase row until sleeve reaches the following total mesh square counts:
Size S: 18 mesh squares (5 increase rows worked, sleeve = 23 rows total including foundation)
Size M: 20 mesh squares (5 increase rows worked, sleeve = 23 rows total)
Size L: 22 mesh squares (6 increase rows worked, sleeve = 27 rows total)
Size XL: 24 mesh squares (6 increase rows worked, sleeve = 27 rows total)
CHECKPOINT: After all increase rows, the sleeve should measure approximately 18 (18.5, 19, 19.5) in / 45.5 (47, 48.5, 49.5) cm from foundation chain to top edge, and 17 (19, 21, 23) in / 43 (48.5, 53.5, 58.5) cm wide at the top edge (matching the body width). The lower edge should measure approximately 9 (9, 10, 11) in / 23 (23, 25.5, 28) cm wide.
Sleeve Cap Shaping
Row 1 of cap: Sl st across first 3 (3, 3, 3) mesh squares to match armhole shaping, ch 5, work in mesh pattern across until 3 (3, 3, 3) mesh squares remain, turn leaving remaining squares unworked.
After Row 1 of cap: 12 (14, 16, 18) mesh squares.
Rows 2 through 6 of cap: Work even.
Fasten off, leaving a 24-inch / 61 cm tail for seaming.
Setting In the Sleeves
Insert the sleeve cap into the armhole opening with right sides together. The sleeve cap top edge (12 (14, 16, 18) mesh squares) should align with the armhole opening edge (also 12 (14, 16, 18) mesh squares on each panel combined). Pin in place, easing any fullness evenly around the curve.
Seam using the long tail and a yarn needle with a whipstitch through the dc posts and outer edges of the ch-2 spaces. Work all the way around the armhole to close the sleeve into the body. Repeat for second sleeve.
Seam the sleeve underarm: fold each sleeve with right sides together and seam from the cuff edge to the underarm point using a surface slip stitch seam.
Hood
The hood is picked up along the neckline edge and worked flat. The neckline opening spans the full back neck (4 (4, 4, 4) center squares of the back) plus both front shoulders.
With H-8 / 5.0 mm hook and RS facing, join yarn at the right shoulder seam. Work a foundation row of dc and ch-2 spaces along the neckline as follows:
Hood Foundation Row: Starting at right front shoulder edge, work (dc, ch 2) into each dc post and ch-2 sp along the neckline edge, working across right shoulder, across back neck, and across left shoulder. You should end with 20 (20, 20, 20) mesh squares across the hood foundation. Adjust pickup stitches as needed to reach 20 mesh squares evenly. Turn.
Note: 20 mesh squares produces a hood width of approximately 20 in / 51 cm across, which folds to a hood depth of 10 in / 25.5 cm. This is consistent for all sizes.
Rows 1 through 15 of hood: Work even in Square Mesh Stitch. After Row 15, hood height measures approximately 12 in / 30.5 cm.
After Row 15, fold the hood in half with the right side facing inward. The fold aligns the two short side edges together. Seam the top of the hood using a whipstitch or surface slip stitch through both layers of dc posts and ch-2 sp edges. Fasten off.
Turn hood right side out.
Hood Edging and Drawstring Channel
With H-8 / 5.0 mm hook and RS facing, join yarn at the bottom right corner of the hood opening (at the front right neckline).
Row 1: Ch 1, sc evenly along the right front edge of the hood opening, working approximately 1 sc per dc post and 1 sc per ch-2 sp up the right front face of the hood, across the front face of the hood (the face-framing edge), and back down the left front edge of the hood to the bottom left corner. Do not work around the entire hood circumference, only along the front opening. Turn.
Row 2: Ch 1, sc in BLO of each sc across. Turn.
Row 3: Ch 1, sc in BLO of each sc across. Turn.
Fasten off. This 3-row ribbed border frames the hood opening and creates a slight structure.
Drawstring Channel: Using a safety pin or large blunt tapestry needle, thread the cotton cord through the ch-2 spaces along Row 1 of the hood (the foundation row of the hood where it meets the neckline) starting from the right front opening, threading through each ch-2 sp across the front of the hood, and exiting at the left front opening. Pull the cord to even lengths on each side. Knot or knot and trim both ends to prevent fraying.
Hem Band
With G-6 / 4.0 mm hook, join yarn at any side seam along the lower foundation chain edge of the garment.
Round 1: Ch 1, sc evenly around the entire lower hem edge of the garment, working 1 sc into each skipped ch-2 sp base and 1 sc into each dc base from the foundation chain. You should have approximately 68 (76, 84, 92) sc around. Sl st to first sc to join. Do not turn.
Work ribbing flat:
Row 1: Ch 10. Sc in 2nd ch from hook and in each ch across. 9 sc. Sl st into the next sc of the hem edge to anchor. Turn.
Row 2: Ch 1, sc in BLO across all 9 sc. Turn.
Row 3: Ch 1, sc in BLO across 9 sc. Sl st into next sc of hem edge. Turn.
Rep Rows 2 and 3, working a sl st anchor into the next hem edge sc on every right-side row, until all hem edge sc have been used. Seam the short ends of the ribbing strip together to close the band.
Total ribbing rows: 68 (76, 84, 92) anchor points worked.
The hem band is approximately 1.5 in / 4 cm tall.
Cuffs (make 2)
With G-6 / 4.0 mm hook, chain 7.
Row 1: Sc in 2nd ch from hook and in each ch across. Turn. 6 sc.
Rows 2 through 68 (68, 76, 76): Ch 1, sc in BLO across. Turn. 6 sc.
After last row, the cuff strip measures approximately 13.5 (13.5, 15, 15) in / 34 (34, 38, 38) cm long.
Seam the short ends of the cuff strip together using a sl st seam to form a tube.
Attach cuff to sleeve lower edge: With RS of cuff facing the RS of sleeve edge, pin the cuff seam to the sleeve underarm seam. Whipstitch the cuff to the lower edge of the sleeve, distributing the mesh edge evenly around the cuff. The ribbing should extend below the sleeve edge.
Size Customization Tips
To make the garment shorter or longer: Add or remove rows from the body section (before armhole shaping). Each 4 rows adds or removes approximately 3.2 in / 8 cm of length.
To adjust bust width: The mesh repeat is a multiple of 3 chains. Add or remove 3 chains from the foundation chain to adjust width by approximately 1 mesh square (approximately 1 in / 2.5 cm). Adjust both front and back panels by the same amount to keep the garment balanced.
To adjust sleeve length: Add or remove increase repeat cycles (4-row sets) from the sleeve. Each full increase cycle adds approximately 3.2 in / 8 cm.
To adjust hood height: Add or remove rows from the hood section. Each 2 rows adds or removes approximately 1.6 in / 4 cm.
If you adjust the finished bust measurement significantly, recalculate the number of mesh squares in the sleeve cap to match the armhole opening.
Finishing and Blocking Your Mesh Hoodie
1. Weave in all ends securely on the wrong side, drawing ends through at least 5 or 6 stitches to prevent the open mesh from pulling loose.
2. Wet blocking is strongly recommended. Soak the finished garment in cool water with a small amount of wool wash or gentle soap for 20 minutes. Gently squeeze out excess water (do not wring). Lay flat on blocking mats and pin to the finished measurements listed under Finished Size. Allow to dry completely before wearing or storing. Cotton will relax and even out significantly after blocking, and the mesh squares will open up to their full, clean shape.
3. Steam blocking is an alternative: pin the pieces dry to measurements and hold a steam iron 1 to 2 inches / 2.5 to 5 cm above the surface. Do not press down onto the fabric. Allow to cool fully before unpinning.
Care Instructions
Machine wash cold on the gentle cycle in a mesh laundry bag. Do not use bleach or fabric softener. Lay flat to dry. Do not tumble dry, as heat may cause cotton yarn to shrink and distort the mesh structure. Do not hang dry, as the mesh will stretch under its own weight when wet. Store folded.
Final Thoughts on This Crochet Hoodie Tutorial
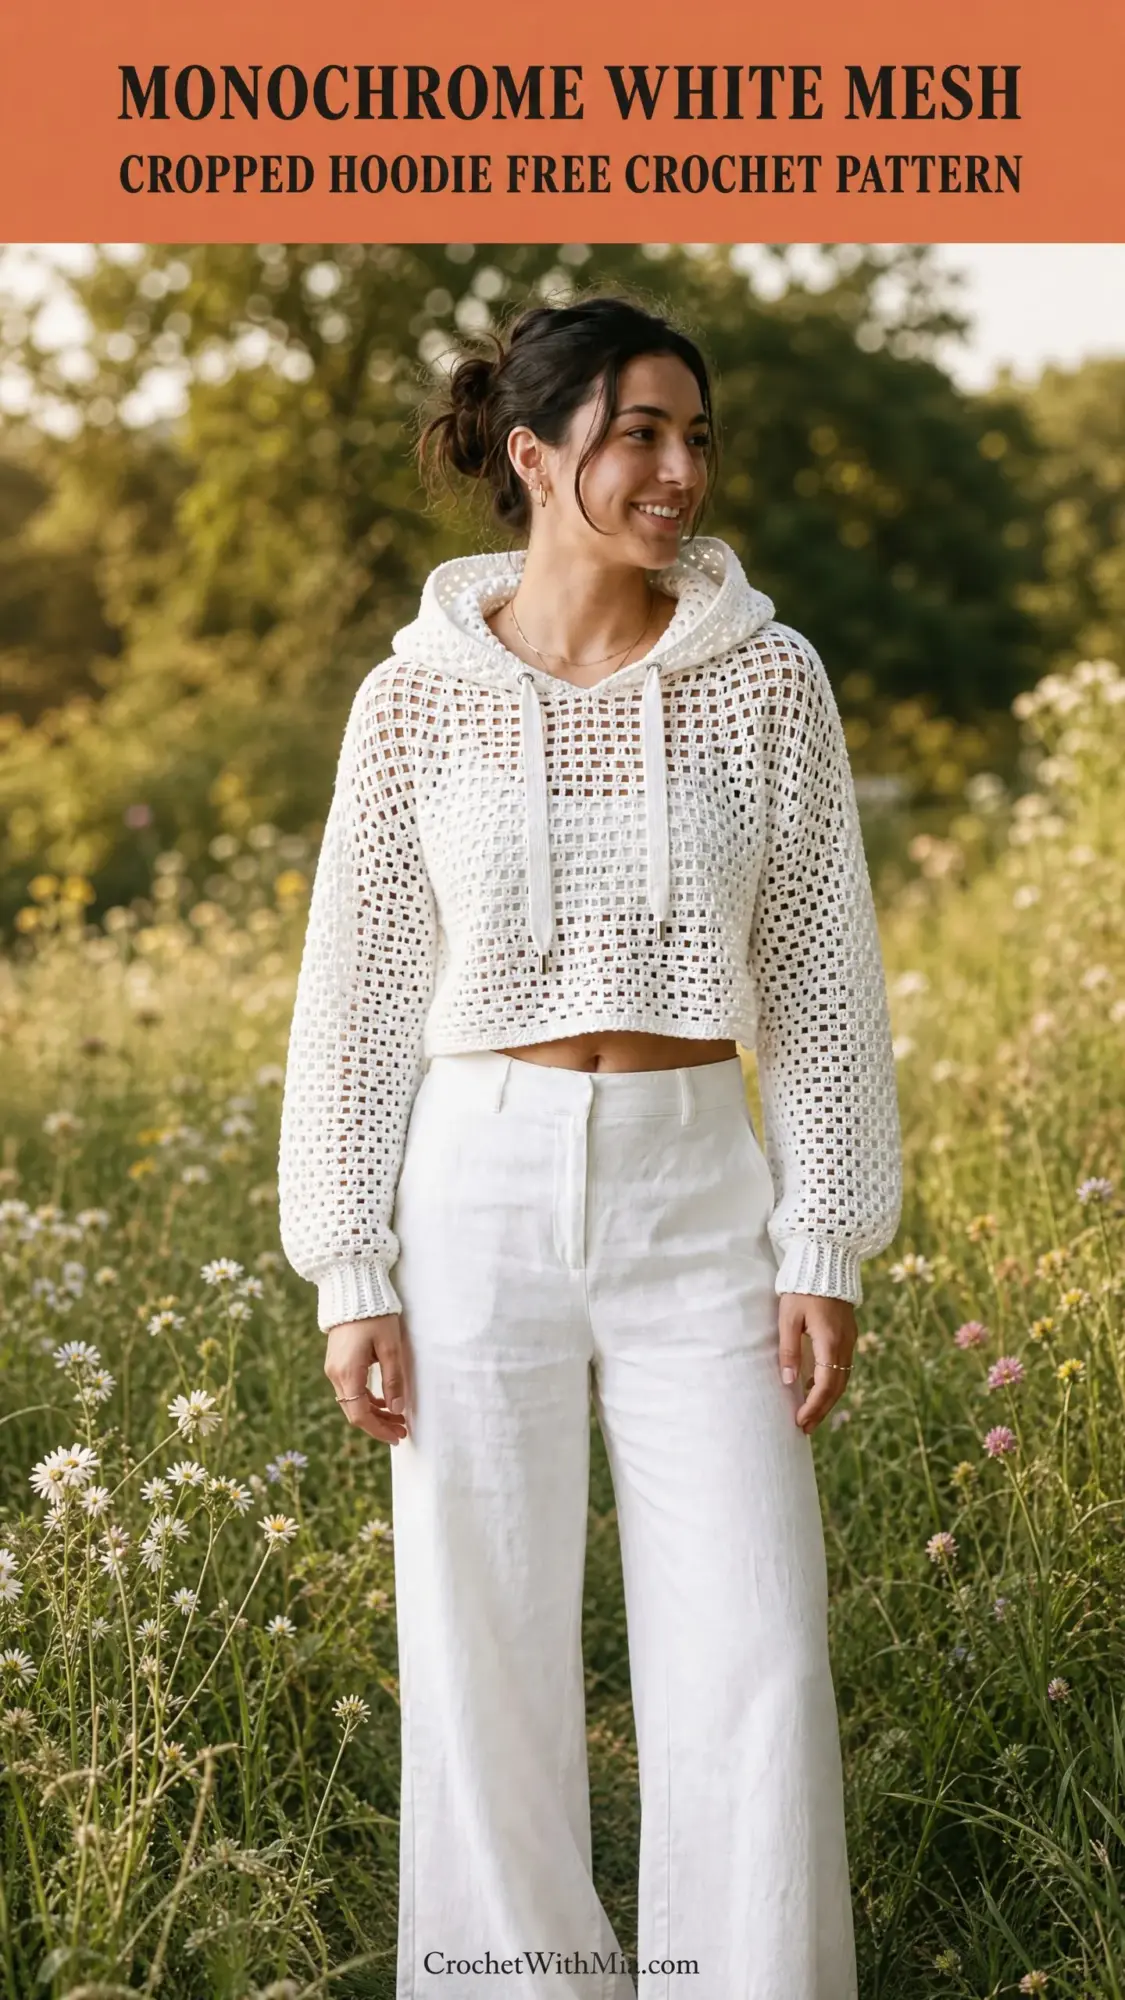
This mesh cropped hoodie has become one of my absolute favorite makes. There is something about the way the light passes through the open squares, the satisfying weight of cotton yarn in your hands, and the moment you finally try it on and realize it actually fits. That feeling never gets old.
Take your time with the seaming sections. They are not difficult, but rushing through them can lead to puckered seams or uneven edges. Pin everything first. Step back and look at the alignment before you start stitching. Your future self will thank you.
Thank you so much for choosing this pattern. It means the world to me that you would spend your precious crafting time on something I designed. I would absolutely love to see your finished hoodie. Tag me on Instagram or share it in our Facebook group so I can cheer you on.
If you loved this pattern, go ahead and save it to your Pinterest boards so you can find it again later. And please drop a comment below if you make this hoodie. I read every single one and it honestly makes my day to hear how your projects turn out.