
Looking for the perfect handmade beach outfit for your little one this summer? This adorable two-piece set combines a flirty coral ruffle top with sandy tan shorts decorated in crocheted seashells and starfish. The whole project uses basic stitches you probably already know, with just enough detail work to keep things interesting.
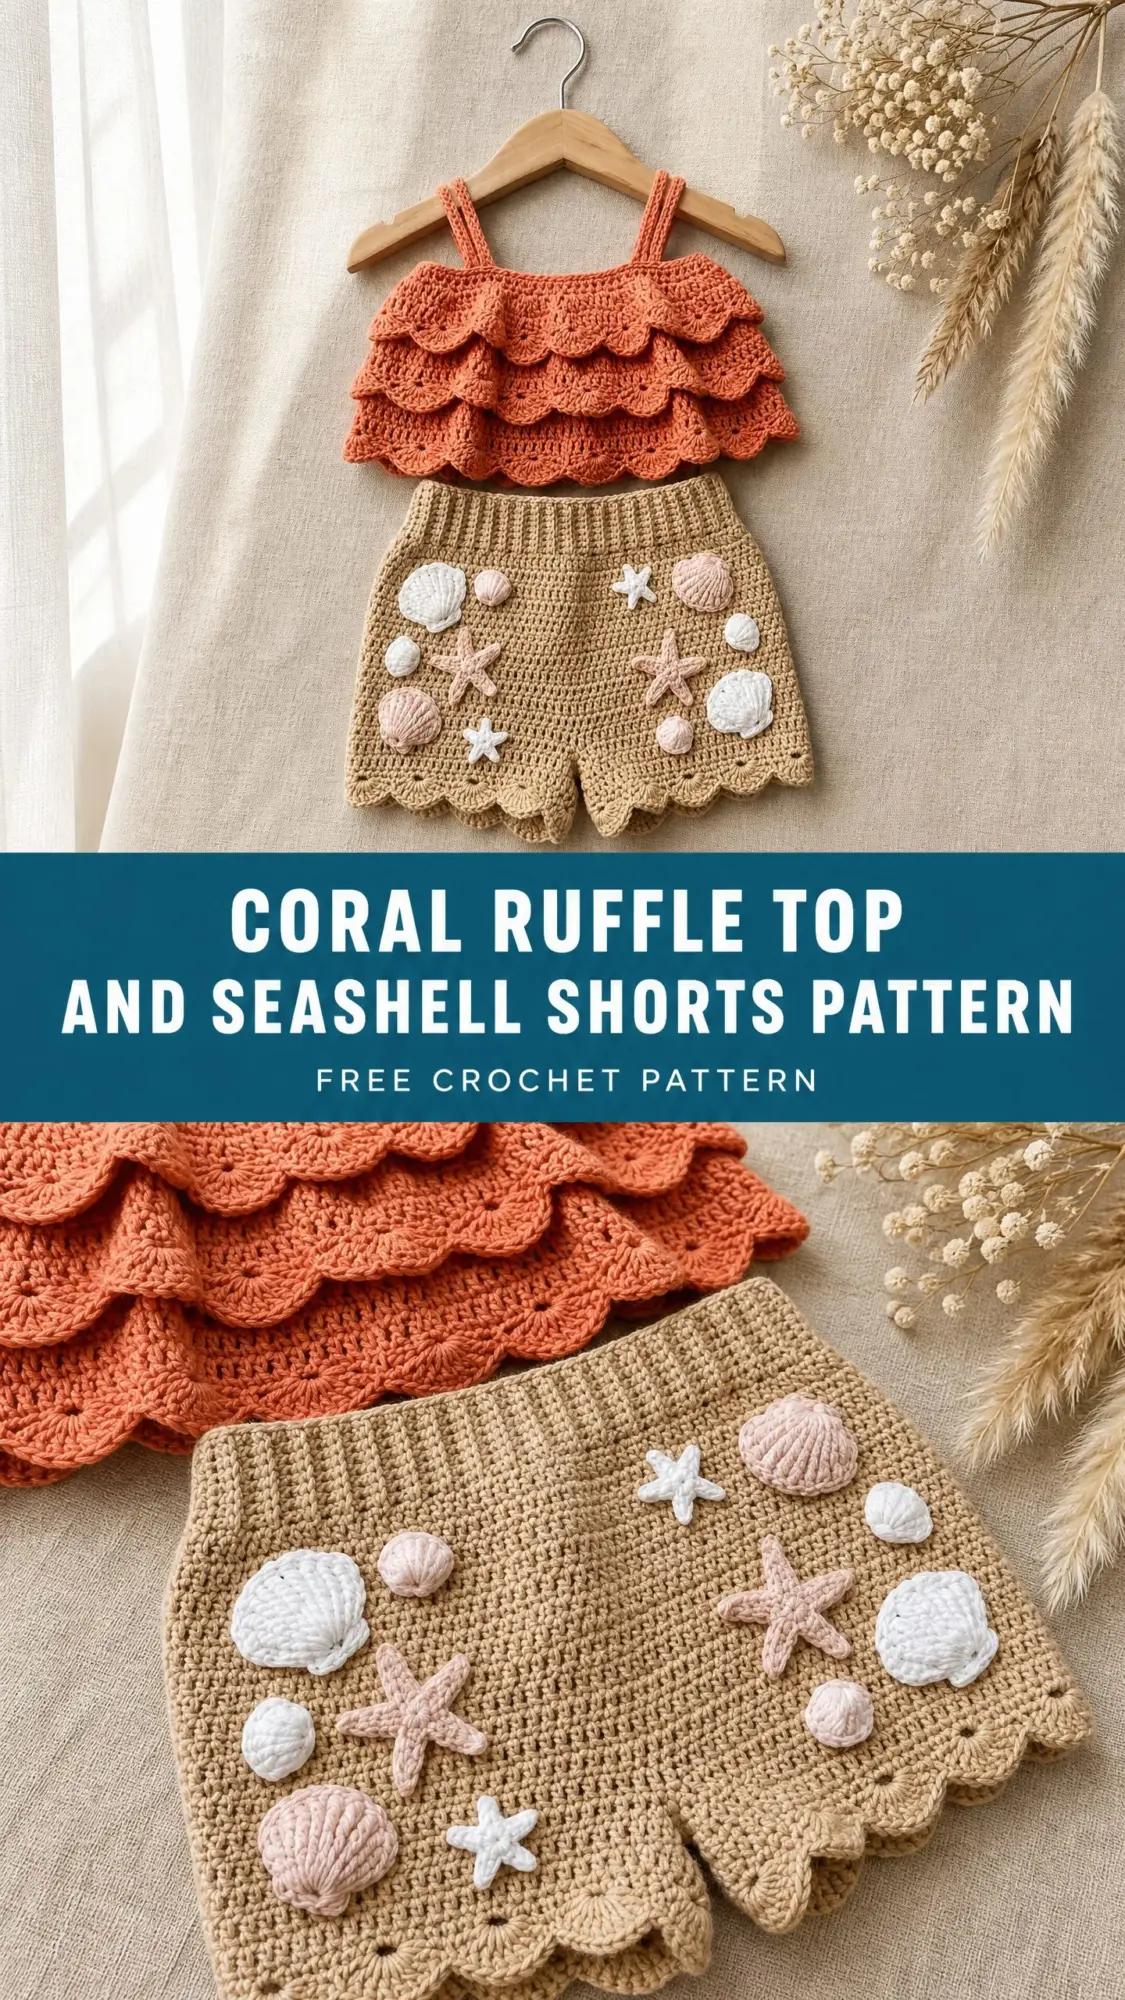
This crochet pattern is sized for toddlers around 2 to 3 years old. It works up in DK weight yarn and takes roughly 12 to 18 hours total. The finished set makes an unforgettable gift for baby showers, birthdays, or your own kiddo’s summer wardrobe.
I love how the tiered ruffles cascade down the top like gentle waves, while those little seashell appliques transform simple shorts into something truly special. Let me walk you through everything you need to bring this beachy creation to life.
What Makes This Crochet Pattern Special
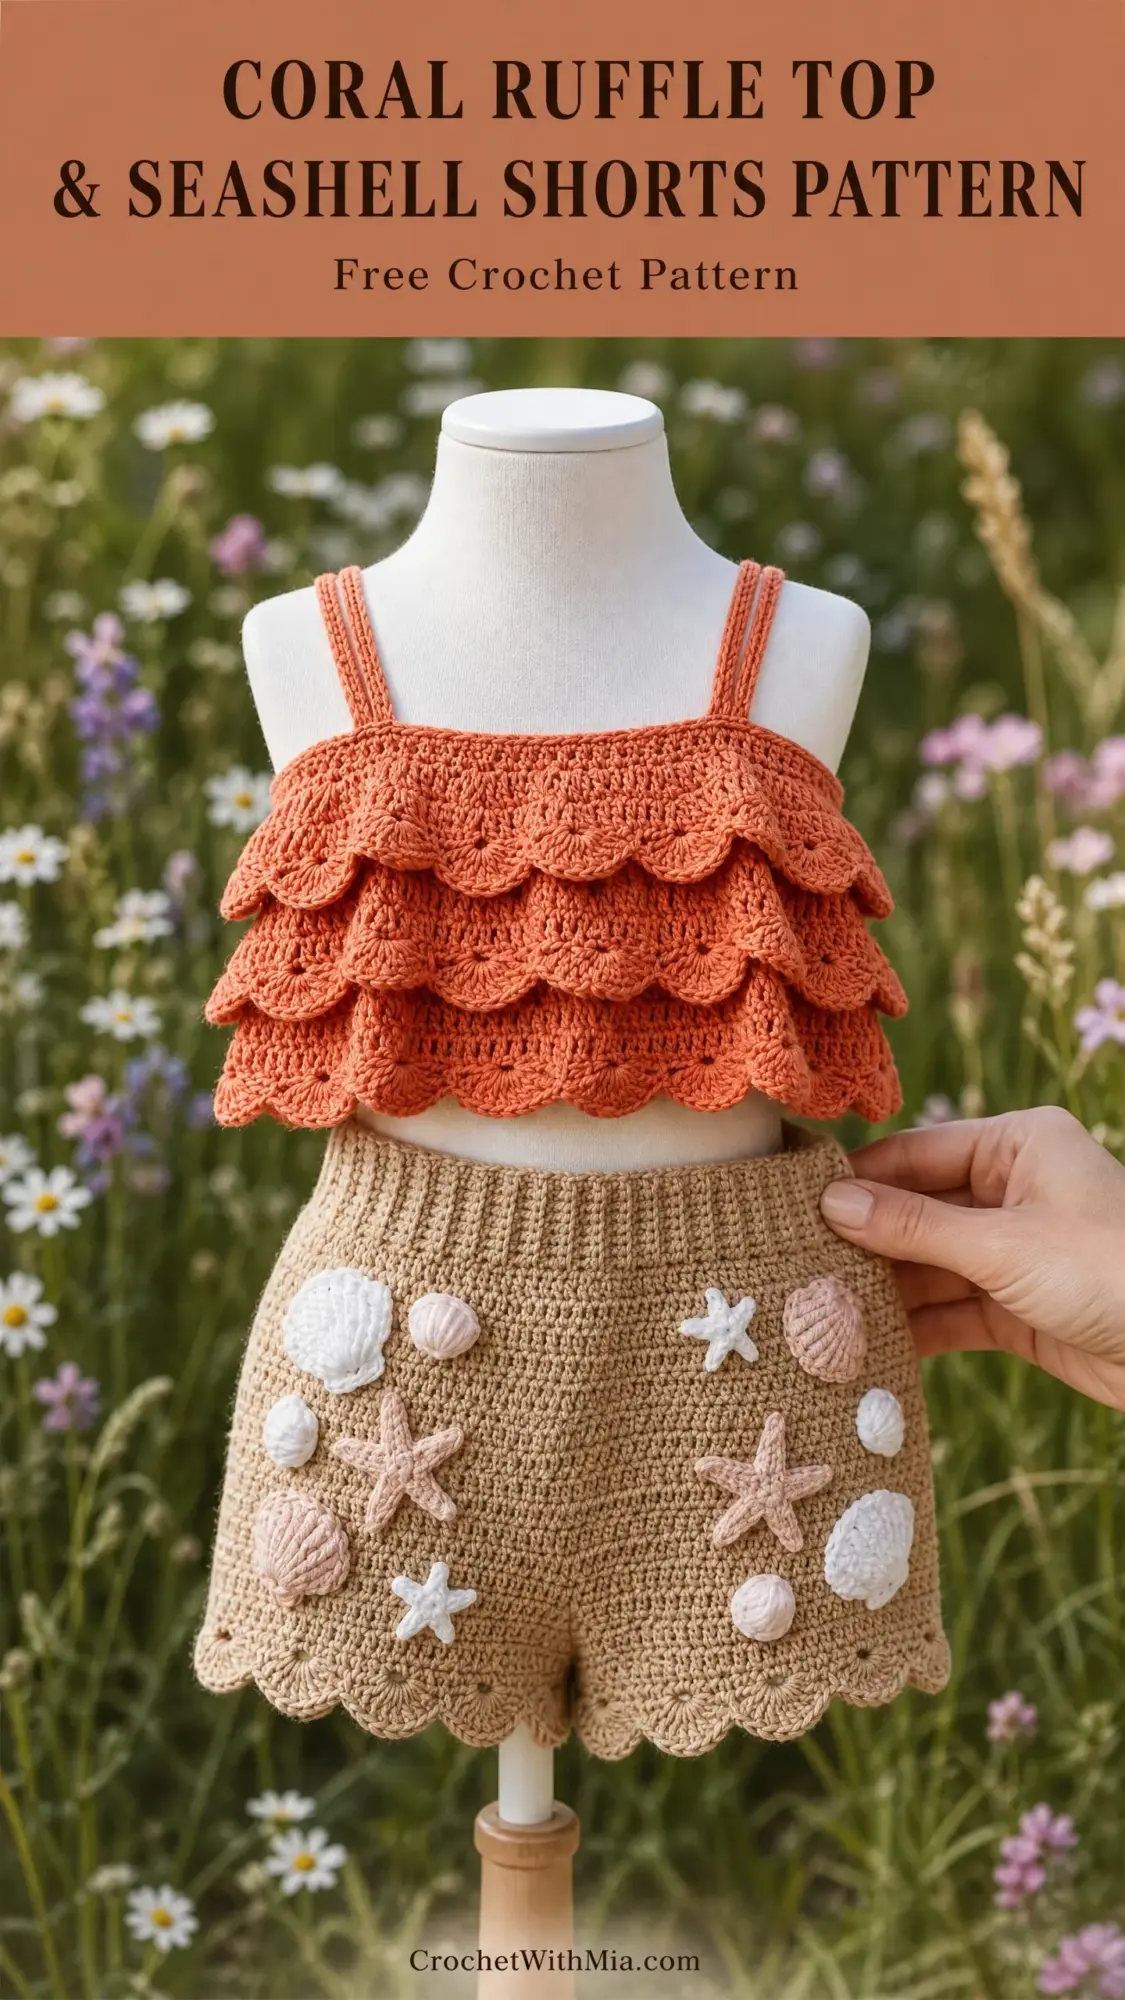
This coordinating set features two distinct pieces that complement each other beautifully. The coral ruffle camisole top has three cascading tiers with scalloped edges and thin spaghetti straps. The high-waisted shorts feature a stretchy ribbed waistband, a simple single crochet body, and dimensional seashell and starfish appliques scattered across the front.
Both pieces are worked primarily top-down or from the waist out. The construction is straightforward once you understand the technique. You will work the top body as a tube, then pick up stitches in the front loops to create those gorgeous layered ruffles. The shorts start with sideways ribbing for the waistband, then continue in joined rounds down to the legs.
Skill Level
This pattern is rated intermediate. You should be comfortable working in the round, joining rounds, creating shell stitches and fan stitches, crocheting ribbing, and doing simple garment shaping. The 3D appliques add a fun decorative challenge. If you have completed basic garment projects before, you can absolutely handle this one.
Do not let the word intermediate scare you. I will explain every special stitch and technique as we go.
Finished Measurements
Top (Size 2T to 3T):
Shorts (Size 2T to 3T):
Materials You Will Need
Yarn
For the Coral Top: approximately 250 yards or 229 meters of DK weight yarn (CYCA 3 Light) in coral or terra-cotta
For the Tan Shorts: approximately 300 yards or 274 meters of DK weight yarn (CYCA 3 Light) in sandy tan or camel
For Appliques: small amounts of white, blush pink, and light coral DK weight yarn for seashells and starfish
Recommended Yarn Options
Paintbox Yarns Simply DK works wonderfully for this project. It is 100% acrylic, machine washable, and gives clean stitch definition perfect for those ruffle details.
Drops Safran is another excellent choice if you prefer cotton. This 100% Egyptian cotton gives the set a natural, breathable quality ideal for summer wear.
Lion Brand 24/7 Cotton photographs beautifully and holds its structure well. The mercerized cotton creates excellent stitch definition.
Avoid fuzzy or textured yarns. They will obscure the shell stitch detail on the ruffle tiers.
Hooks
Notions
Gauge
Getting gauge right is critical for garment fit. Please swatch before beginning.
For the Top (shell stitch pattern):
One shell repeat (5 dc into same stitch) equals approximately 1 inch or 2.5 cm wide. Six rows in shell stitch pattern equals approximately 2.5 inches or 6.4 cm tall.
For the Shorts (single crochet):
18 single crochet stitches equal 4 inches or 10 cm. Twenty rows equal 4 inches or 10 cm.
If your swatch is larger than specified, go down a hook size. If smaller, go up a hook size.
Abbreviations and Stitch Definitions
Let me explain every abbreviation you will encounter in this pattern.
ch = chain: wrap yarn over hook and pull through the loop on your hook
sl st = slip stitch: insert hook, yarn over, pull through both the stitch and the loop on your hook in one motion
sc = single crochet: insert hook, yarn over and pull up a loop (2 loops on hook), yarn over and pull through both loops
hdc = half double crochet: yarn over, insert hook, yarn over and pull up a loop (3 loops on hook), yarn over and pull through all 3 loops
dc = double crochet: yarn over, insert hook, yarn over and pull up a loop (3 loops on hook), yarn over and pull through 2 loops, yarn over and pull through remaining 2 loops
tr = treble crochet: yarn over twice, insert hook, yarn over and pull up a loop, [yarn over and pull through 2 loops] 3 times
sk = skip: pass over the indicated stitch without working into it
st/sts = stitch/stitches
sp = space
ch-sp = chain space: the gap created by a chain in the previous row
rep = repeat
blo = back loop only: work into only the back loop of the stitch
flo = front loop only: work into only the front loop of the stitch
RS/WS = right side/wrong side
pm = place marker
MR = magic ring: an adjustable starting loop for working in the round
inc = increase: work 2 sc in the same stitch
tog = together
sc2tog = single crochet 2 together: a decrease where you work 2 stitches together as one
dc2tog = double crochet 2 together: a decrease in double crochet
rnd = round
t-ch = turning chain
Numbers in brackets [ ] mean work those instructions the number of times indicated. Numbers in parentheses ( ) at the end of a row indicate your total stitch count.
Special Stitches
Shell Stitch
Work 5 double crochet stitches all into the same stitch or space. This creates a beautiful fan-shaped shell. When working shells in the next row, place your shell into the center (third) dc of the shell below.
Scallop Edge
Work as follows: sc in first st, skip 2 sts, 5 dc in next st, skip 2 sts. Repeat across. This creates the curved scalloped border at the hem of each ruffle tier and at the shorts hem.
Picot
Chain 3, slip stitch in first chain made. This creates a small decorative loop, used optionally at scallop edge tips.
Ribbing for Shorts Waistband
Foundation: ch 9, sc in 2nd ch from hook and in each ch across. (8 sc)
Row 1: ch 1, turn, sc in blo of each sc across. (8 sc)
Repeat Row 1 for the length of ribbing. Work lengthwise, then seam to form a tube.
3D Seashell Applique
This creates those adorable dimensional seashells for the shorts.
Step 1: MR, ch 3 (counts as first dc), work 11 dc into MR, sl st to top of ch-3 to join. Pull ring closed. (12 dc)
Step 2: Ch 1, turn. Working back and forth across the top half of the circle only: sc across 6 sts, ch 1, turn. (6 sc)
Step 3: [sc2tog, sc in next 2 sts] rep across. (4 sc)
Step 4: Sc2tog twice. (2 sc)
Step 5: Sc2tog. (1 sc) Fasten off, leave long tail for sewing.
Fold the circular base so the pointed tip faces upward. Pinch the base slightly to create a shell shape. Sew the base edges together lightly with a tapestry needle to hold shape.
3D Starfish Applique
Step 1: MR, ch 1, work 5 sc into ring, sl st to join. Pull ring closed. (5 sc)
Step 2: Ch 1, [sc in next st, ch 8, sc in 2nd ch from hook, sc in next 6 ch, sl st back to base sc] rep 5 times, sl st to join. (5 arms made)
Step 3: Fasten off, leave long tail for sewing. Flatten and arrange arms evenly before sewing to shorts.
Pattern Notes Before You Begin
1. The top body is worked in the round as a tube. The ruffle tiers are added afterward by picking up stitches in the front loops of specific rows.
2. The shorts are worked in joined rounds from the waistband down, then split into two legs.
3. All rounds are joined with a slip stitch unless noted otherwise.
4. Chain-3 at the beginning of a dc round counts as the first dc throughout.
5. Mark Rnds 4, 7, and 10 of the top body. These are your ruffle pickup rows.
6. Sew appliques after blocking is complete.
7. Read each section fully before beginning.
Coral Ruffle Top Instructions
Section 1: Top Body
The top body is worked as a tube from the bottom up.
Foundation Ring: With coral yarn and E-4 hook, ch 88, sl st to first ch to form ring, being careful not to twist. (88 ch)
Rnd 1: Ch 3 (counts as dc), dc in each ch around, sl st to top of ch-3 to join. (88 dc)
Rnd 2: Ch 1, sc in each dc around, sl st to first sc to join. (88 sc)
Rnd 3: Ch 1, sc in each sc around, sl st to first sc to join. (88 sc)
Rnd 4: Ch 3, dc in each sc around, sl st to top of ch-3 to join. (88 dc)
Rnds 5 and 6: Repeat Rnds 2 and 3. (88 sc each rnd)
Rnd 7: Ch 3, dc in each sc around, sl st to top of ch-3 to join. (88 dc)
Rnds 8 and 9: Repeat Rnds 2 and 3. (88 sc each rnd)
Rnd 10: Ch 3, dc in each sc around, sl st to top of ch-3 to join. (88 dc)
Rnd 11: Ch 1, sc in each dc around, sl st to first sc to join. (88 sc)
Rnd 12: Ch 1, sc in each sc around, sl st to first sc to join. (88 sc)
Place markers at Rnds 4, 7, and 10. These are your ruffle pickup rows.
Checkpoint: After completing Rnds 1 through 12, the tube should measure approximately 5.5 inches or 14 cm tall. The circumference should measure approximately 20 inches or 51 cm.
Section 2: Underarm Shaping and Bust Band
Rnd 13: Ch 1, sc in first 22 sts, ch 2 (underarm gap right), sk 2 sts, sc in next 42 sts, ch 2 (underarm gap left), sk 2 sts, sc in last 20 sts, sl st to first sc to join. (84 sc plus 2 ch-2 spaces)
Rnd 14: Ch 1, sc in each sc and 2 sc in each ch-2 sp around, sl st to first sc to join. (88 sc)
Rnd 15: Ch 1, sc in each sc around, sl st to first sc to join. (88 sc)
Rnd 16: Ch 1, sc in first 22 sts, sc2tog, sc in next 40 sts, sc2tog, sc in last 22 sts, sl st to first sc to join. (86 sc)
Rnd 17: Ch 1, sc in each sc around, sl st to first sc to join. (86 sc)
Rnd 18: Ch 1, sc in first 21 sts, sc2tog, sc in next 40 sts, sc2tog, sc in last 21 sts, sl st to first sc to join. (84 sc)
Rnd 19: Ch 1, sc in each sc around, sl st to first sc to join. (84 sc)
Rnd 20: Ch 1, sc in first 20 sts, sc2tog, sc in next 40 sts, sc2tog, sc in last 20 sts, sl st to first sc to join. (82 sc)
Rnd 21: Ch 1, sc in each sc around, sl st to first sc to join. (82 sc)
Checkpoint: After Rnd 21, the top body should measure approximately 8 inches or 20 cm from bottom hem to top edge. The top opening should measure approximately 18 inches or 46 cm in circumference. Fasten off and weave in ends.
Section 3: Ruffle Tiers
Each ruffle tier is worked by joining yarn in the front loop only of a designated dc row, then working into every front loop around.
Ruffle Tier 1 (Pick Up at Rnd 10)
Join coral yarn in any front loop of Rnd 10. The front loops contain 88 sts.
Ruffle Rnd 1A: Ch 3, work 2 dc in same flo, [sk 1 flo, 3 dc in next flo] rep around until all 44 groups of 3 dc are made, sl st to top of ch-3 to join. (132 dc)
Ruffle Rnd 2A: Ch 1, turn. Working in WS, sc in each dc around, sl st to first sc to join. (132 sc)
Ruffle Rnd 3A: Ch 3, 2 dc in same st, [sk 2 sts, 3 dc in next st] rep across, sl st to top of ch-3 to join. (132 dc)
Ruffle Rnd 4A (Scallop Hem): Ch 1, [sc in first dc of 3-dc group, 5 dc in center dc of next 3-dc group, sc in first dc of following 3-dc group] rep around, adjusting as needed to end evenly, sl st to first sc to join. (22 scallop points)
Fasten off, weave in ends.
Ruffle Tier 2 (Pick Up at Rnd 7)
Join coral yarn in any front loop of Rnd 7.
Ruffle Rnd 1B: Ch 3, work 2 dc in same flo, [sk 1 flo, 3 dc in next flo] rep around, sl st to top of ch-3 to join. (132 dc)
Ruffle Rnd 2B: Ch 1, turn. Sc in each dc around, sl st to first sc to join. (132 sc)
Ruffle Rnd 3B: Ch 3, 2 dc in same st, [sk 2 sts, 3 dc in next st] rep, sl st to top of ch-3 to join. (132 dc)
Ruffle Rnd 4B: Ch 1, turn. Sc in each dc around, sl st to first sc to join. (132 sc)
Ruffle Rnd 5B: Ch 3, 2 dc in same st, [sk 2 sts, 3 dc in next st] rep, sl st to top of ch-3 to join. (132 dc)
Ruffle Rnd 6B (Scallop Hem): Ch 1, [sc in first dc of group, 5 dc in center dc of next group, sc in first dc of following group] rep around, sl st to first sc to join. (22 scallop points)
Fasten off, weave in ends.
Ruffle Tier 3 (Pick Up at Rnd 4)
Join coral yarn in any front loop of Rnd 4.
Ruffle Rnd 1C: Ch 3, work 2 dc in same flo, [sk 1 flo, 3 dc in next flo] rep around, sl st to top of ch-3 to join. (132 dc)
Ruffle Rnd 2C: Ch 1, turn. Sc in each dc around, sl st to first sc to join. (132 sc)
Ruffle Rnd 3C: Ch 3, 2 dc in same st, [sk 2 sts, 3 dc in next st] rep, sl st to top of ch-3 to join. (132 dc)
Ruffle Rnd 4C: Ch 1, turn. Sc in each dc around, sl st to first sc to join. (132 sc)
Ruffle Rnd 5C: Ch 3, 2 dc in same st, [sk 2 sts, 3 dc in next st] rep, sl st to top of ch-3 to join. (132 dc)
Ruffle Rnd 6C: Ch 1, turn. Sc in each dc around, sl st to first sc to join. (132 sc)
Ruffle Rnd 7C: Ch 3, 2 dc in same st, [sk 2 sts, 3 dc in next st] rep, sl st to top of ch-3 to join. (132 dc)
Ruffle Rnd 8C (Scallop Hem): Ch 1, [sc in first dc of group, 5 dc in center dc of next group, sc in first dc of following group] rep around, sl st to first sc to join. (22 scallop points)
Fasten off, weave in ends.
Note: Tier 1 is shortest, Tier 2 is medium, and Tier 3 is longest. This creates the beautiful cascading layered look.
Section 4: Spaghetti Straps (Make 2)
With coral yarn, ch 52 (approximately 8.5 inches or 21.5 cm).
Row 1: Sl st in 2nd ch from hook and in each ch across. (51 sl st)
Fasten off, leaving a 10-inch or 25 cm tail at each end for sewing.
Strap placement: Fold the top body flat with side seams aligned. Mark front top edge at 6 sts from center left and 6 sts from center right. This creates approximately a 2.5-inch or 6 cm gap between straps at the front. Mark back top edge similarly. Sew one end of each strap to the front and the other end to the corresponding back position.
Section 5: Top Finishing
Weave in all ends. Sew straps securely at all four attachment points using whip stitch through multiple stitches for strength. Block according to yarn care instructions.
Tan Seashell Shorts Instructions
Section 1: Waistband
With tan yarn and D-3 hook (or E-4 for looser ribbing), ch 10.
Row 1: Sc in 2nd ch from hook and in each ch across. (9 sc)
Row 2: Ch 1, turn. Sc in blo of each sc across. (9 sc)
Repeat Row 2 until the ribbing strip measures approximately 17 inches or 43 cm long (approximately 76 rows).
Joining: Fold the ribbing strip in half and sl st the last row to the foundation chain to form a ring. Do not fasten off.
Waistband pickup: Sc evenly around the bottom edge of the waistband ring, working 1 sc into each row end, sl st to first sc to join. (76 sc)
Checkpoint: The waistband ring should measure approximately 17 inches or 43 cm unstretched and approximately 1.75 inches or 4.5 cm tall.
Section 2: Shorts Body
Continue with E-4 hook.
Rnd 1: Ch 1, sc in each sc around, sl st to first sc to join. (76 sc)
Rnd 2: Ch 1, [sc in next 18 sts, 2 sc in next st] 4 times, sl st to first sc to join. (80 sc)
Rnd 3: Ch 1, sc in each sc around, sl st to first sc to join. (80 sc)
Rnd 4: Ch 1, [sc in next 19 sts, 2 sc in next st] 4 times, sl st to first sc to join. (84 sc)
Rnd 5: Ch 1, sc in each sc around, sl st to first sc to join. (84 sc)
Rnd 6: Ch 1, [sc in next 20 sts, 2 sc in next st] 4 times, sl st to first sc to join. (88 sc)
Rnd 7: Ch 1, sc in each sc around, sl st to first sc to join. (88 sc)
Rnd 8: Ch 1, [sc in next 21 sts, 2 sc in next st] 4 times, sl st to first sc to join. (92 sc)
Rnd 9: Ch 1, sc in each sc around, sl st to first sc to join. (92 sc)
Rnd 10: Ch 1, sc in each sc around, sl st to first sc to join. (92 sc)
Checkpoint: After Rnd 10, the shorts body should measure approximately 3.5 inches or 9 cm from waistband. Circumference should measure approximately 20.5 inches or 52 cm.
Section 3: Crotch Shaping and Legs
Mark st 1 (center front) and st 47 (center back). Front half is sts 1 to 46, back half is sts 47 to 92.
Rnd 11: Sc in first 46 sts (front panel), ch 4 (crotch bridge front), sk to st 47, sc in sts 47 through 92 (back panel), ch 4 (crotch bridge back), sl st to first sc to join.
Fasten off. Work each leg separately.
Leg 1
Join tan yarn at center front of left leg opening. The leg opening has approximately 54 sts around (23 sc from front, 4 ch, 23 sc from back, 4 ch).
Leg Rnd 1: Ch 1, sc in each sc and 2 sc in each ch-sp around leg opening, sl st to first sc to join. (54 sc)
Leg Rnd 2: Ch 1, sc in each sc around, sl st to first sc to join. (54 sc)
Leg Rnd 3: Ch 1, sc in each sc around, sl st to first sc to join. (54 sc)
Leg Rnd 4: Ch 1, sc2tog, sc in next 25 sts, sc2tog, sc in last 25 sts, sl st to first sc to join. (52 sc)
Leg Rnd 5: Ch 1, sc in each sc around, sl st to first sc to join. (52 sc)
Leg Rnd 6: Ch 1, sc2tog, sc in next 24 sts, sc2tog, sc in last 24 sts, sl st to first sc to join. (50 sc)
Revised Leg Rnd 7: Ch 1, sc2tog, sc in next 22 sts, sc2tog, sc in last 22 sts, sl st to first sc to join. (48 sc)
Leg Rnd 8 (Scallop Hem): Ch 1, [sc in next st, sk 2 sts, 5 dc in next st, sk 2 sts] 8 times, sl st to first sc to join. (8 scallop points)
Fasten off, weave in ends.
Leg 2
Repeat Leg 1 instructions for the right leg opening.
Checkpoint: Each completed leg should measure approximately 3.5 inches or 9 cm from crotch to hem. Full shorts measure approximately 7 inches or 18 cm from waistband to hem.
Section 4: Appliques
Make the following using the special stitch instructions above:
Large seashells (approximately 1.25 inches): Make 4 in white and 2 in blush pink.
Medium seashells (approximately 0.75 inches): Make 4 in white. Work through Step 3 only, stopping before the final decrease rows.
Starfish (approximately 1.25 inches arm span): Make 2 in white and 2 in light peach or blush.
Placement: Arrange 5 to 7 appliques across the front of each leg, concentrating them in the lower half of the shorts body. Leave the back and waistband plain. Pin before sewing to confirm arrangement.
Sew each applique using small whip stitches around the base. Pull thread to WS and secure with a knot.
Section 5: Optional Elastic
Cut approximately 18 inches or 46 cm of thin elastic. Thread through the waistband ribbing using a safety pin. Overlap ends by 0.5 inch and sew securely. The ribbing naturally holds shape without elastic for most yarns, but elastic adds security for active little ones.
Size Customization Tips
To size up to 3T to 4T: Increase the top starting chain from 88 to 96 (maintaining divisibility by 6). Add 2 additional rows before underarm shaping. Increase waistband length to 18.5 inches or 47 cm.
To size down to 12 to 18 months: Decrease the top starting chain to 72. Decrease waistband length to 15 inches or 38 cm. Start shaping decreases 2 rounds earlier.
General rule: The top body starting chain must be divisible by 6 for the ruffle repeat math to work correctly.
Finishing and Care
Block both pieces according to your yarn’s care instructions. Cotton yarns benefit from wet blocking. Acrylic yarns may be steam blocked gently. Once blocked, sew on all appliques securely. Try the straps on a dress form or the child to confirm length before finishing.
This sweet beach set is machine washable if you used acrylic yarn. For cotton, hand washing or a gentle cycle works best. Lay flat to dry to maintain the ruffle shape.
Thank you so much for choosing this pattern for your summer crochet project. I truly hope you enjoy making this adorable set as much as I enjoyed designing it. There is something wonderful about creating handmade clothes for the little ones in our lives.
If you make this coral ruffle top and seashell shorts set, I would absolutely love to see your finished creation. Tag me on Instagram or share in my Facebook group. Seeing your work brings me so much joy.
Go ahead and save this pattern to your Pinterest boards so you can find it when you are ready to start stitching. And please drop a comment below if you make this set or have any questions along the way. Happy crocheting!