
Got a few skeins of DK weight yarn in coordinating colors tucked away in your stash? This is the project to finally use them. The Peach Ombre Baby Hooded Cardigan works up in a seamless top-down construction that might sound intimidating but breaks down into logical, repeatable steps. You will learn raglan shaping, work in the round, and add the sweetest shell stitch edging along every edge.
Fair warning: this is an intermediate pattern. If you have never worked a top-down raglan before, take your time reading through the instructions first. The gradient color changes add visual interest without complicated colorwork, and the hood gets picked up and worked separately so you are never juggling too many pieces at once.
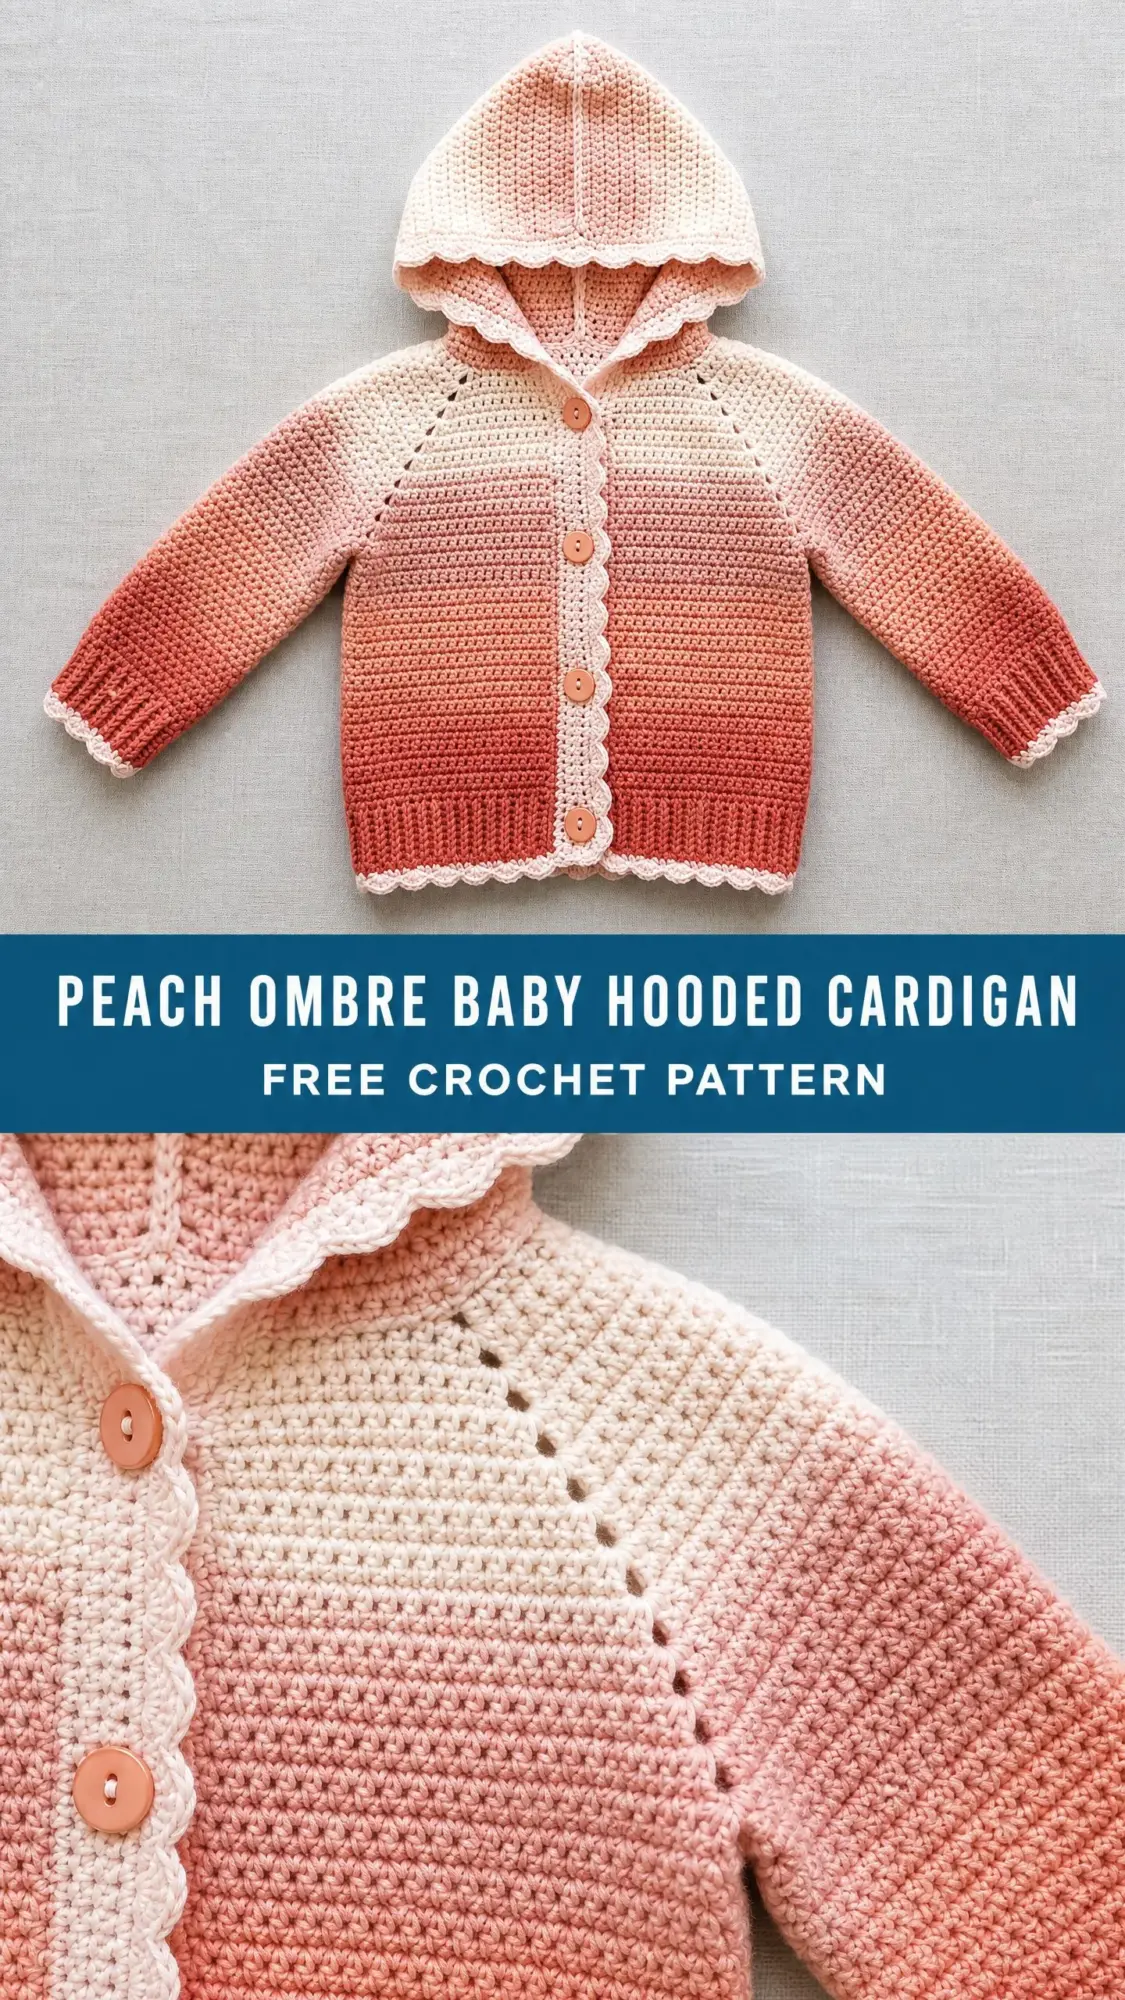
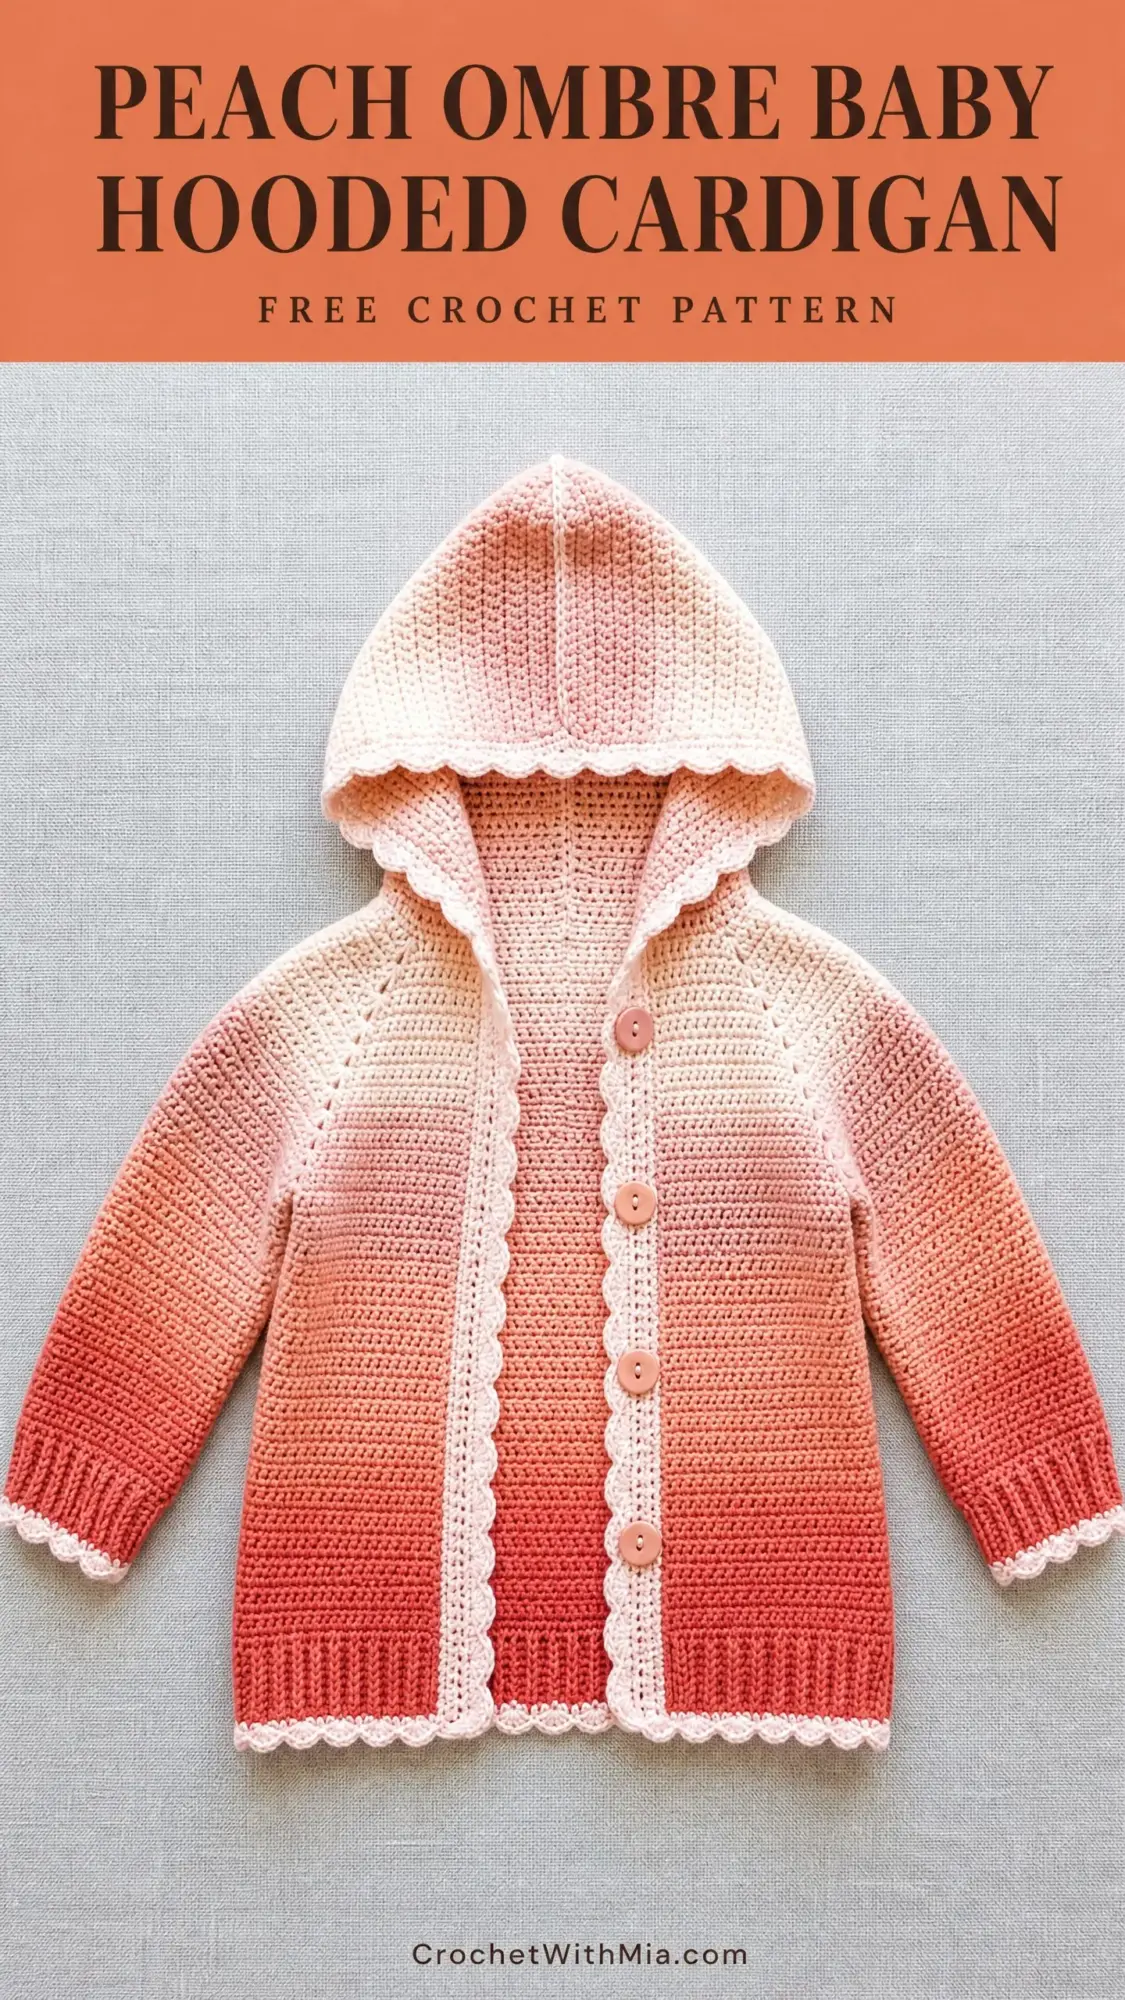
By the end, you will have a cozy little cardigan with a cream-to-coral ombre fade, scalloped trim, and round buttons down the front. Perfect for baby showers, first birthday gifts, or that new arrival you have been meaning to make something special for.
Why This Pattern Works So Well
The seamless construction means minimal sewing. You start at the neckline, work down through the yoke with raglan increases, separate the sleeves, continue the body in the round, then go back and finish each sleeve. The hood gets picked up from the neckline and seamed at the crown. Finally, you add shell stitch edging everywhere for that polished, heirloom look.
The ombre gradient flows naturally because you change colors at strategic points. Color A (cream or light blush) covers the entire yoke. Color B (soft peach) begins at the underarm separation. Color C (mid peach or coral) picks up at mid-body. Color D (deep coral) finishes the hem and sleeve cuffs. This creates that beautiful sunset fade visible in the finished piece.
Finished Sizes
This pattern covers four sizes:
Newborn: chest 16 inches (41 cm), length 9 inches (23 cm), sleeve 6 inches (15 cm)
3 to 6 months: chest 18 inches (46 cm), length 10 inches (25 cm), sleeve 7 inches (18 cm)
6 to 12 months: chest 20 inches (51 cm), length 11 inches (28 cm), sleeve 7.5 inches (19 cm)
12 to 18 months: chest 22 inches (56 cm), length 12 inches (30.5 cm), sleeve 8 inches (20 cm)
The pattern is written for size 3 to 6 months. Other sizes appear in parentheses in this order: Newborn, 6 to 12 months, 12 to 18 months. When only one number appears, it applies to all sizes.
Materials You Will Need
Yarn: DK weight (CYCA 3), approximately 400 (350, 450, 500) yards total across all four colors
Hook: US size E-4 / 3.5 mm (adjust to meet gauge)
Notions: 4 stitch markers, yarn needle, scissors, 5 round buttons approximately 12 mm diameter (coral or blush pink), sewing needle and thread for buttons
Yarn Suggestions
Paintbox Yarns Simply DK is a smooth 100 percent acrylic that shows the ombre gradient cleanly with excellent stitch definition for the shell edging.
Drops Safran is a cotton and polyester blend that gives a soft matte finish and drapes gently on baby skin. The slight elasticity helps ribbed cuffs hold their shape.
Paintbox Yarns Cotton DK works well for warmer climates. Note that cotton has no stretch, so your gauge swatch is essential.
Choose any DK weight yarn that achieves the stated gauge. For a true gradient, select four distinct shades from the same yarn line to ensure consistent weight and fiber blend.
Gauge
18 single crochet (sc) by 22 rows equals 4 inches (10 cm) in single crochet on US E-4 / 3.5 mm hook, blocked.
To make your gauge swatch: chain 24, work single crochet for 26 rows, block, and measure the center 18 stitches over 22 rows. Gauge is critical for a garment. Adjust your hook size up or down as needed before beginning.
Abbreviations and Stitch Definitions
ch = chain: yarn over, pull through loop on hook
sc = single crochet: insert hook, yarn over, pull up a loop (2 loops on hook), yarn over, pull through both loops
dc = double crochet: yarn over, insert hook, yarn over, pull up a loop (3 loops), yarn over, pull through 2 loops, yarn over, pull through remaining 2 loops
sc2tog = single crochet two together (decrease): insert hook into next stitch, pull up a loop (2 loops on hook), insert hook into following stitch, pull up a loop (3 loops on hook), yarn over and draw through all 3 loops
sl st = slip stitch: insert hook, yarn over, pull through stitch and loop on hook in one motion
pm = place marker
sm = slip marker
st(s) = stitch(es)
RS = right side
WS = wrong side
sp = space
rep = repeat
sk = skip
Special Stitches for the Baby Hooded Cardigan
Shell Stitch (used for edging)
Work 5 double crochet (dc) all into the same stitch or space. This creates a fan-shaped embellishment used along all outer edges.
Shell Edging Row or Round
Step 1: Slip stitch into first stitch.
Step 2: Skip 2 stitches.
Step 3: Work 5 dc into the next stitch (shell made).
Step 4: Skip 2 stitches.
Step 5: Slip stitch into the next stitch.
Step 6: Repeat steps 2 through 5 across or around.
The stitch count of any edge receiving shell edging must be divisible by 6 plus 1 for the slip stitch anchors. Adjustments are noted in the finishing section.
Raglan Increase
At each of the four raglan markers: work 1 sc into the stitch before the marker, chain 1 (raglan seam chain), work 1 sc into the stitch after the marker. This adds 2 sc per raglan point per increase row, adding 8 sc total across all four raglan points per increase row.
Pattern Notes Before You Begin
1. The cardigan is worked flat (back and forth) for the yoke to create the center front opening, then the body is worked in joined rounds. Sleeves are worked in joined rounds.
2. The turning chain (ch 1) at the beginning of each single crochet row does NOT count as a stitch.
3. Color changes follow the gradient sequence. Change yarn on the last yarn over of the last stitch of the previous row so the new color appears at the start of the next row.
4. Place four stitch markers at the raglan points before beginning increases. Move markers up each row.
5. The hood is worked flat, seamed at the crown, and the hood opening receives shell edging.
6. Buttons are sewn to the left front band. Buttonholes are worked into the right front edging during the shell edging row using the natural spacing of the shells.
7. Block the finished garment according to yarn care instructions before sewing on buttons.
Section 1: Yoke (Worked Flat, Color A)
The yoke begins at the neckline with a foundation chain. Work entirely in Color A.
Foundation Chain: Ch 39 (39, 41, 43).
Row 1 (RS): Sc in 2nd ch from hook and in each ch across. Turn.
Stitch count: 38 (38, 40, 42) sc.
Place markers to set raglan zones as follows:
For 3 to 6 months (38 sts): right front 7 sts, pm, right sleeve 6 sts, pm, back 12 sts, pm, left sleeve 6 sts, pm, left front 7 sts. (7+6+12+6+7 = 38)
For Newborn (38 sts): same as 3 to 6 months.
For 6 to 12 months (40 sts): right front 7, pm, right sleeve 7, pm, back 12, pm, left sleeve 7, pm, left front 7. (7+7+12+7+7 = 40)
For 12 to 18 months (42 sts): right front 7, pm, right sleeve 8, pm, back 12, pm, left sleeve 8, pm, left front 7. (7+8+12+8+7 = 42)
Working the Increase Rows
On every WS row, work raglan increases at all 4 markers (adding 8 sts total). On every RS row, sc across without increases.
Row 2 (WS): Ch 1, turn. Work sc across, placing raglan increase at each marker. Slip marker as you go. Turn.
Stitch count: 46 (46, 48, 50).
Row 3 (RS): Ch 1, turn. Sc in each st and in each ch-1 sp across. Turn.
Stitch count: 46 (46, 48, 50).
Row 4 (WS): Ch 1, turn. Sc across with raglan increases at 4 markers. Turn.
Stitch count: 54 (54, 56, 58).
Row 5 (RS): Ch 1, turn. Sc across. Turn.
Stitch count: 54 (54, 56, 58).
Row 6 (WS): Ch 1, turn. Raglan increases. Turn.
Stitch count: 62 (62, 64, 66).
Row 7 (RS): Ch 1, turn. Sc across. Turn.
Stitch count: 62 (62, 64, 66).
Row 8 (WS): Ch 1, turn. Raglan increases. Turn.
Stitch count: 70 (70, 72, 74).
Row 9 (RS): Ch 1, turn. Sc across. Turn.
Stitch count: 70 (70, 72, 74).
Row 10 (WS): Ch 1, turn. Raglan increases. Turn.
Stitch count: 78 (78, 80, 82).
Row 11 (RS): Ch 1, turn. Sc across. Turn.
Stitch count: 78 (78, 80, 82).
Row 12 (WS): Ch 1, turn. Raglan increases. Turn.
Stitch count: 86 (86, 88, 90).
Row 13 (RS): Ch 1, turn. Sc across. Turn.
Stitch count: 86 (86, 88, 90).
For Newborn and 3 to 6 months: stop here with 86 sts.
For 6 to 12 months and 12 to 18 months, continue:
Row 14 (WS): Ch 1, turn. Raglan increases. Turn.
Stitch count: (94, 98).
Row 15 (RS): Ch 1, turn. Sc across. Turn.
Stitch count: (94, 98).
Row 16 (WS): Ch 1, turn. Raglan increases. Turn.
Stitch count: (102, 106).
Row 17 (RS): Ch 1, turn. Sc across. Turn.
Stitch count: (102, 106).
For 6 to 12 months: stop here.
For 12 to 18 months, continue:
Row 18 (WS): Ch 1, turn. Raglan increases. Turn.
Stitch count: (114).
Row 19 (RS): Ch 1, turn. Sc across. Turn.
Stitch count: (114).
Tips for Working the Ombre Gradient
The gradient in this baby cardigan creates the signature look. Here are my best tips for smooth color transitions:
Change colors cleanly by working the last yarn over of the last stitch in the old color with the new color. This makes the new color appear right at the start of the next row with no jog.
Weave in ends as you go rather than saving them all for the end. With four colors, you will have multiple ends to manage.
Keep tension consistent across color changes. Different colors from the same yarn line should behave identically, but always double check your gauge if switching brands.
Working the Body and Sleeves
After completing the yoke, you will separate the sleeves from the body at the underarm. The body continues in the round while sleeves are set aside on stitch markers or waste yarn.
At separation, you will chain 3 (4, 4, 5) stitches at each underarm to bridge the gap. This creates the underarm ease needed for comfortable movement.
Change to Color B at the underarm separation. Continue working the body in joined rounds, changing to Color C at approximately the midpoint and Color D for the final section before the ribbed hem.
For the sleeves, pick up the held stitches plus the underarm chain stitches. Work in the round, tapering slightly with sc2tog decreases if needed, and finish with Color D and a ribbed cuff.
Adding the Hood
The hood is picked up along the neckline and worked upward. You will work flat in rows, then seam the crown closed.
Pick up stitches evenly across the back neck and up both front edges. Work in single crochet, increasing at intervals to create the hood depth. Continue until the hood reaches the desired length, then fold in half and seam the top edge.
The hood receives shell stitch edging around the face opening, matching the front bands and hem.
Shell Stitch Edging and Finishing
Work shell stitch edging along:
Use Color A (cream) for the edging throughout. This creates the contrast trim visible in the finished piece and frames the ombre beautifully.
For buttonholes, use the natural openings between shells on the right front band. Sew buttons to the left front band, spacing them evenly to align with the shell gaps.
Time Estimate and Skill Level
Plan for approximately 12 to 18 hours depending on your experience level. The seamless construction moves quickly once you understand the raglan increases.
This is an intermediate pattern. You should be comfortable with:
All stitches used are basic, but the all-in-one construction and gradient sequencing require attention.
Making It Your Own
While the peach ombre is stunning, this cardigan works beautifully in any four-color gradient. Consider:
You could also work the entire cardigan in a single color and let the shell stitch edging be the star.
I hope you love making this sweet little cardigan as much as I loved designing it. The seamless construction and ombre gradient combine to create something truly special for the little one in your life.
If you found this pattern helpful, save it to your Pinterest boards so you can find it when you are ready to cast on. And please leave a comment below if you make one. I would absolutely love to see your color choices and finished cardigans!