
When I first started designing this delicate nose cuff, I knew I wanted something truly special. The goal was to create a wearable piece of art that combined the elegance of thread crochet with the natural beauty of jasmine flowers.
Get the Ad-Free PDF Pattern
You can find the free pattern below, or you can purchase the ad-free printable PDF from my shop.
Get the Printable PDF →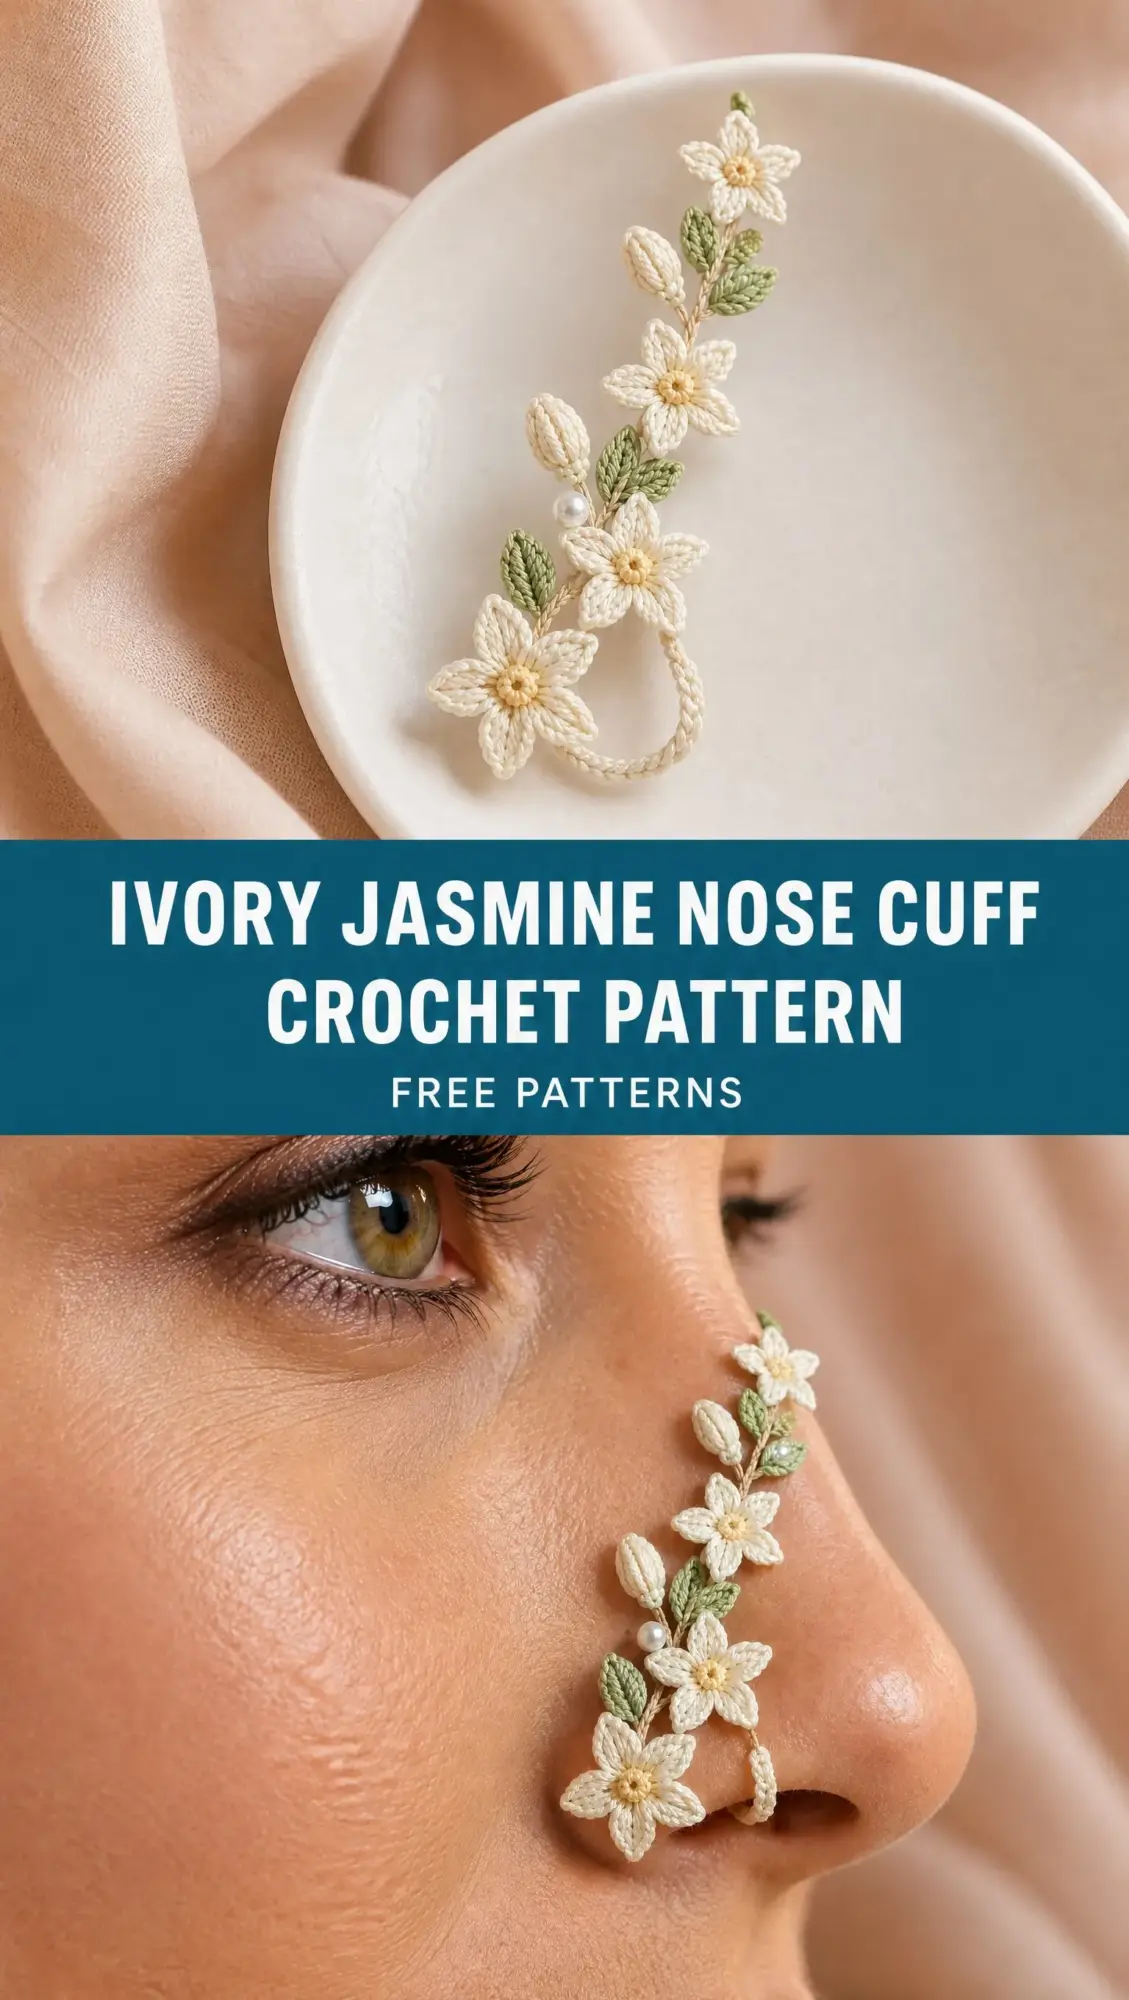
I wanted graduated flower sizes that would flow naturally along the bridge of the nose, paired with soft mint leaves and tiny pearl accents for that extra touch of refinement. Every design choice came down to one thing: keeping the piece comfortable, beautiful, and secure without any piercing required.
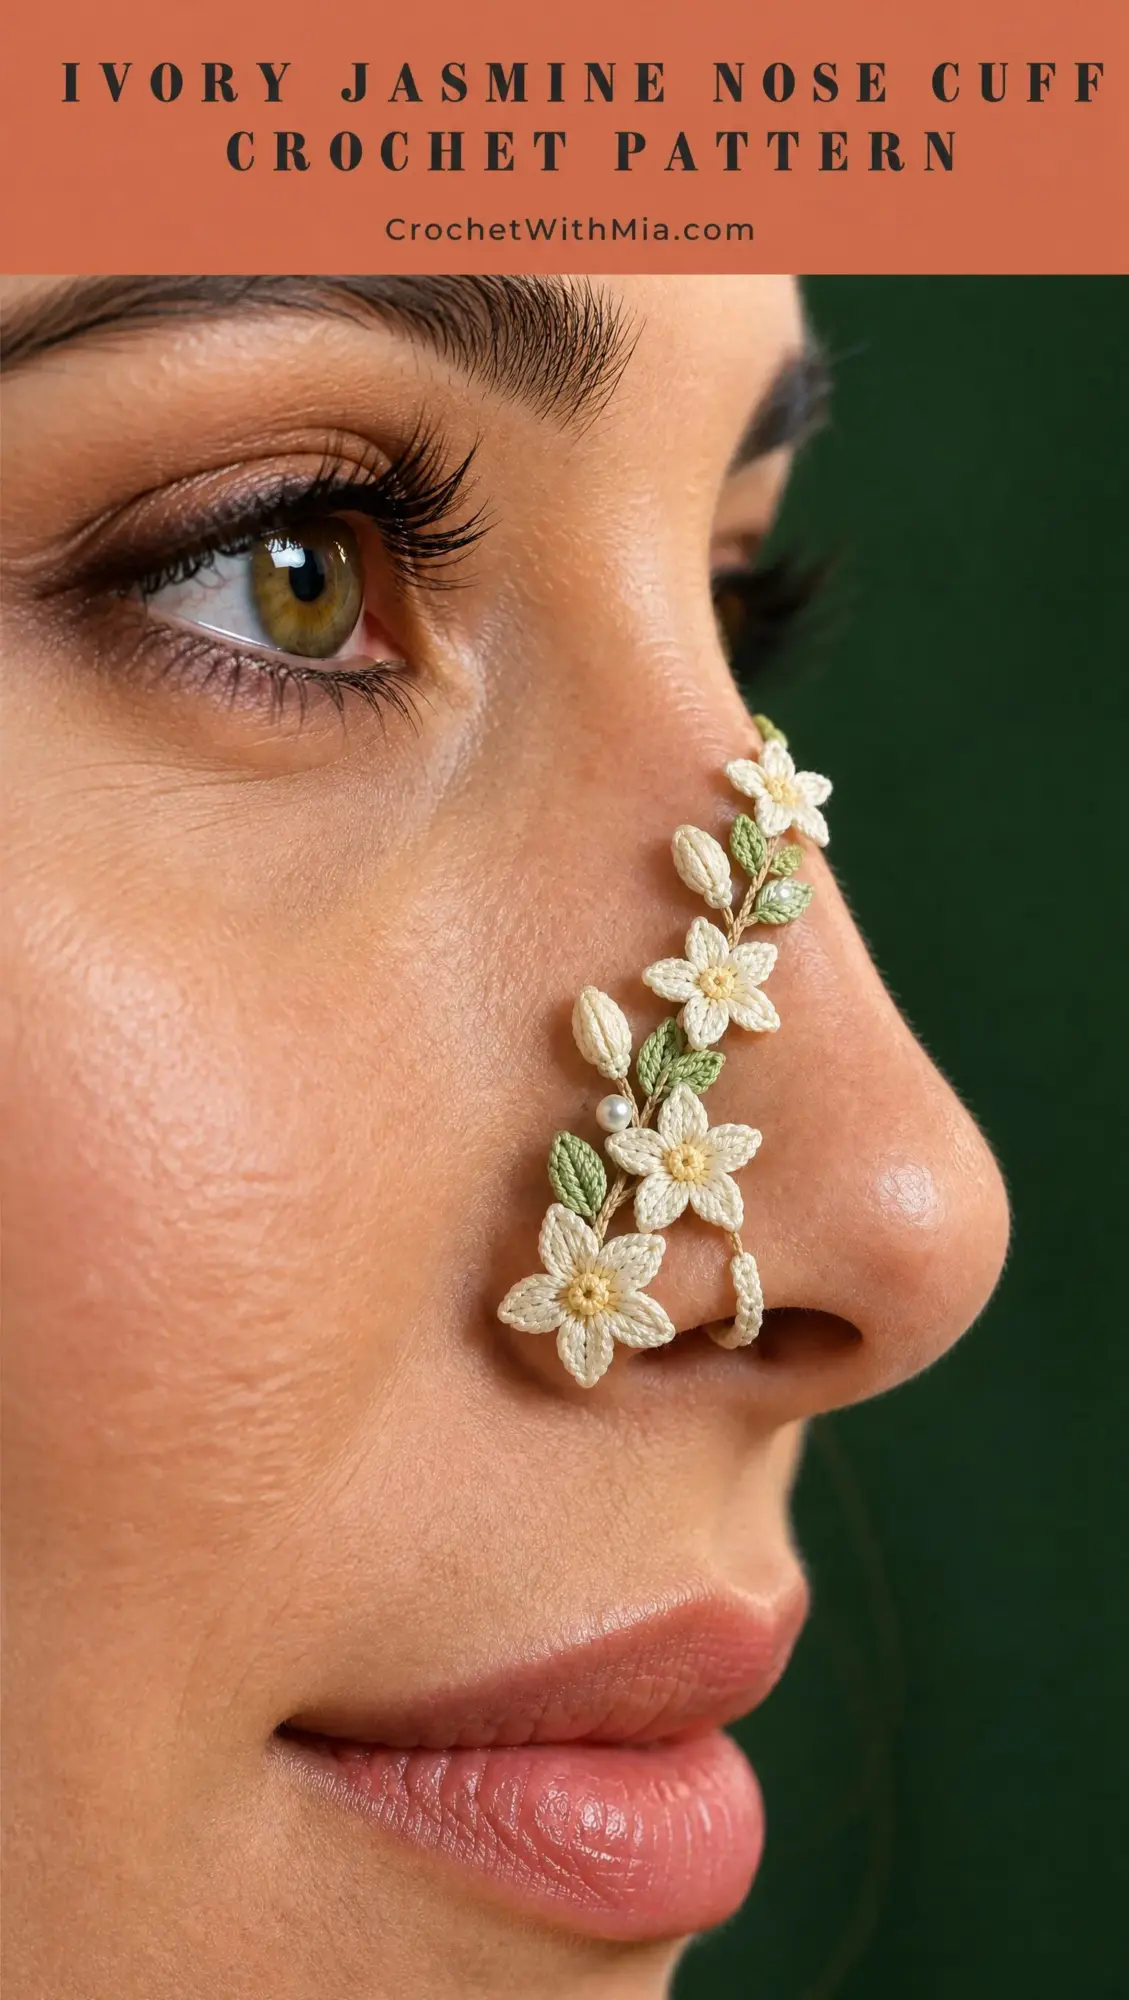
I am SO pleased with how this turned out! The four jasmine blossoms cascade perfectly from largest to smallest, the buds add organic movement, and those three little pearls catch the light in the most gorgeous way.
What Makes This Nose Cuff Special
This thread crochet accessory sits gently along the bridge of your nose with a soft loop that curves beside the nostril. Unlike traditional nose jewelry that requires piercings, this cuff stays in place through clever construction and careful shaping.
The design features four five-petal jasmine flowers in graduated sizes, two tapered buds, five to seven mint leaves, and three pearl bead accents placed at leaf junctions. Everything attaches to a slim champagne-colored foundation vine, keeping the back flat and comfortable against your skin.
Thread crochet refers to working with very fine mercerized cotton thread using a tiny steel hook. The result is incredibly delicate fabric perfect for jewelry and miniature work.
Materials You Will Need
Before you begin, gather these supplies. Using the correct materials ensures your finished piece matches the intended dimensions and holds its shape beautifully.
Ivory crochet thread: Mercerized cotton in size 20 or 30, approximately 8 to 12 meters
Champagne thread: Size 20 or 30, approximately 2 to 3 meters
Pale mint thread: Size 20 or 30, approximately 2 to 3 meters
Buttercream thread: Size 30 or finer, less than 1 meter
Hook: 0.60 to 0.75 mm steel crochet hook. Use the size that gives you firm, neat stitches.
Pearls: 3 smooth 2 to 2.5 mm pearl beads with holes large enough for sewing thread
Optional support: 0.25 to 0.35 mm clear nylon jewelry line or very fine soft craft wire, fully covered by crochet
Finishing tools: Fine tapestry needle, sewing needle, sharp snips, blocking mat, rustproof pins
Gauge and Sizing Notes
Exact gauge is not critical for this project, but the fabric should be firm enough to hold tiny petals while still feeling soft against skin. As a guide, 10 single crochet (sc) stitches worked in size 20 thread should measure roughly 20 to 24 mm.
Your flower motifs should range from about 8 mm for the largest bloom down to 5 to 6 mm for the smallest. If your flowers come out too large or too small, adjust your hook size or thread tension.
The foundation vine should measure 45 to 55 mm before the nostril loop. The loop circumference should be 18 to 24 mm depending on the wearer. Remember, the loop should sit beside the nostril, never inside it, and never tight enough to mark the skin.
Abbreviations Guide
Let me walk you through every abbreviation you will encounter. Understanding these terms is essential for following the pattern accurately.
ch (chain): The foundation stitch that creates a series of interlocking loops. You wrap the yarn over your hook and pull through the loop already on your hook.
sl st (slip stitch): The shortest crochet stitch. Insert your hook, yarn over, and pull through both the stitch and the loop on your hook in one motion.
sc (single crochet): Insert hook into stitch, yarn over and pull up a loop (2 loops on hook), yarn over and pull through both loops.
hdc (half double crochet): Yarn over, insert hook, yarn over and pull up a loop (3 loops on hook), yarn over and pull through all 3 loops.
dc (double crochet): Yarn over, insert hook, yarn over and pull up a loop (3 loops on hook), yarn over and pull through 2 loops, yarn over and pull through remaining 2 loops.
tr (treble crochet): Yarn over twice, insert hook, yarn over and pull up a loop, (yarn over, pull through 2 loops) three times.
st(s): Stitch or stitches
MR (magic ring): An adjustable starting ring that can be pulled tight to close the center hole completely.
FO: Fasten off
picot: Chain 2, slip stitch in first chain unless otherwise stated.
How to Crochet the Jasmine Flowers
You will make four blossoms total in ivory thread. Use the same basic construction for each, but vary the petal height slightly to create the graduated sizes visible in the finished design.
Large Jasmine (Make 1)
With ivory thread, make a magic ring. Chain 1, then work 5 single crochet into the ring. Slip stitch to the first single crochet to join. Pull the ring firmly closed.
Petal 1: Slip stitch in the next single crochet, chain 4, work 1 single crochet in the second chain from hook, 1 half double crochet in the next chain, 1 double crochet in the next chain. Slip stitch back into the same base single crochet.
Repeat this petal sequence around until you have completed 5 petals. Keep each petal pointed by tightening the first single crochet and the final slip stitch.
Fasten off with a 12 cm tail. Thread the tail down through the center and weave it around the back of the ring, keeping the back flat.
With buttercream thread, make 3 tiny surface knots or 3 short straight stitches in the center. Do not build a bulky raised center. This flower should measure approximately 7 to 9 mm across.
Medium Jasmine (Make 1)
Work exactly as for the large jasmine, but use chain 3 for each petal instead of chain 4. Work single crochet in the second chain from hook, half double crochet in the next chain, then slip stitch to the base stitch. Aim for about 7 mm across. Add the same minute buttercream center.
Small Jasmine (Make 2)
Start with a magic ring, work 5 single crochet, and join. For each petal, chain 3, slip stitch in the second chain from hook, half double crochet in the next chain, then slip stitch to the same base single crochet. Make 5 petals total. Aim for about 5 to 6 mm across. Add the same buttercream center as the larger flowers.
Petal Shaping
After finishing each flower, lightly dampen it and pin the five petals into a narrow star shape on your blocking mat. Let them dry fully. Do not starch heavily. The petals should retain a soft satin-like appearance and a slight three-dimensional cup.
How to Crochet the Closed Buds
Make 2 buds in ivory thread. One may be 1 to 2 mm longer than the other for visual interest.
Chain 5. Starting in the second chain from hook, work slip stitch, single crochet, half double crochet, single crochet.
Rotate the chain and work along the unused loops on the opposite side: single crochet, half double crochet, single crochet, slip stitch.
Fasten off leaving a sewing tail. Fold the narrow oval lengthwise so the pointed ends align, then whipstitch only the lower third. Leave the tip closed naturally by tension rather than stuffing.
Wrap the sewing tail twice around the base to create a neat stem effect, secure it, and leave the remaining tail for attachment to the vine.
How to Crochet the Mint Leaves
Make 5 to 7 leaves in pale mint thread. Keep them sparse along the vine and alternate their direction for natural flow.
Chain 4. Starting in the second chain from hook, work slip stitch, single crochet, half double crochet.
Chain 1 at the tip. Rotate and work down the opposite side of the foundation chain: half double crochet, single crochet, slip stitch.
Fasten off with a 7 to 10 cm sewing tail. For the smallest leaves, use chain 3 and work slip stitch, single crochet on each side.
Pin the leaves into narrow pointed shapes and allow them to dry. Leaves should remain slim rather than rounded.
Foundation Vine and Nostril Loop Tutorial
The foundation vine is intentionally narrow. You can make it entirely in thread, or crochet it around a very fine clear nylon support for slightly more shape retention. Any support must remain completely covered and must have smooth, buried ends.
Foundation Vine
With champagne thread, chain 28 to 34, or enough to measure about 45 to 55 mm when gently relaxed. Do not stretch the chain while measuring.
Turn. Starting in the second chain from hook, slip stitch in each chain across. This creates a slim cord with one flat side.
Optional support method: Before working the slip stitch return row, lay the nylon line along the top of the foundation chain and crochet over it. Stop the support 4 to 5 mm before each end. Clip only after the ends are fully trapped beneath several stitches.
Fasten off at the far end, leaving a 15 cm tail for assembly.
Soft Nostril Loop
Join ivory thread to the lower end of the champagne vine with a secure slip stitch.
Chain 11 to 15, depending on fit. Bring the chain into a gentle teardrop curve and slip stitch it back to the same lower foundation point.
Work 1 slip stitch into each loop chain to make the loop smoother and slightly firmer. Do not add wire inside this loop.
Fasten off and weave the tail into the champagne foundation, keeping the join flat. The loop should remain flexible enough to flex open with minimal pressure.
Fit check before decoration: Hold the piece against the bridge of your nose with clean hands. The champagne vine should follow the bridge without springing away, and the ivory loop should rest beside the nostril without entering or compressing it. Adjust your chain counts now, before adding flowers.
Assembly Map for Your Nose Cuff
Lay the vine diagonally with the nostril loop at the lower end. Arrange all your motifs before sewing anything down. Here is the balanced order from low to high:
Position 1 (lowest): Large jasmine, placed about 5 to 8 mm above the loop, angled slightly outward
Position 2: Mint leaf plus pearl, with the leaf pointing upward and the pearl sitting at the leaf junction
Position 3: Medium jasmine, centered over the vine with petals rotated so they do not stack directly over the lower flower
Position 4: Small bud, angled outward on the opposite side of the vine
Position 5: Mint leaf plus pearl, using a small leaf pair or single leaf with the pearl only at the junction
Position 6: Small jasmine, placed slightly off-center
Position 7: Second bud, tapered upward toward the bridge
Position 8: Small jasmine, your final upper blossom in the smallest-looking placement
Position 9 (uppermost): Mint leaf plus pearl, using the smallest leaf and keeping the very end of the vine visible
Sewing the Motifs to the Vine Step by Step
Thread the large jasmine tail onto a fine tapestry needle. Catch only the center ring and the champagne foundation. Do not stitch through the outer petals. Make 3 to 4 tiny passes and knot on the back beneath the flower.
Attach the first leaf beside the large flower. Sew only the leaf base and first 1 to 2 mm of the center ridge, leaving the pointed tip free.
Continue upward, attaching the medium flower, buds, leaves, and small flowers according to the assembly map. Keep motif edges distinct rather than overlapping heavily.
At each bud, sew through the wrapped base and foundation 2 to 3 times. The bud should stand slightly proud from the vine but should not dangle.
After all motifs are attached, turn the piece over. Trim and weave every tail into the foundation or into the back of its own motif. No thread ends should protrude toward the skin.
Adding the Three Pearl Beads
Place pearls only where a leaf meets the vine. This keeps the design refined and avoids loose bead movement.
Using matching champagne sewing thread or a split strand of the crochet thread, come up from the back at a leaf junction.
Pass through the pearl, then down through the same junction. Repeat twice so the pearl cannot rotate freely.
Take one tiny securing stitch around the base of the bead without covering it. Knot on the back and bury the tail in several slip stitches of the vine.
Repeat at two other leaf junctions, spacing the pearls rather than clustering them.
Final Shaping and Finishing
Mist the crochet lightly with clean water, avoiding soaking the pearls.
Lay the accessory on a padded blocking surface. Pin flowers into five-point stars, buds into slim tapered forms, and leaves into narrow points.
Curve the champagne foundation gently so it follows a nose bridge shape. Leave the nostril loop rounded and soft.
Allow to dry completely. Remove pins and inspect every join by gently tugging each motif.
If desired, apply a tiny amount of clear fabric stiffener only to the flower petals with a fine brush. Do not stiffen the loop or skin-contact side.
Comfort and Wear Notes
This is a decorative accessory, not a piercing device. It should rest lightly against the skin and be removable without force.
Never position the loop inside the nostril, across the airway, or where it interferes with breathing.
Do not use sharp exposed wire ends, rough bead holes, pins, or hard glue blobs on the skin-contact side.
Remove immediately if the piece causes pressure, redness, itching, or discomfort. Avoid wearing during sleep, exercise, or activities where it could snag.
Keep away from small children and pets because the pearls and tiny motifs can become choking hazards if detached.
For hygiene, wipe gently with a barely damp cloth and allow to dry fully. Do not share without cleaning.
Customization Ideas
For an even finer look, use size 30 thread and a 0.50 to 0.60 mm hook.
For more structure, crochet the champagne vine over clear nylon line, but keep the nostril loop unsupported and soft.
To make the blossoms more dimensional, gently curl only the outer 1 to 2 mm of each petal upward after blocking.
For a pearl-free version, replace each bead with a tiny buttercream French-knot-style embroidery stitch at the leaf junction.
Final Thoughts on This Crochet Pattern
Thank you so much for choosing this jasmine nose cuff pattern! I truly hope you enjoy making this delicate piece as much as I enjoyed designing it. Thread crochet opens up a whole world of miniature possibilities, and this project is a beautiful introduction to wearable fiber art.
If you make this nose cuff, I would absolutely love to see your finished piece! Share your photos with me on Instagram or Facebook. Seeing your creations brings me so much joy.
Go ahead and save this Ivory Jasmine Nose Cuff Crochet Pattern to your Pinterest boards so you can find it whenever inspiration strikes. And please drop a comment below if you make one. I would love to hear how it turned out for you!
Want a Quick & Easy Printable Version?
Get a clean, beautifully formatted PDF of this pattern — easy to follow step by step, ready to print or save on any device. No scrolling, no distractions, just the pattern.
Get the Printable PDF →