
I originally sketched this design in an old spiral notebook years ago, back when I was obsessed with Irish crochet roses and couldn’t stop drawing little flower motifs everywhere. The notebook got buried under a pile of yarn catalogs and forgotten until last spring, when I rediscovered it during a studio clean-out.
Get the Ad-Free PDF Pattern
You can find the free pattern below, or you can purchase the ad-free printable PDF from my shop.
Get the Printable PDF →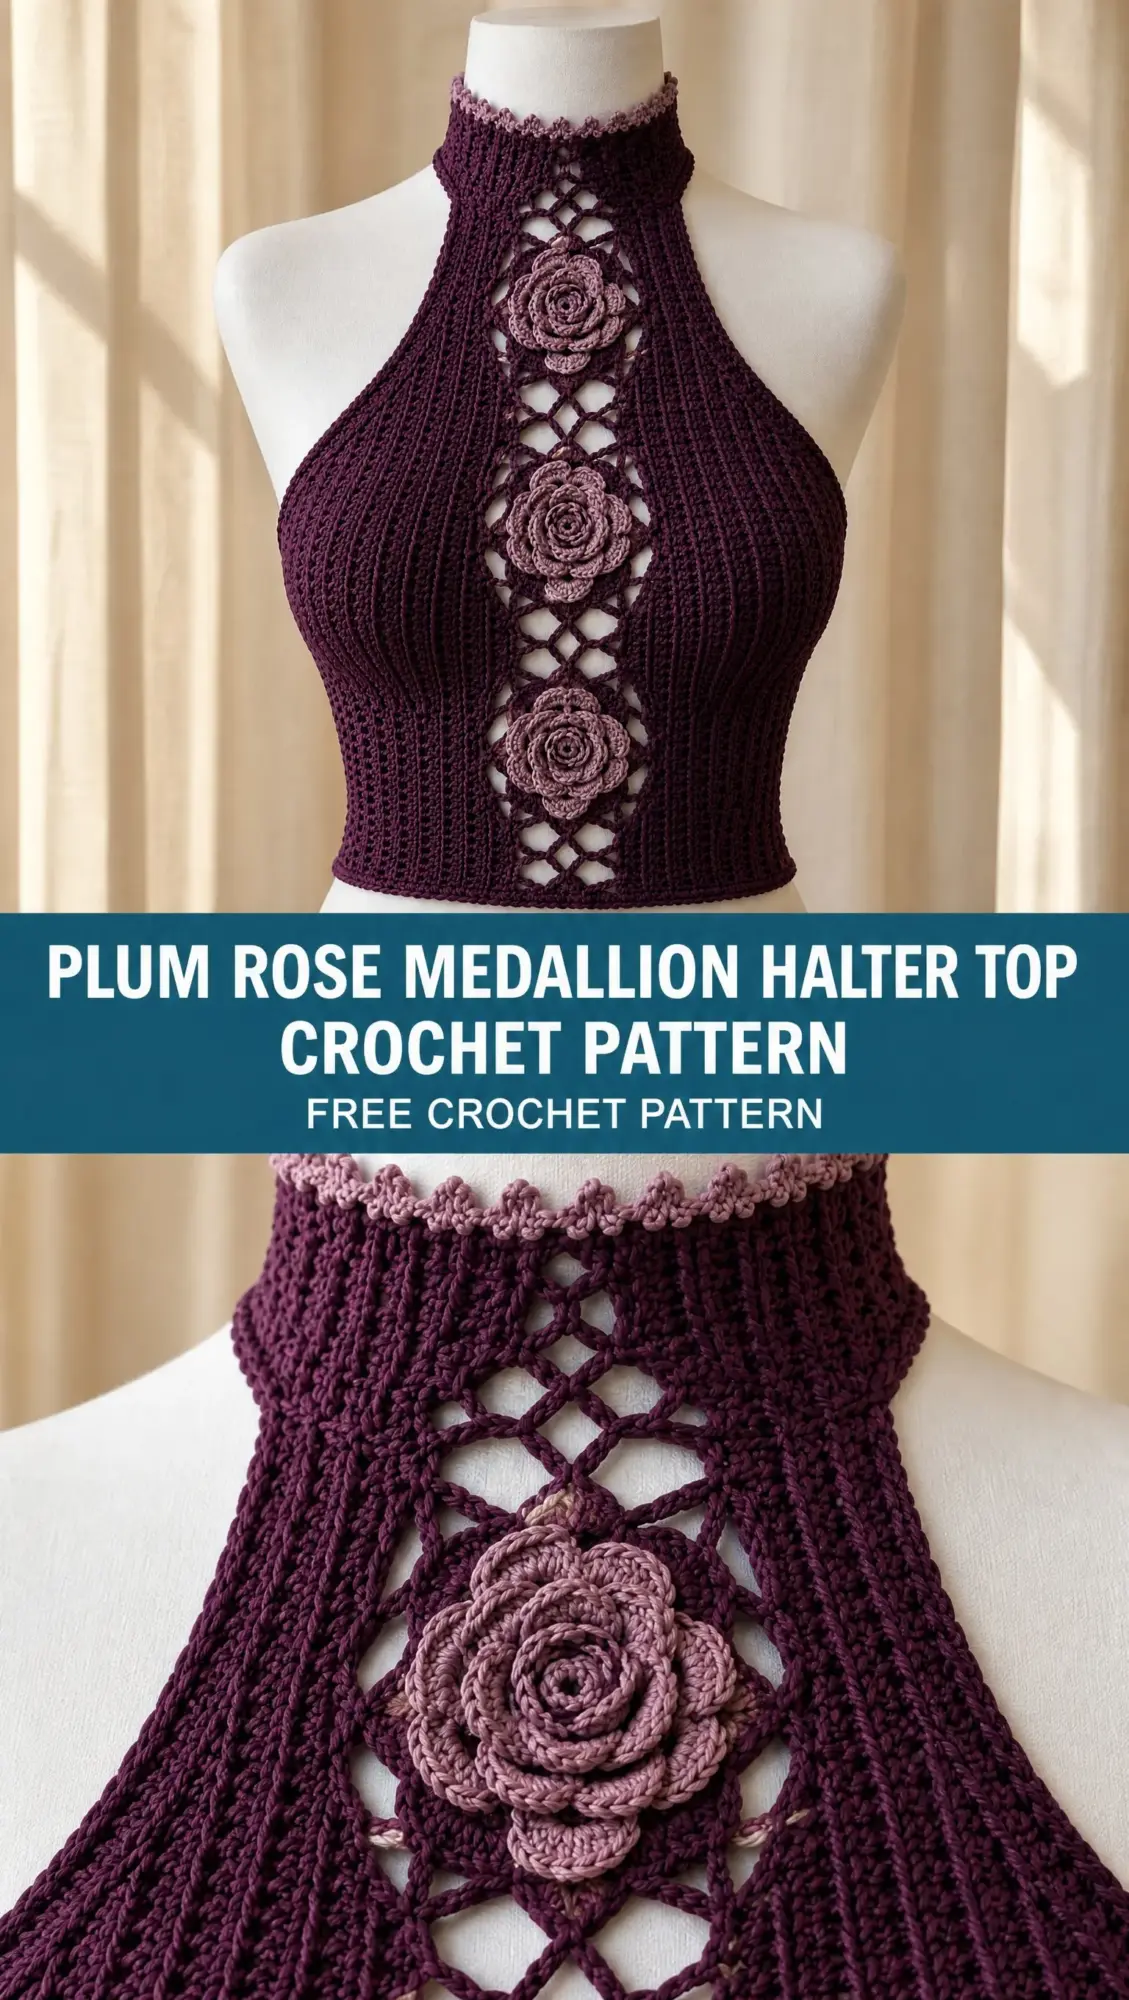
When I saw that original sketch again, I knew exactly what it needed to become. A fitted halter with dimensional roses down the center, connected by delicate open diamonds, framed by clean vertical ribbing. I named it the Plum Rose Medallion Top because that deep plum color with dusty mauve roses felt so romantic and sophisticated.
This pattern has been living in my head for years, and I am thrilled to finally share it with you. The construction is modular, which means you work the medallions first, then the side panels, then join everything together. It sounds complex, but I will walk you through every single step.
About This Design
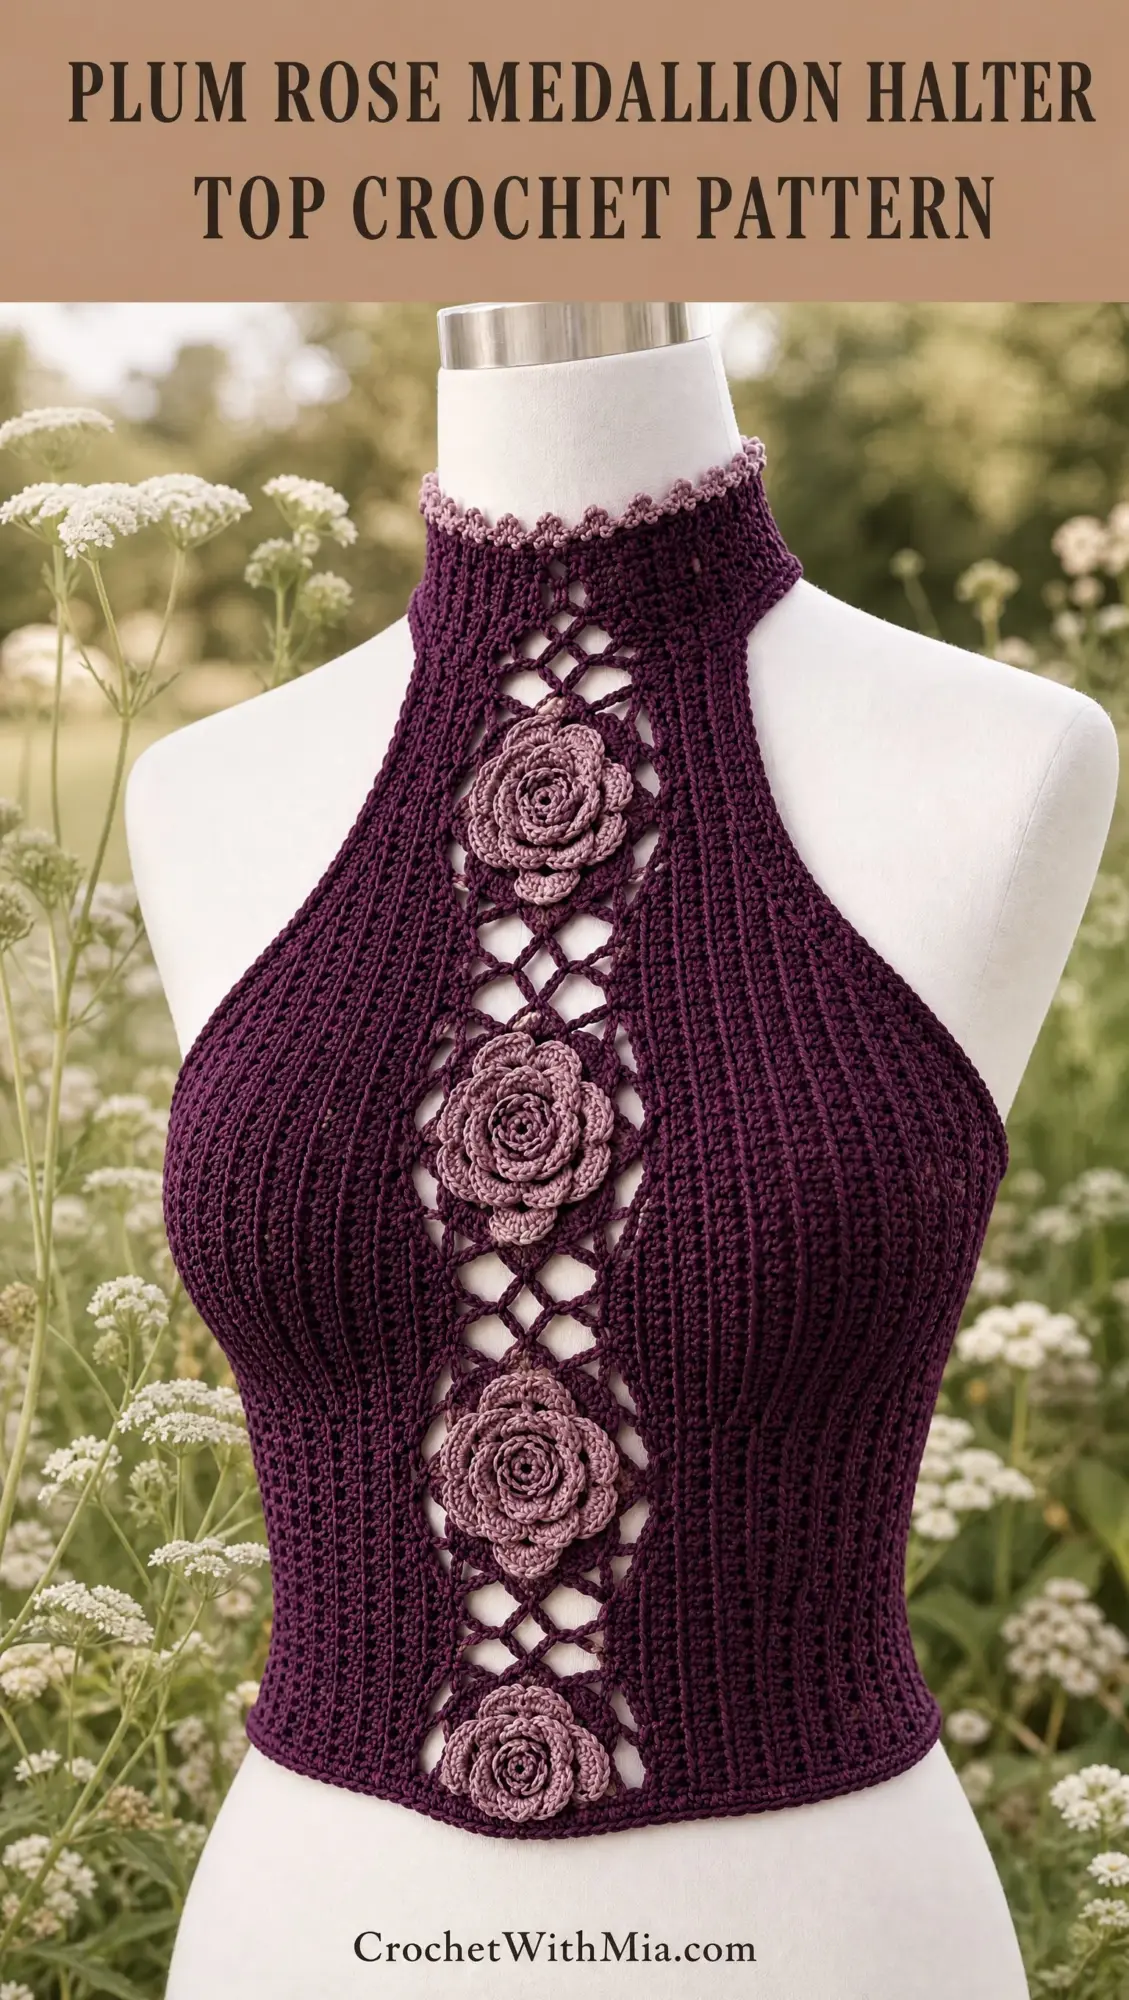
The Plum Rose Medallion Halter Top features a tall ribbed collar, close vertical ribbing at the sides, and a stunning central strip of rose-wheel medallions linked by open chain diamonds. The construction method is modular panels plus a center lace strip, which gives you lots of control over fit as you work.
This is an intermediate to advanced level pattern. You should be comfortable with working in the round, joining motifs, and basic garment construction. That said, I have broken down every technique so even ambitious beginners can tackle this with patience.
The finished garment has approximately 2 to 6 cm of negative ease for a fitted halter silhouette. It sits close to the body without being restrictive, and the vertical ribbing creates a flattering visual line.
Pattern at a Glance
Skill Level: Intermediate to advanced
Construction: Modular panels plus center lace strip
Terminology: US crochet terms
Sizes: XS (S, M, L, XL, 2X, 3X, 4X, 5X)
Finished Bust: 76 (84, 92, 100, 110, 120, 130, 140, 150) cm
Finished Waist: 64 (72, 80, 88, 98, 108, 118, 128, 138) cm
Length: 42 to 48 cm, easily adjustable
Materials You Will Need
Main Color (plum): Approximately 450 (500, 550, 600, 675, 750, 825, 900, 1000) meters
Contrast Color (dusty mauve): Approximately 90 (100, 110, 120, 130, 145, 160, 175, 190) meters
Hooks: 3.5 mm main hook, plus 3.0 mm if you want a firmer collar or smaller picots
Notions: Tapestry needle, locking stitch markers, scissors, flexible tape measure, rustproof pins, blocking mat
Optional: 10 to 15 mm wide soft elastic for the lower edge if extra support is desired
Recommended Fiber
Use a smooth mercerized cotton, cotton/bamboo, or cotton/acrylic yarn with moderate firmness. Avoid very fluffy yarns because the vertical ribbing and rose edges need to remain crisp. For the closest drape to the pictured top, choose a yarn around 100 to 130 meters per 50 grams. DK or light worsted weight (category 3 to 4) works best.
Gauge
Ribbing gauge: 20 half double crochet (hdc) back loop only (BLO) by 16 rows equals 10 by 10 cm, lightly blocked.
Medallion gauge: One finished rose-wheel equals about 7.5 to 8 cm across.
Gauge matters most across the bust and waist. If your ribbing is wider, use a smaller hook. If narrower, use a larger hook. Always make a swatch before starting.
Abbreviations and Special Stitches
Before we dive in, let me define every stitch and abbreviation you will encounter in this pattern.
ch = chain (yarn over, pull through loop on hook)
sl st = slip stitch (insert hook, yarn over, pull through stitch and loop on hook in one motion)
sc = single crochet (insert hook, yarn over, pull up a loop, yarn over, pull through both loops)
hdc = half double crochet (yarn over, insert hook, yarn over, pull up a loop, yarn over, pull through all 3 loops)
dc = double crochet (yarn over, insert hook, yarn over, pull up a loop, yarn over, pull through 2 loops twice)
tr = treble crochet (yarn over twice, insert hook, yarn over, pull up a loop, yarn over and pull through 2 loops three times)
BLO = back loop only (work into only the back loop of the stitch, leaving the front loop unworked)
sp = space
st(s) = stitch(es)
RS / WS = right side / wrong side
inc = increase
dec = decrease
Special Stitches
hdc BLO: Yarn over, insert hook into the back loop only of the next stitch, yarn over and pull up a loop, yarn over and draw through all 3 loops. This creates the ribbed texture.
sc2tog: Insert hook in next stitch and pull up loop. Repeat in next stitch. Yarn over and draw through all 3 loops. This is a single crochet decrease.
Picot: Ch 3, sl st in first chain made. This creates a small decorative bump.
Measurements and Fit Planning
Here is the full size chart to help you choose your size:
| Size | To Fit Bust (cm) | Finished Bust (cm) | Finished Waist (cm) | Center Strip Width (cm) |
|---|---|---|---|---|
| XS | 76-81 | 76 | 64 | 8 |
| S | 84-89 | 84 | 72 | 8 |
| M | 92-97 | 92 | 80 | 8 |
| L | 100-105 | 100 | 88 | 8 |
| XL | 108-114 | 110 | 98 | 9 |
| 2X | 116-123 | 120 | 108 | 9 |
| 3X | 124-132 | 130 | 118 | 9 |
| 4X | 133-142 | 140 | 128 | 10 |
| 5X | 143-152 | 150 | 138 | 10 |
1. Measure your full bust, underbust, natural waist and the desired shoulder-to-hem length.
2. Choose the size closest to your bust. The fabric should stretch gently across the torso without distorting the center medallions.
3. The front is built from a fixed center lace strip plus two mirror-image ribbed side panels. Most width adjustments are made by adding or removing rib rows at the outer side edge.
4. For a longer top, add stitches to the lower section of each side panel before beginning bust shaping. For a shorter crop, subtract stitches there.
5. Before seaming the back/side area, pin or clip the pieces around the body or mannequin and confirm snugness. Aim for secure but comfortable negative ease.
Length Planning
A good starting body length is 42 (43, 44, 45, 46, 46, 47, 47, 48) cm from the top of the collar to hem. The center strip uses 4 medallions for XS through L, 5 for XL through 3X, and 5 larger-spaced medallions for 4X through 5X. You can use 4 or 5 motifs in any size depending on torso length.
Color Placement
Work the side panels, collar framework, joins, lower hem and medallion outlines in plum. Work the raised inner rose petals in dusty mauve. For a softer transition, the final round of each rose may alternate plum and mauve as described below.
Rose-Wheel Medallion Instructions
Make 4 to 5 motifs depending on desired torso length. Keep each motif flat. Raised petals are confined to the center only.
Round 1 (mauve): Make a magic ring. Ch 1, 8 sc in ring. Join with sl st to first sc. Pull ring closed.
Round 2 (mauve petal bases): Ch 1. In each stitch around work (sc, ch 3, sc). Join. You now have 8 small chain loops.
Round 3 (mauve inner petals): Into each ch-3 loop work (sc, hdc, 3 dc, hdc, sc). Join behind first petal. Fasten mauve only if changing colors cleanly.
Round 4 (plum framework): Join plum behind a petal. Ch 5 behind next petal, sc around the post between petals. Repeat around. Join. This creates 8 back loops and keeps petals slightly raised.
Round 5 (plum wheel): In each ch-5 loop work (sc, hdc, 3 dc, hdc, sc). Join. The motif should now look like a flat flower wheel around the raised mauve center.
Round 6 (outline): Sc in next 3 sts, ch 2, skip 1 st. Repeat around, adjusting evenly so there are 8 ch-2 anchor spaces. Join and fasten off.
Block each medallion to about 7.5 to 8 cm across. Do not stretch the center petals upward. Press them gently outward with your fingers while damp.
Center Lace Strip
The vertical strip is assembled first, then the ribbed side panels are joined to it. Work with the medallions laid flat and oriented the same way.
1. Lay 4 or 5 medallions in a vertical line with 1.5 to 2.5 cm between motifs. Leave a slightly larger gap below the collar if desired.
2. Diamond connector: Join plum to the top anchor space of the lower medallion. Ch 5, sc into the corresponding lower anchor space of the medallion above. Ch 5, sc back into the next anchor space on the lower motif. Ch 5, sc into the next anchor space on the upper motif. This makes an open diamond or X-shaped bridge.
3. Repeat a mirrored connector on the opposite side of the same gap so the motifs cannot twist.
4. Continue until all motifs are joined. The strip should hang straight with each flower centered.
5. Side rails: Starting at the lower-left corner, join plum and work a chain-and-sc rail up the side: ch 4, sc in next available motif anchor or connector junction. Keep the rail smooth and slightly elastic. Repeat on the right side.
6. At the top, continue both rails upward with open diamonds to form the narrow lace throat between the upper medallion and collar. Aim for 6 to 9 cm of extra openwork depending on size and neckline depth.
7. At the lower end, add 1 to 2 small chain diamonds below the last flower if needed so the lace strip reaches the desired hem level.
Target Strip Width
After blocking, the strip should measure about 8 cm wide for XS through L, 9 cm for XL through 3X, and 10 cm for 4X through 5X. If your flowers are wider, reduce chain lengths in the side rails. If narrower, increase ch-4 sections to ch-5.
Ribbed Side Panels and Bust Shaping
Make two mirror-image panels. They are worked vertically from hem to upper chest in rows of hdc BLO, creating the long ribs seen in the sample.
Starting chain: Ch 70 (72, 74, 76, 78, 80, 82, 84, 86), or chain to the measured distance from hem to high chest along the side of the body. This chain determines garment length, not width.
Row 1: Hdc in 2nd ch from hook and each ch across. Turn.
Row 2: Ch 1, hdc BLO in each st across. Turn. Repeat Row 2 for the lower straight section.
Work 10 (12, 14, 16, 18, 20, 22, 24, 26) rib rows without shaping. These rows form the side-waist area closest to the center lace strip.
Bust expansion: On every 2nd row, work 2 hdc BLO in the first stitch at the upper-chest edge only. Repeat 6 (7, 8, 9, 10, 11, 12, 13, 14) times. This adds shallow wedge width over the bust while leaving the lower waist narrower.
Continue even in hdc BLO until the panel measures approximately half of the required remaining front width: (finished bust minus center strip width) divided by 2, allowing 1 to 2 cm for the final side seam and stretch.
Armhole curve: For the final 5 to 8 rows, shorten each row at the upper edge by 2 stitches using slip stitches to move inward before beginning the next hdc row. This creates the high inward curve toward the halter neckline. Keep the hem edge straight.
Fasten off leaving a long sewing tail. Make the second panel as a mirror image, placing bust increases and shortened armhole rows on the opposite edge.
Practical Fitting Method
Because torso proportions vary, rib-row count is more reliable than a rigid stitch count. Pin each panel to the center strip. Wrap the piece around your torso. Add rib rows at the outer edge until the back/side seam meets comfortably with 2 to 6 cm negative ease. Remove rows if the medallion strip begins to stretch sideways.
Tall Halter Collar
The collar is a firm ribbed band approximately 5.5 to 7 cm tall, attached across both side panels and the openwork center throat.
1. With plum, ch 13 (13, 14, 14, 15, 15, 16, 16, 17). Hdc in 2nd ch from hook and across. Turn.
2. Work hdc BLO rows until the band, slightly stretched, fits around the base of the neck where you want the collar to sit. A typical finished circumference is 34 to 42 cm depending on size and preference.
3. Slip stitch or mattress-seam the short ends to form a ring. Place seam at center back.
4. Pin the collar ring evenly around the upper edge of the garment. The two side panels should rise into the collar at the front sides while the center lace throat fills the middle opening.
5. With plum, sc around to join collar to garment, easing any small difference in circumference. Do not gather the collar.
6. Picot rim: Switch to mauve. Work sc in next 2 sts, picot. Repeat around the top edge. Adjust spacing so the picots remain fine and evenly distributed. Join and fasten off.
Comfort tip: If the collar feels too rigid, go up 0.25 to 0.5 mm in hook size for the last few rib rows. If it flares, use the smaller hook for the joining round and picot edge.
Joining and Side Seams
1. Block the center strip and both side panels separately before joining. Let them dry completely.
2. Lay the right side panel beside the center strip. Match the waistline, hem and upper chest. Use locking markers every 3 to 4 cm.
3. With plum, join by working sc through one edge stitch of the ribbed panel and one side-rail space of the center strip. Work evenly without pulling either piece. For a flatter seam, use mattress stitch instead.
4. Repeat for the left panel. Check that the flower column remains centered and vertical.
5. Wrap the top around the torso. Join the outer side/back edges using mattress stitch or slip stitch. If you prefer an opening, leave the upper 10 to 15 cm unseamed and add a row of small chain loops and buttons, or crochet ties.
6. Weave in all structural ends before working the final hem.
Hem and Final Edging
1. Join plum at a side seam. Work 1 round of sc evenly around the entire lower edge, including the base of the center lace strip. Keep the hem flat and level.
2. Work a second round of sc BLO for a subtle corded finish. If extra stability is needed, hold thin soft elastic along the wrong side and crochet over it without stretching aggressively.
3. At the armhole/outer halter edges, work one light round of sc in plum, placing approximately 2 sc for every 3 rib rows. This smooths the curve and prevents stretching.
4. Optional decorative finish: Add a very sparse mauve picot every 5 to 6 sc along only the collar and not the armholes, preserving the clean modern look.
Finishing, Blocking and Fit Adjustments
Wet-block or steam-block according to the yarn label. Pin the center strip perfectly straight, smooth the ribbing vertically and shape the armhole curves symmetrically. Do not over-stretch the roses.
Fit Adjustment Guide
| Issue | Adjustment |
|---|---|
| Too loose at waist | Remove 2-6 rib rows at each outer side, or seam 1-2 cm deeper |
| Too tight at bust | Add rib rows at outer sides; if needed add 1-2 extra bust-increase rows |
| Center flowers pull sideways | Increase side-panel width rather than stretching lace strip |
| Armhole gapes | Work one extra sc edging round with occasional sc2tog at the deepest curve |
| Collar too loose | Remove collar rib rows and re-seam; do not rely on a tight edging alone |
| Collar too tight | Add rib rows or remake with a hook 0.25-0.5 mm larger |
| Top too short | Add rows of sc/hdc at hem, or remake panels with a longer starting chain |
| Top too long | Remove lower stitches from starting-chain count in both panels |
Final Checklist
Before wearing, confirm these points:
Care Instructions
Hand wash or machine wash on a gentle cycle according to yarn instructions. Reshape flat to dry. Store folded rather than hanging for long periods so the halter collar and center lace strip do not stretch.
Personalization Ideas
You can make this design your own in several ways. Change the number of medallions for a longer or shorter torso. Add a fifth rose if you have a longer torso. Use a contrasting collar rim in a third color. Replace the lower flower with an open diamond for a lighter, airier crop. The modular construction makes customization straightforward.
I hope you absolutely love making this Plum Rose Medallion Halter Top as much as I loved designing it. It is one of those patterns that looks so impressive but comes together piece by piece in a really satisfying way. Thank you so much for choosing this pattern, and I cannot wait to see your finished tops! If you make one, please share a photo on Instagram or in my Facebook group.
Go ahead and save this pattern to your Pinterest boards so you can find it when you are ready to start. And if you make this top, I would love to hear about it in the comments below!
Want a Quick & Easy Printable Version?
Get a clean, beautifully formatted PDF of this pattern — easy to follow step by step, ready to print or save on any device. No scrolling, no distractions, just the pattern.
Get the Printable PDF →