
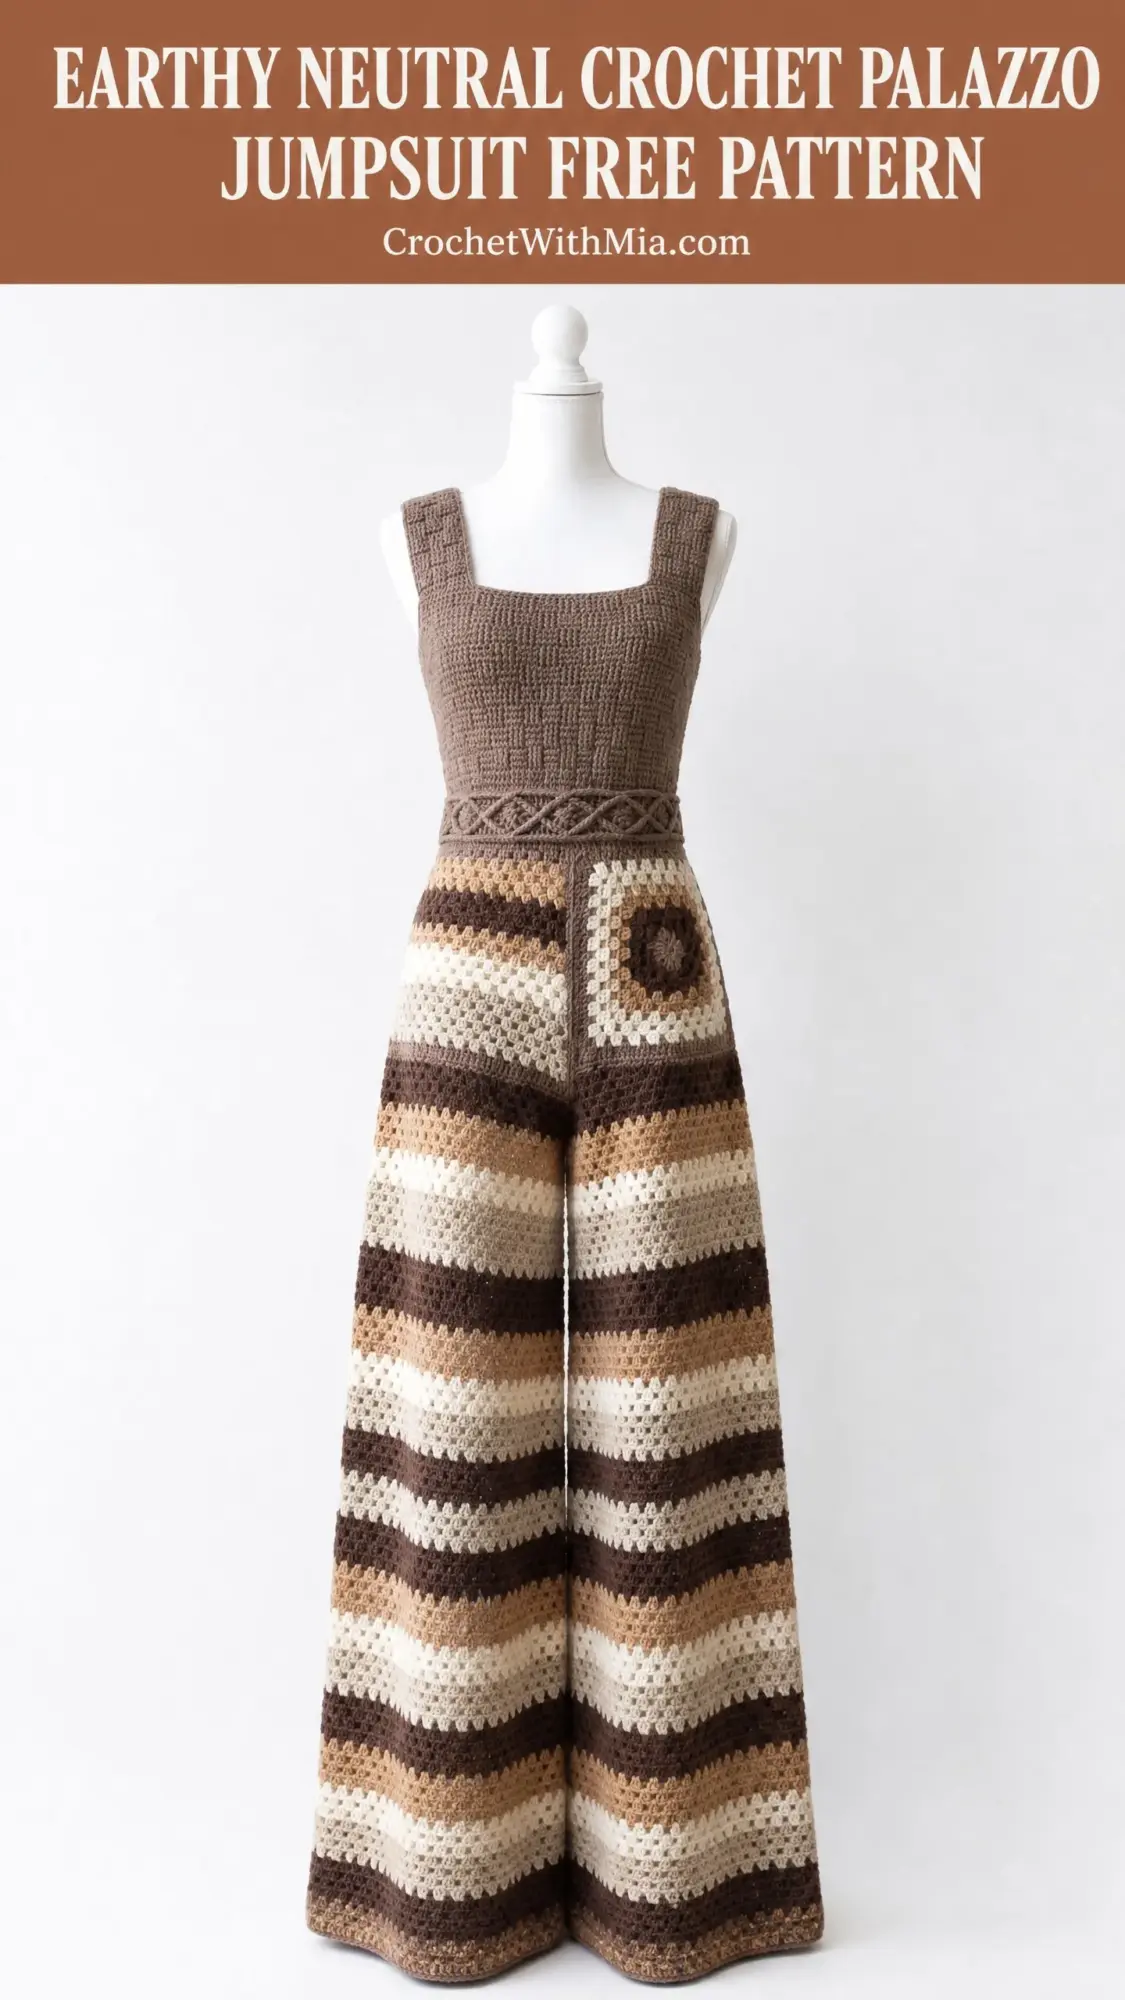
This is a full-length crochet jumpsuit with a structured bodice, wide palazzo legs, and decorative hip pockets. It uses basketweave stitch for the top, granny stripes for the pants, and a cable-style braid at the waist.
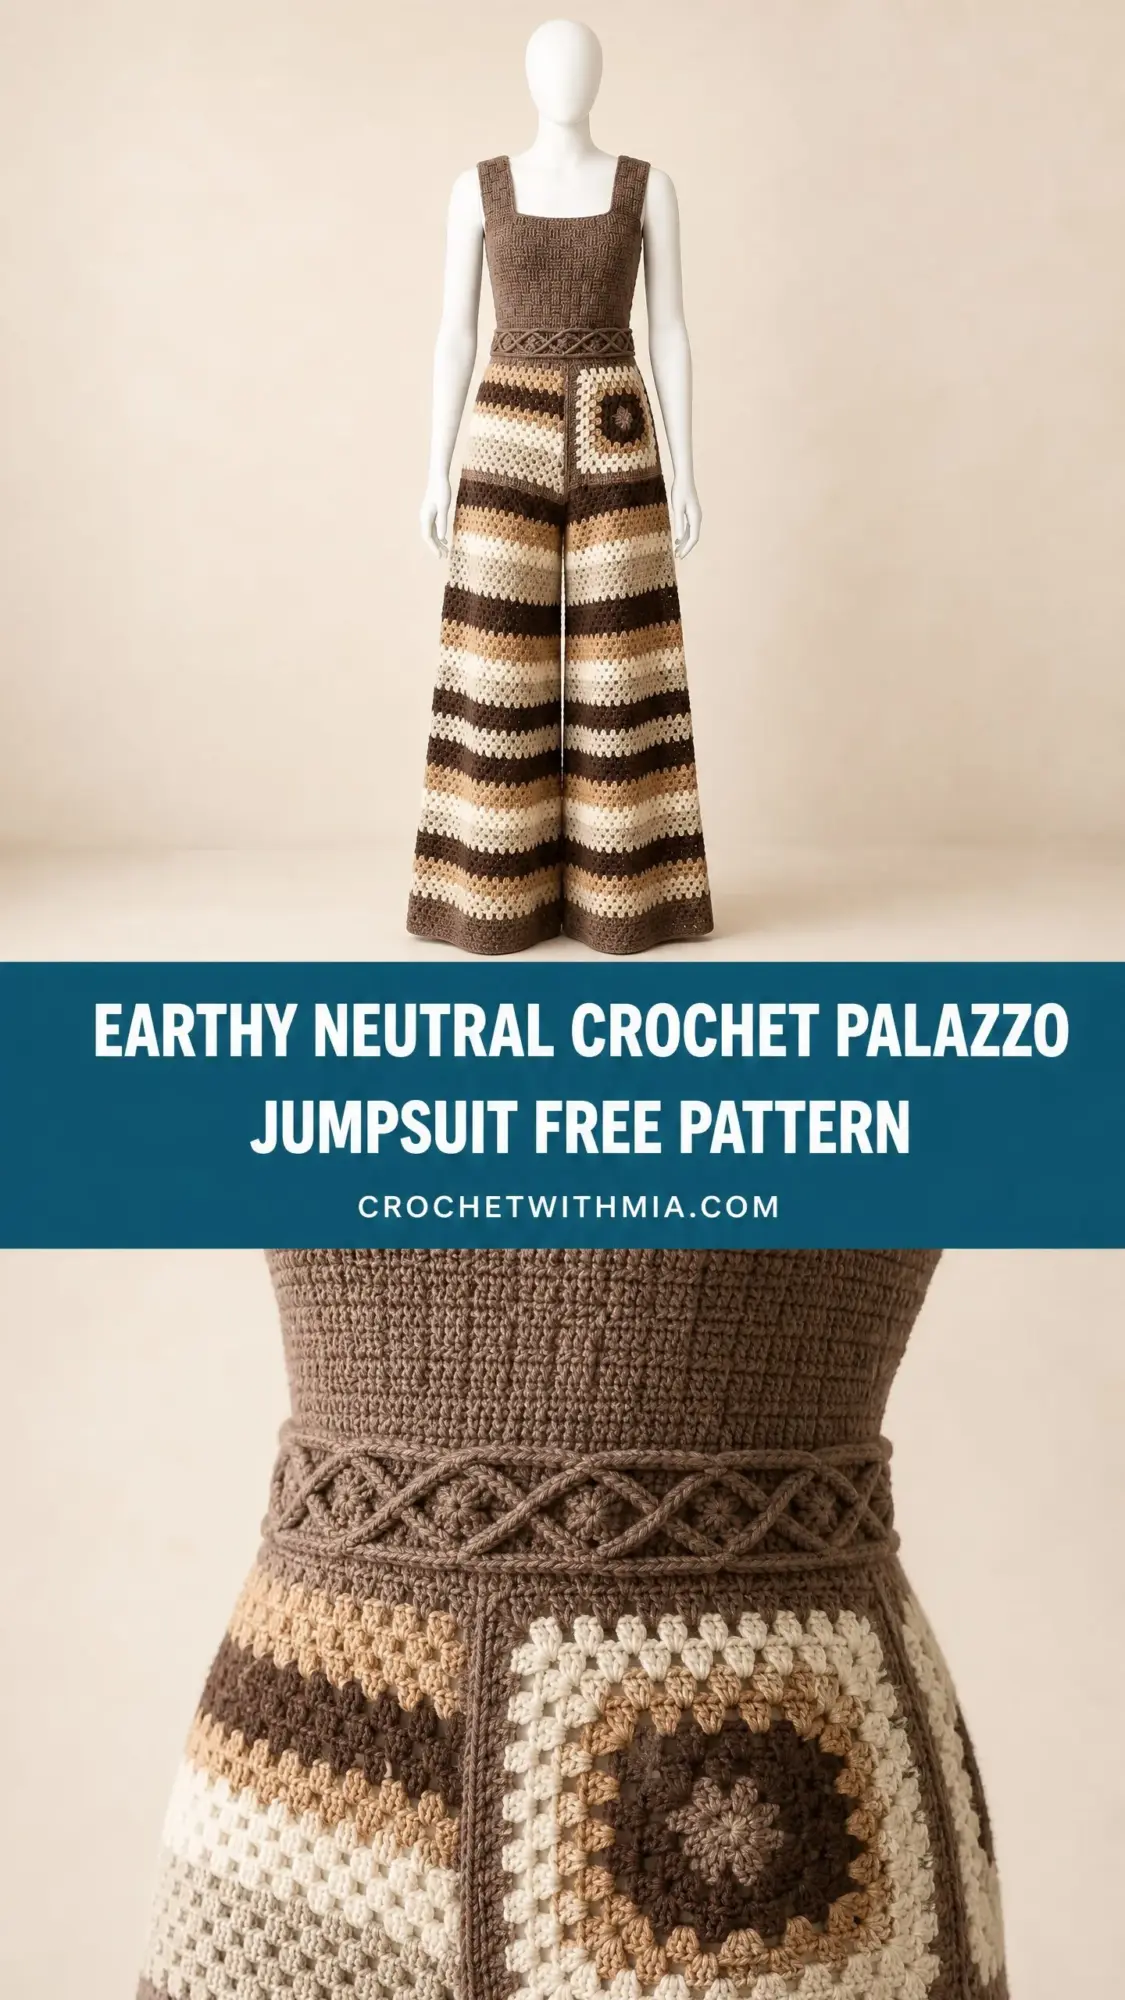
The color palette moves through chocolate brown, camel, tan, and cream. Those warm earth tones create horizontal stripes that flow beautifully with every step. The whole piece is worked in worsted weight yarn with two hook sizes.
Fair warning: this is an advanced project. You will need to be comfortable with front post and back post double crochet, granny squares, working in the round, and seaming. If you have completed at least three garment projects before, you are ready. If not, I recommend practicing each stitch section as a swatch first.
Why This Crochet Palazzo Jumpsuit Pattern Works
The construction is smart and logical. You work the bodice flat in two panels, seam them together, then pick up stitches for the waistband. From there, the pants flow downward in joined rounds until you split for the legs. No complicated shaping. No confusing increases scattered randomly. Everything builds step by step.
The basketweave stitch on the bodice creates that gorgeous woven texture you see in the photos. It looks intricate but it is really just alternating front post and back post double crochet in a predictable rhythm. Once you get the first few rows established, your hands will remember the pattern.
The granny stripe pants section is even more relaxing. You work clusters of three double crochet separated by chain spaces, changing colors at the start of each round. The gradual increases for the palazzo flare happen every few rounds, and I will walk you through exactly where to place them.
Skill Level and Time Estimate
This pattern is rated Advanced. Plan for approximately 60 to 90 hours of work if you crochet at a moderate pace. That sounds like a lot, but remember you are making an entire outfit. Break it into sections and celebrate each completed piece.
The skills you need include:
Finished Measurements
This pattern is written for size Small/Medium, which fits US sizes 4 through 8.
The jumpsuit is designed with 2 to 4 inches of positive ease at the bust and 4 to 6 inches at the hip. This creates that relaxed bohemian silhouette you see in the reference photos.
Materials You Will Need
Yarn: Worsted weight (CYC 4), approximately 1800 yards (1645 meters) total across four colors.
Hooks:
Notions:
Yarn Suggestions
Lion Brand Pound of Love works beautifully here. It is 100% acrylic, machine washable, and holds stitch definition well for the post stitches.
WeCrochet Brava Worsted is another excellent choice. Purchase 3 skeins of Color A, 2 of Color B, 2 of Color C, and 1 to 2 of Color D.
Avoid yarns with high drape like bamboo or rayon for the bodice. The basketweave stitch needs a yarn with some body to maintain its texture. For the pants, moderate drape helps the palazzo legs hang beautifully.
Gauge
Getting gauge right is critical for a garment that fits. Make a 6-inch swatch of each stitch pattern before you begin.
Basketweave bodice gauge (with I-9 hook): 14 stitches x 10 rows = 4 inches (10 cm)
Granny stripe gauge (with J-10 hook): One 3-dc cluster = approximately 1 inch wide. Four rows of granny stripe = 2.5 inches tall.
Granny square gauge (with J-10 hook): One completed 4-round square = 4.5 x 4.5 inches (11.5 x 11.5 cm)
Abbreviations and Special Stitches
Let me define every stitch you will use in this crochet jumpsuit pattern.
Front Post Double Crochet (FPdc)
Yarn over. Insert your hook from front to back to front around the post of the indicated stitch in the row below. Do not go into the top of the stitch. Go around the vertical post. Draw up a loop and complete as a standard double crochet. This stitch pushes forward on the right side.
Back Post Double Crochet (BPdc)
Yarn over. Insert your hook from back to front to back around the post of the indicated stitch. Draw up a loop and complete as double crochet. This stitch recesses on the right side.
Basketweave Stitch
This creates the woven texture on the bodice by alternating raised and recessed columns. On right side rows, you work FPdc over raised columns and BPdc over recessed columns. On wrong side rows, you reverse this. The result looks identical on both sides and creates dense, structured fabric.
Granny Cluster
Work 3 dc into the same chain space or stitch. That is one cluster.
Cable-Style Waistband Braid
This creates the decorative X pattern at the waist. Skip the next 2 post stitches, FPdc around each of the next 2 post stitches, then working behind those just made, FPdc around each of the 2 skipped stitches. Repeat around.
Step by Step Crochet Pattern Instructions
Section 1: Bodice Front Panel
The bodice uses Color A and the smaller I-9 / 5.5 mm hook.
Foundation: With Color A and I-9 hook, ch 62.
Row 1 (WS setup): Dc in 4th ch from hook and in each ch across. Turn. (60 dc)
Row 2 (RS, establish basketweave): Ch 3 (counts as dc throughout). [FPdc around each of next 4 sts, BPdc around each of next 4 sts] 7 times, FPdc around each of next 4 sts, dc in top of t-ch. Turn. (60 sts)
Row 3 (WS): Ch 3. [BPdc around each of next 4 sts, FPdc around each of next 4 sts] 7 times, BPdc around each of next 4 sts, dc in top of t-ch. Turn. (60 sts)
Rows 4 through 5: Repeat Rows 2 and 3. (60 sts each row)
Row 6 (RS, begin second block layer): Ch 3. [BPdc around each of next 4 sts, FPdc around each of next 4 sts] 7 times, BPdc around each of next 4 sts, dc in top of t-ch. Turn. (60 sts)
Row 7 (WS): Ch 3. [FPdc around each of next 4 sts, BPdc around each of next 4 sts] 7 times, FPdc around each of next 4 sts, dc in top of t-ch. Turn. (60 sts)
Rows 8 through 9: Repeat Rows 6 and 7. (60 sts each row)
Rows 10 through 33: Continue alternating the 4-row basketweave block sequence. Switch post-stitch orientation every 4 rows. Maintain 60 stitches throughout.
After Row 33, the panel measures approximately 14 inches tall. Do not fasten off. Set aside.
Checkpoint: Your panel should be 60 stitches wide and approximately 14 inches tall.
Section 2: Bodice Back Panel
Work exactly as the Front Panel, Rows 1 through 33. Fasten off and weave in ends.
Section 3: Shoulder Straps and Side Seam Assembly
Lay both panels with wrong sides facing outward.
Strap seam: Align top edges. Using mattress stitch, seam the outermost 9 stitches on each shoulder together. The center 42 stitches remain open as the square neckline.
Side seams: With right sides together, seam the left and right sides from bottom edge upward for the full 14-inch length.
Turn right side out. You now have a tube with two wide shoulder straps.
Checkpoint: The completed bodice should measure 34 to 36 inches in circumference at the bottom opening.
Section 4: Waistband
Switch to J-10 / 6.0 mm hook. Use Color A.
Join Color A to any bottom-edge stitch with sl st.
Round 1 (Setup): Ch 2 (does not count as st), work 120 dc evenly around the bottom opening. Join with sl st to first dc. (120 dc)
Round 2 (RS, establish cable braid): Ch 2. [Skip next 2 sts, FPdc around each of next 2 sts, then working in front of those just made, FPdc around each of the 2 skipped sts] 30 times. Join with sl st to first FPdc. (120 sts)
Rounds 3 through 5: Repeat Round 2. (120 sts each round)
Round 6: Ch 1. Sc in each st around. Join. (120 sc)
Fasten off Color A.
Checkpoint: Waistband measures approximately 2.5 inches deep.
Section 5: Pants Body (Waist to Crotch)
Continue with J-10 hook. Colors alternate: A, B, C, D, repeat.
Round 1 (Foundation): Join Color A. Ch 4 (counts as dc plus ch 1). [Sk 1 st, dc in next st, ch 1] 59 times. Sk 1 st, join with sl st to 3rd ch of beg ch-4. (60 dc and 60 ch-1 spaces)
Round 2 (First granny cluster round, Color A): Sl st into first ch-1 sp. Ch 3 (counts as first dc of cluster). 2 dc in same ch-1 sp. [Ch 1, 3 dc in next ch-1 sp] 59 times. Ch 1. Join with sl st to top of beg ch-3. (60 clusters, 60 ch-1 sps)
Fasten off Color A.
Round 3 (Color B): Join Color B in any ch-1 sp. Ch 3, 2 dc in same sp. [Ch 1, 3 dc in next ch-1 sp] 59 times. Ch 1. Join. (60 clusters, 60 ch-1 sps)
Fasten off Color B.
Round 4 (Color C): Join Color C, repeat Round 3. (60 clusters, 60 ch-1 sps)
Round 5 (Color D): Join Color D, repeat Round 3. (60 clusters, 60 ch-1 sps)
Rounds 6 through 9: Repeat Rounds 2 through 5 once more in color sequence. (60 clusters each round)
Gradual Flare (Rounds 10 through 25)
The pants widen from 60 to 84 clusters. Increases are worked by placing 2 clusters into a single ch-1 space.
Round 10 (Color A, increase): Work increase every 10th cluster position. (66 clusters)
Rounds 11 through 13 (Colors B, C, D): Work standard rounds. (66 clusters each)
Round 14 (Color A, increase): Increase 6 evenly, approximately every 11th cluster. (72 clusters)
Rounds 15 through 17 (Colors B, C, D): Work standard rounds. (72 clusters each)
Round 18 (Color A, increase): Increase 6 evenly, approximately every 12th cluster. (78 clusters)
Rounds 19 through 21 (Colors B, C, D): Work standard rounds. (78 clusters each)
Round 22 (Color A, increase): Increase 6 evenly, approximately every 13th cluster. (84 clusters)
Rounds 23 through 25 (Colors B, C, D): Work standard rounds. (84 clusters each)
Checkpoint: Pants section measures approximately 10 inches below waistband. Circumference is approximately 42 inches.
Section 6: Crotch Split and Legs
Divide the 84 clusters into two legs of 42 clusters each. Place markers at the halfway point.
Right Leg Setup Round: With Color A, ch 3, 2 dc in first ch-1 sp. [Ch 1, 3 dc in next ch-1 sp] 41 times. At midpoint marker, ch 5 (crotch bridge). Join to starting ch-3. After bridge adjustment: (44 clusters)
Continue Right Leg: Work straight granny stripe rounds in 4-color rotation for approximately 28 rounds (17.5 inches of leg length).
Final Hem Round: With Color A, ch 1. Sc in each dc and sc 1 in each ch-1 sp around. Join. (88 sc)
Fasten off. Repeat for Left Leg.
Checkpoint: Each leg opening measures approximately 27 to 28 inches in circumference.
Section 9: Granny Square Hip Pockets (Make 2)
With J-10 hook.
Round 1 (Color A): Magic ring. Ch 3, 2 dc in ring. [Ch 2, 3 dc in ring] 3 times. Ch 2. Join. Tighten ring. (4 clusters, 4 ch-2 corner sps)
Round 2 (Color B): Join in any corner sp. Ch 3, 2 dc in same sp, ch 2, 3 dc in same sp. [Ch 1, (3 dc, ch 2, 3 dc) in next corner sp] 3 times. Ch 1. Join. (8 clusters)
Round 3 (Color C): Join in corner sp. Work corner, [ch 1, 3 dc in ch-1 sp, ch 1, corner in next corner sp] 3 times. Ch 1, 3 dc in last ch-1 sp. Ch 1. Join. (12 clusters)
Round 4 (Color D): Join in corner sp. Work corner, [ch 1, 3 dc in next ch-1 sp] twice, ch 1, corner. Repeat around. Join. (16 clusters)
Finished square measures 4.5 x 4.5 inches.
Pocket Placement: Position one square on each hip, approximately 1 inch below the waistband. Whipstitch bottom and sides, leaving top open for a functional pocket.
Section 10: Edging
With Color A and I-9 hook, work 2 rounds of sc around the neckline. Repeat for armholes.
Finishing and Blocking
Weave in all ends securely. Hand wash in cool water with gentle soap. Roll in a towel to remove moisture. Lay flat and pin to measurements. Steam block for acrylic yarns. Allow 12 to 24 hours to dry completely.
Size Customization Tips
To increase bust size by 2 inches: Add 8 stitches to the bodice foundation chain (ch 70 instead of 62). Increase waistband to 136 dc.
To lengthen the bodice: Add 4 rows for each additional 1.5 inches.
To lengthen the pants: Add granny stripe rounds before the hem. Every 2 rounds adds approximately 1.25 inches.
For size Large/XL: Use ch 70 foundation, 136 dc waistband, 90 clusters before crotch split, 45 clusters per leg.
You Did It
This crochet palazzo jumpsuit pattern is a true statement piece. The combination of structured basketweave, flowing granny stripes, and those darling pocket squares creates something you will want to wear constantly. Take your time with each section and trust the process.
I hope you love making this as much as I loved designing it. If you create your own version, I would absolutely love to see it. Tag me on Instagram or share in my Facebook group.
Save this pattern to your Pinterest boards so you can find it when you are ready to start. And please drop a comment below if you make one. Seeing your finished projects is the best part of sharing patterns.