
THIS is the project that will have everyone asking where you bought your hat. I’m not exaggerating. The Strawberry Sundae Beanie looks like it belongs in a boutique window, but you can make it yourself in a weekend.
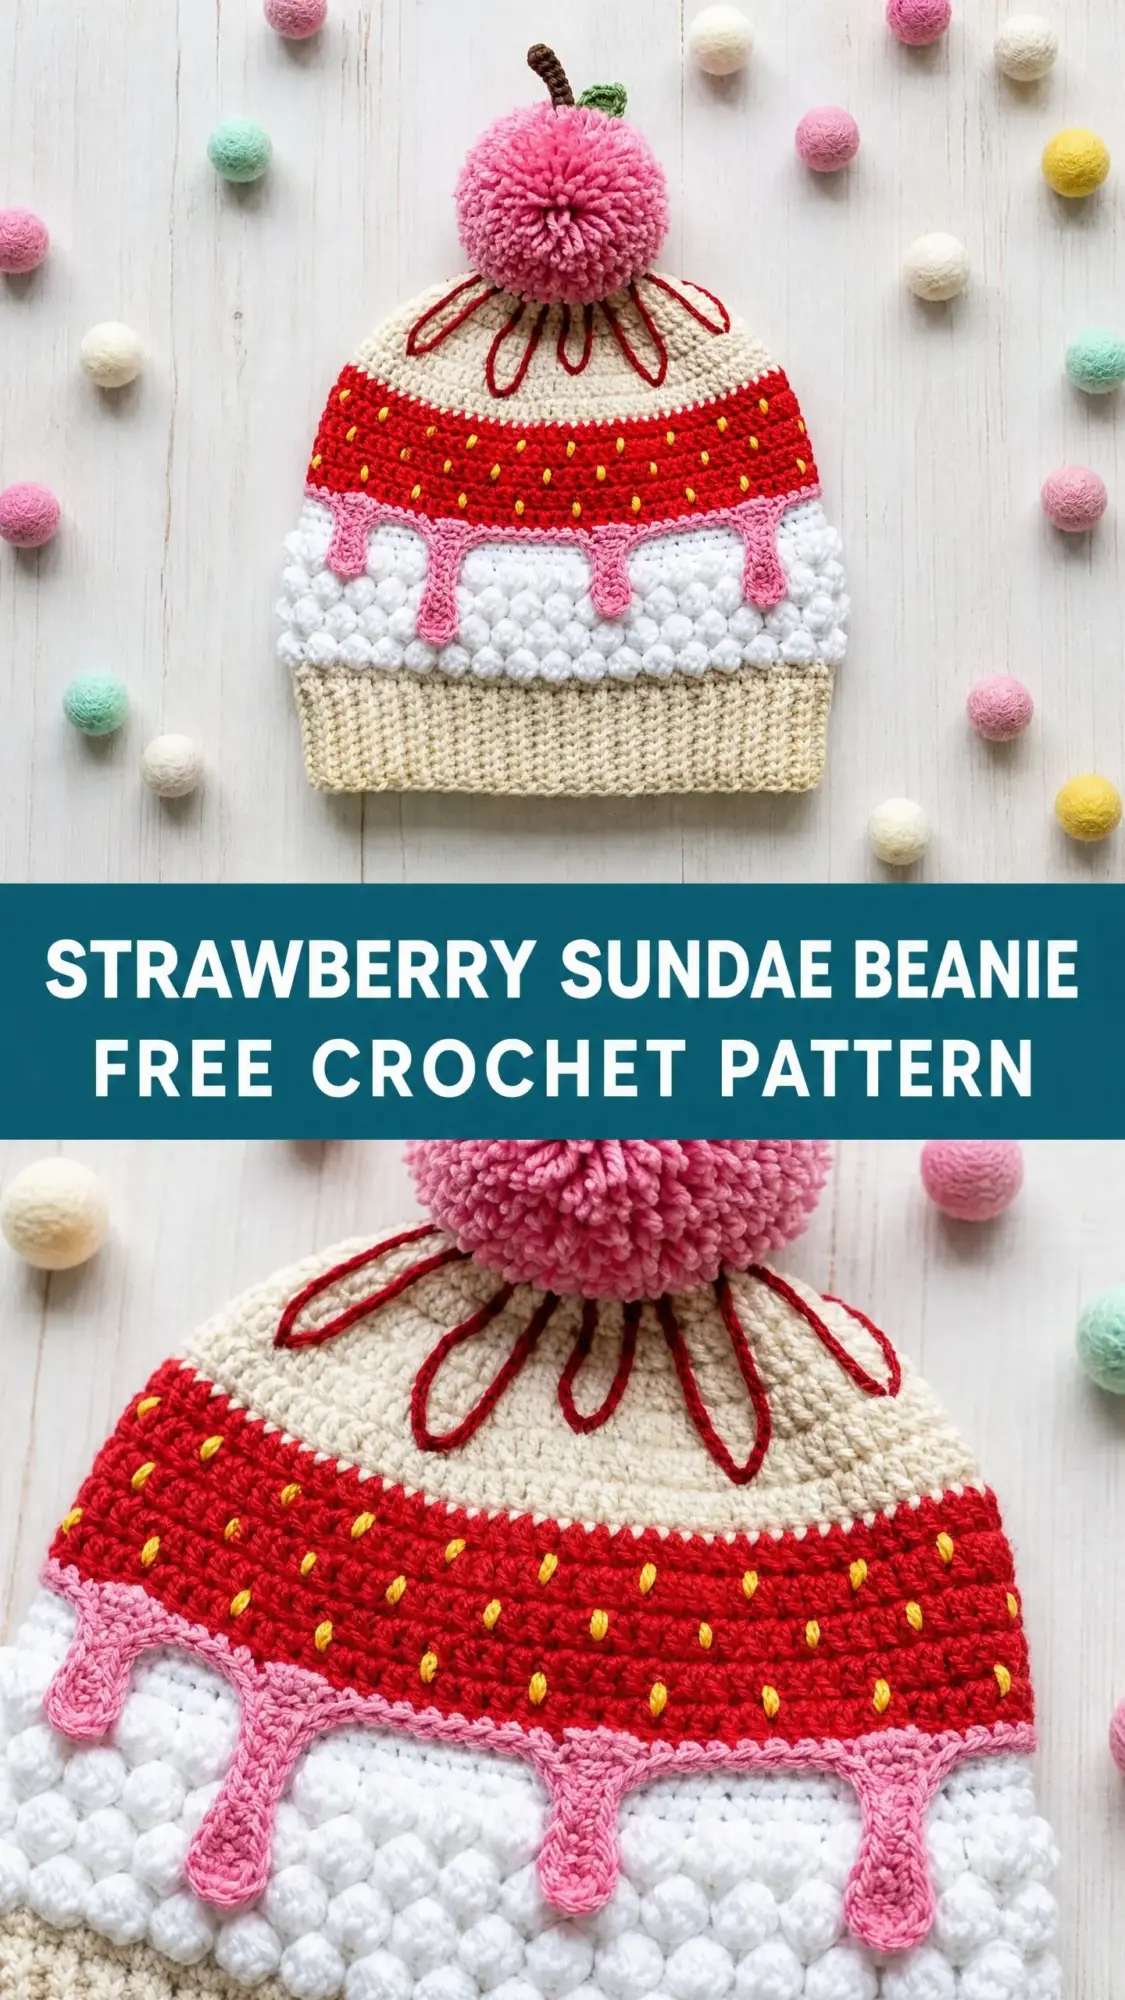
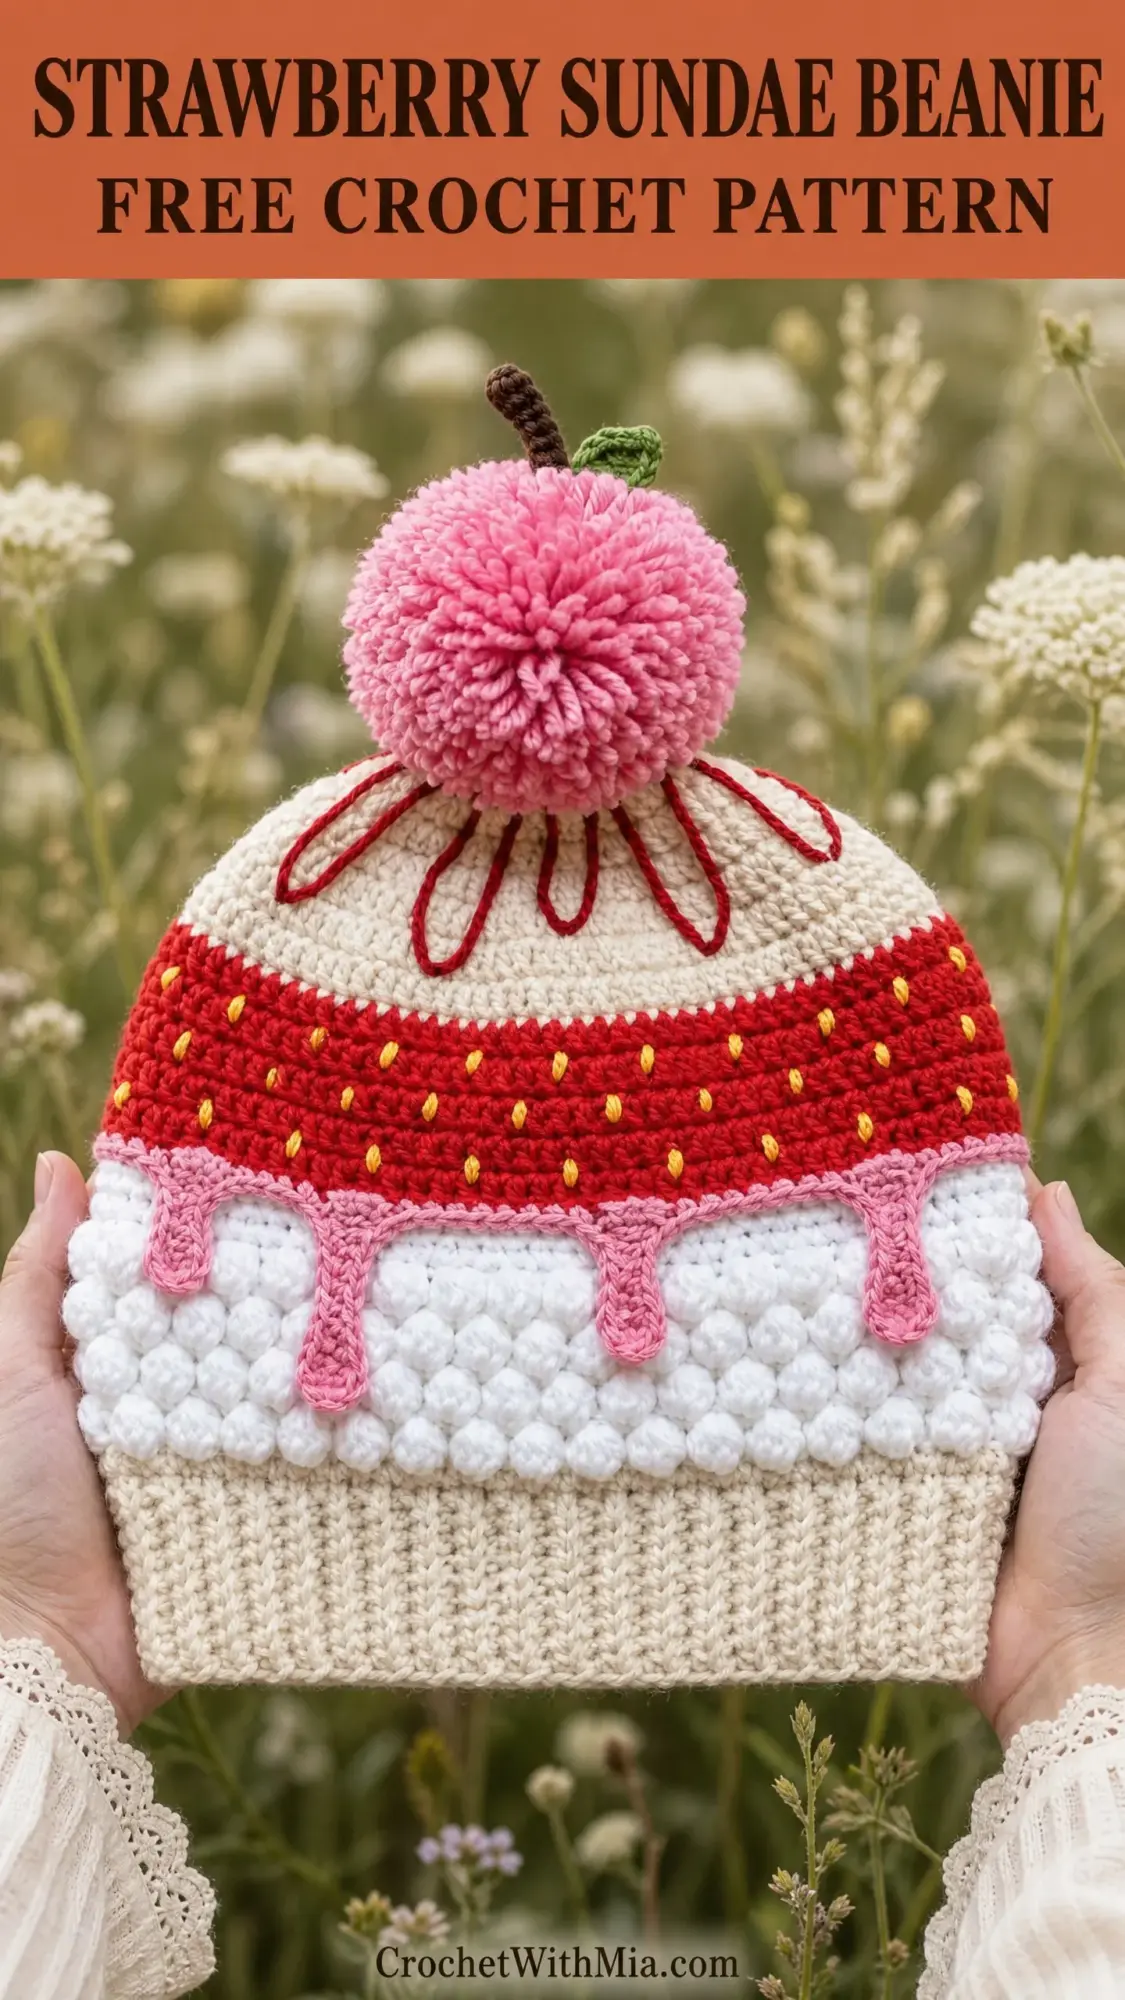
The construction is clever without being complicated. You’ll work from the brim up through distinct sections that mimic layers of a strawberry shortcake sundae. Think ribbed cream brim, fluffy white bobble stitches for whipped cream, pink frosting drips, a bright red strawberry band with embroidered seeds, and a cream dome topped with sauce drizzle. The cherry on top? An actual cherry pom-pom with a stem and leaf.
If you’ve ever wanted to make something that stops people in their tracks, this is it. It takes about 8 to 12 hours for an experienced crocheter, and it makes an absolutely unforgettable gift.
About This Strawberry Sundae Beanie Crochet Pattern
This beanie is designed for an adult head circumference of 21 to 23 inches (53 to 58 cm). The finished hat measures approximately 9.5 inches (24 cm) tall from brim to crown, not including the pom-pom cherry topper. The brim adds about 2 inches (5 cm) of ribbed texture at the base.
The construction works bottom-up in joined rounds. You’ll create separate decorative zones as you work your way toward the crown. Each section uses different colors and techniques to build up that layered sundae effect. The bobble stitches create genuine texture that resembles whipped cream, while surface crochet and embroidery add the finishing details that make this hat truly special.
Skill level: Intermediate. You should be comfortable working in rounds, changing colors, and making bobble stitches. The embellishment steps require surface slip stitch work and basic embroidery. None of these techniques are difficult once you understand them, and I’ll walk you through each one.
Materials You’ll Need
Yarn (all worsted weight):
Hooks:
Notions:
Yarn suggestions: Lion Brand Vanna’s Choice works beautifully for this project. The stitch definition is excellent, which makes those bobbles really pop. Red Heart Super Saver is a budget-friendly alternative with plenty of color options. If you prefer DK weight yarn, use a US Size H-8 (5.0 mm) hook and swatch carefully.
Gauge
With US Size J-10 (6.0 mm) hook and worsted weight yarn:
14 single crochet (sc) x 16 rows = 4 inches (10 cm) worked in rounds
Bobble stitch gauge: 12 bobble stitches and 8 rounds = 4 inches (10 cm)
Gauge matters here. Even one stitch per 4 inches off will affect your final hat size. Please swatch before starting. If your gauge is tighter, go up a hook size. If it’s looser, go down.
Abbreviations and Special Stitches
Let me walk you through every stitch and term you’ll encounter in this pattern.
Standard Abbreviations:
Bobble Stitch (bo-st): This creates the puffy whipped cream texture. In one stitch, work 5 incomplete double crochets. Here’s exactly how: yarn over, insert hook, pull up a loop, yarn over and pull through 2 loops. You now have 2 loops on your hook. Repeat this 4 more times in the same stitch. You’ll have 6 loops on your hook. Yarn over and pull through all 6 loops at once. One bobble complete. The bobble naturally pushes to the wrong side of your work, so you’ll flip the hat inside out while working this section.
Standing Single Crochet: Make a slip knot with new yarn, insert hook into the designated stitch, yarn over and pull up a loop, yarn over and pull through both loops. This gives you a clean color change without a joining chain.
Surface Slip Stitch: Hold yarn behind the fabric. Insert hook from front to back, draw up a loop, insert hook at the next point along your line, draw up another loop and pull through the first. Continue to create a chain on the fabric surface. This creates the sauce drizzle and frosting drip outlines.
Drip Loop Detail: While working a surface slip stitch drip line, chain 5 to 7 and slip stitch back into the same point. This creates the rounded bottom of a dripping effect.
Pattern Instructions
Section 1: Brim (Color A, Cream)
The brim is worked as a flat ribbed rectangle, then seamed into a tube. This creates that stretchy, professional-looking ribbed edge.
Foundation chain: Ch 9.
Row 1: Sc in 2nd ch from hook and in each ch across. Turn. (8 sc)
Row 2: Ch 1, sc in blo of each st across. Turn. (8 sc)
Repeat Row 2 until your piece measures 22 inches (56 cm) from the start. The ribbing compresses naturally, so your unstretched measurement should be approximately 21 to 22 inches (53 to 56 cm).
Fold the strip so the short ends meet. Sl st through both loops to seam the short ends together, creating a tube. Do not cut yarn.
Rotate the brim so the top long edge faces up.
Pickup Round: Work 80 sc evenly around the top edge of the brim. Sl st to first sc to join. (80 sc)
Place a stitch marker in the first stitch and move it up each round.
Checkpoint: Your brim tube should measure approximately 2 inches (5 cm) tall with 80 stitches in your working round.
Section 2: Lower Hat Body, Cream Transition (Color A)
Round 1: Ch 1, sc in each st around. Sl st to first sc. (80 sc)
Round 2: Ch 1, sc in each st around. Sl st to first sc. (80 sc)
These 2 rounds create a smooth transition to the bobble section.
Section 3: Whipped Cream Bobble Section (Color C, White)
Important: Flip your hat inside out before starting this section. The bobbles push away from you as you work, so with the wrong side facing out, they’ll end up on the outside of the finished hat.
Join Color C with a standing sc.
Round 3: Ch 1. Work (bo-st in first st, sc in next st) around. Sl st to first st. (40 bo-st, 40 sc = 80 sts)
Round 4: Ch 1, sc in each st around. Sl st to first sc. (80 sc)
Round 5: Ch 1. Work (sc in first st, bo-st in next st) around. Sl st to join. (40 sc, 40 bo-st = 80 sts)
Round 6: Ch 1, sc in each st around. Sl st to first sc. (80 sc)
Round 7: Rep Round 3. (80 sts)
Round 8: Rep Round 4. (80 sc)
Round 9: Rep Round 5. (80 sts)
Round 10: Rep Round 4. (80 sc)
Turn your hat right-side out. Those beautiful bobbles should now face outward like fluffy whipped cream.
Checkpoint: The hat body from the pickup round should measure approximately 3.5 to 4 inches (9 to 10 cm) tall with 80 stitches.
Section 4: Pink Frosting Drip Row (Color D, Pink)
This creates the pink separator between the white cream and red strawberry sections. The drip details get added during finishing.
Join Color D with a standing sc.
Round 11: Ch 1, sc in each st around. Sl st to first sc. (80 sc)
Round 12: Ch 1, sc in each st around. Sl st to first sc. (80 sc)
Section 5: Red Strawberry Section (Color B, Red)
Join Color B with a standing sc.
Rounds 13 through 18: Ch 1, sc in each st around. Sl st to first sc. (80 sc each round)
Work 6 rounds total in red. This section should measure approximately 1.5 to 1.75 inches (3.8 to 4.5 cm) tall. The yellow seed embroidery gets added during finishing.
Checkpoint: Total hat height should be approximately 5.5 to 6 inches (14 to 15 cm) from the brim pickup edge.
Section 6: Upper Cream Dome and Crown Shaping (Color A, Cream)
Join Color A with a standing sc.
Rounds 19 through 22: Ch 1, sc in each st around. Sl st to first sc. (80 sc each round)
Now begin crown shaping:
Round 23: Ch 1. (Sc in next 8 sts, sc2tog) 8 times. Sl st to first sc. (72 sc)
Round 24: Ch 1. (Sc in next 7 sts, sc2tog) 8 times. Sl st to first sc. (64 sc)
Round 25: Ch 1. (Sc in next 6 sts, sc2tog) 8 times. Sl st to first sc. (56 sc)
Round 26: Ch 1. (Sc in next 5 sts, sc2tog) 8 times. Sl st to first sc. (48 sc)
Round 27: Ch 1. (Sc in next 4 sts, sc2tog) 8 times. Sl st to first sc. (40 sc)
Round 28: Ch 1. (Sc in next 3 sts, sc2tog) 8 times. Sl st to first sc. (32 sc)
Round 29: Ch 1. (Sc in next 2 sts, sc2tog) 8 times. Sl st to first sc. (24 sc)
Round 30: Ch 1. (Sc in next st, sc2tog) 8 times. Sl st to first sc. (16 sc)
Round 31: Ch 1. (Sc2tog) 8 times. Sl st to first sc. (8 sc)
Cut yarn, leaving a 10-inch tail. Thread onto yarn needle and weave through remaining 8 sts. Pull tight to close the crown. Knot securely and weave in end.
Checkpoint: Total hat height from brim pickup edge should be approximately 9 to 9.5 inches (23 to 24 cm).
Finishing and Embellishments
Sauce Drizzle Loops on Crown (Color E, Dark Red/Burgundy)
With the right side facing, use Color E to work surface slip stitches across the cream dome in a radiating pattern. Work from the crown center outward in curved lines, approximately 8 to 10 lines reaching toward the strawberry band. At the end of each line, chain 4 to 6 and slip stitch back into the same point to create small loops. This is worked freehand, so follow the photos for placement guidance.
Pink Frosting Drips
Using Color D and surface slip stitch, work 7 to 9 drip shapes evenly spaced around the hat where the pink section meets the white bobble section.
For each drip: Insert hook at the bottom edge of the pink section. Work a surface slip stitch line downward for 3 to 5 stitches into the white section. At the base, ch 5, sl st back into the same point to create a rounded drip. Work back up with surface slip stitch. Space drips approximately every 9 to 11 stitches around.
Yellow Seed Embroidery
Thread Color F onto your yarn needle. Using small horizontal straight stitches approximately 3 to 4 mm long, scatter seed shapes randomly across the red strawberry section (Rounds 13 to 18). Aim for 35 to 50 seeds at slight angles for a natural look.
Cherry Pom-Pom Topper Assembly
Step 1: Create a pom-pom with Color I, approximately 2.5 to 3 inches (6.5 to 7.5 cm) in diameter. Leave long tails for attaching.
Step 2: Make the stem with Color G and G-6 hook. Make a magic ring, sl st to close, ch 8. Sl st down each ch back to the ring. Fasten off with a long tail.
Step 3: Make the leaf with Color H and G-6 hook. Ch 6. Sl st into 2nd ch from hook, sc in next ch, hdc in next ch, sc in next ch, sl st into last ch. Fasten off with a long tail.
Step 4: Attach stem to top of pom-pom by threading the tail through the center and knotting securely.
Step 5: Attach leaf to the base of the stem.
Step 6: Attach completed cherry to the crown by threading pom-pom tails through the crown closing point. Knot inside the hat and weave in ends.
Weave in all remaining tails throughout the hat.
Size Customization Tips
For a child size (19 to 21 inches / 48 to 53 cm): Reduce the brim strip to 19 to 20 inches and pick up 70 stitches instead of 80. Adjust crown shaping to 7-section decreases.
For a larger adult size (23 to 25 inches / 58 to 64 cm): Extend the brim strip to 23 to 24 inches and pick up 88 to 90 stitches. Round up to the nearest multiple of 8 for crown shaping.
To increase height: Add plain sc rounds after Round 22 before decreases begin.
Care Instructions
Hand wash in cool water with mild detergent. Squeeze gently without wringing and lay flat to dry. Avoid crushing the pom-pom during storage.
Thank you so much for choosing this pattern! I really hope you love making your Strawberry Sundae Beanie as much as I loved designing it. If you make one, I’d absolutely love to see it. Tag me on Instagram or share a photo on Facebook so I can cheer you on.
If you want to come back to this pattern later, go ahead and pin it to your favorite Pinterest board. And please drop a comment below if you make one or have any questions along the way. Happy crocheting!